
Forms
A form is a page that asks questions and books nothing. Someone fills it out, the answers are emailed to your office and land in your Inbox as a note on that person’s conversation, and any answers you tell the form to save update the contact or the appointment.
Use a form for new patient paperwork, an intake questionnaire, a consent form, a pre-visit checklist, or anything else you would otherwise email as an attachment and retype by hand.
What your clients see
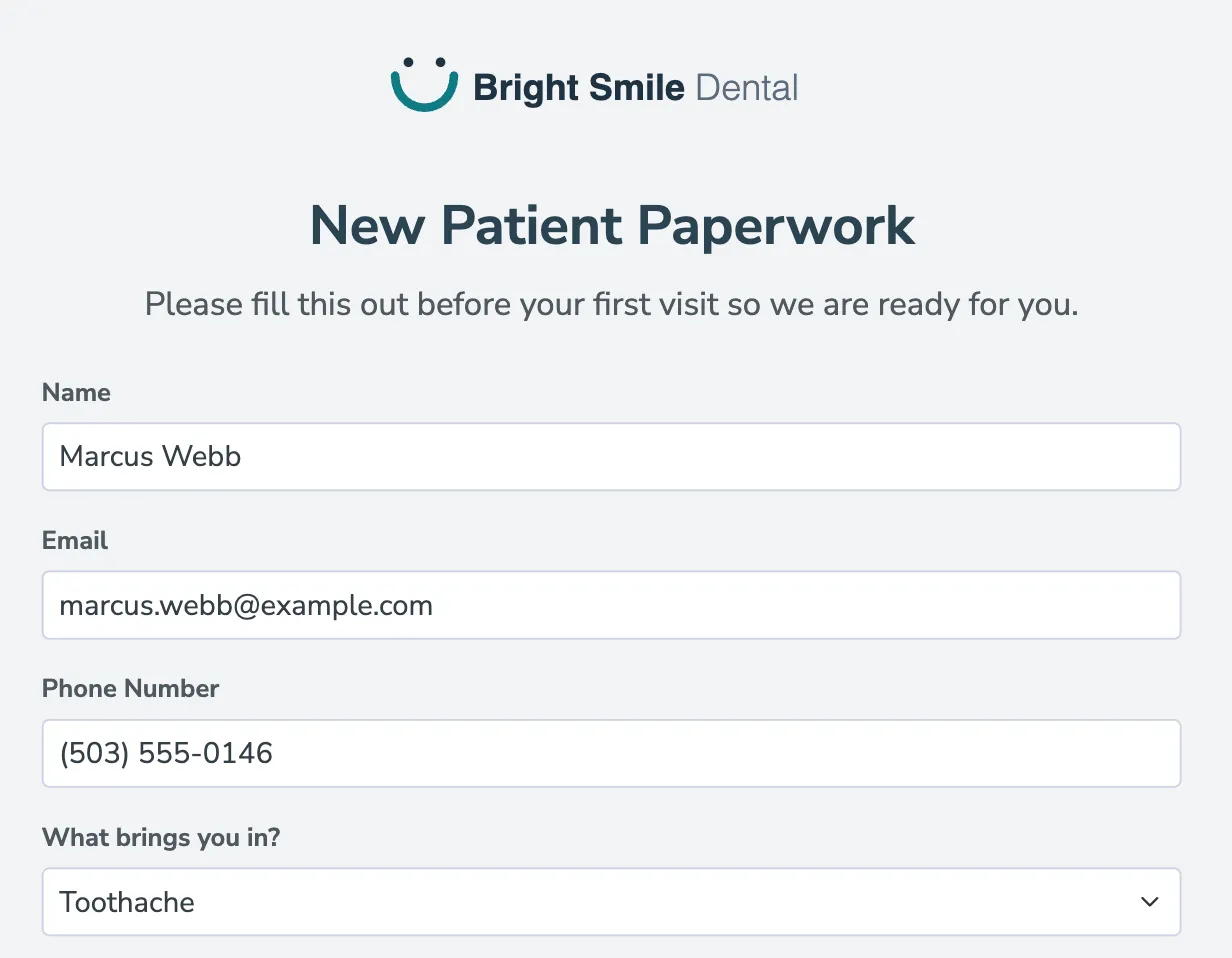
Section titled “What your clients see”They follow the link and get a single page: your logo, the form’s name, whatever you wrote to explain it, and the questions. There is no account to create and nothing to install — they fill it in and press Submit.
Where you build it
Section titled “Where you build it”Forms live on the Settings > Forms tab.

The Text Message Consent form
Section titled “The Text Message Consent form”The first time you open Settings > Forms, there is already a form in the list: Text Message Consent. Apptoto builds it for you so you have a ready-made way to get a client’s permission to text them, before you have written a form of your own.
It is a short sign-up page headed Text Message Sign-Up that asks for:
- Name
- Mobile phone (required)
- Email (optional)
- A checkbox agreeing to appointment text messages
- A checkbox agreeing to marketing text messages
Both checkboxes start unticked, so the person chooses for themselves. When they submit, their number goes on your opt-in list for whatever they ticked and on your opt-out list for whatever they did not, and the submission is kept as a dated record of what they agreed to. See Collecting text message consent for exactly what happens to the answer.
A few ways to put it to work:
- At the front desk. Print its QR code and let people sign up on their own phones.
- In a message. Its key is
consent, so{{ forms.consent.link }}puts its link into any message template. - Anywhere else. Copy its link from the Forms list and paste it onto your website, into an email signature, or into a social post.
Unlike a form you create, it does not email you or the person who filled it out — the answer it collects is the opt-in itself, and every submission is on its Submissions tab. Turn either email on from its On Submit tab if you want one.
Create a form
Section titled “Create a form”- Go to Settings > Forms and click Add.
- Name the form. Only you see this name — it is how you find the form in your list. Renaming it later is safe.
- Pick the web address. Every form gets its own address, like
https://new-patient-paperwork.apptoto.com/. Apptoto tells you whether the one you typed is available. - Add your questions on the Form tab. See Form Questions.
- Click Create.
Your new form appears in the list with its link, how many questions it asks, how many submissions it has received, and whether it is Online or Offline. Click any row to open it.
General
Section titled “General”| Setting | What it does |
|---|---|
| Name | How you find the form in your list. Only you see it. |
| Key | How a message or a rule names this form. See below. |
| Link | The form’s own web address. Share it directly, or let a message send a personalized version. |
| Online | Turn this off and visitors are told the form is not accepting answers. |
| Logo | Your account’s default logo (Settings > Contact Info) is used unless you upload a different one here. |
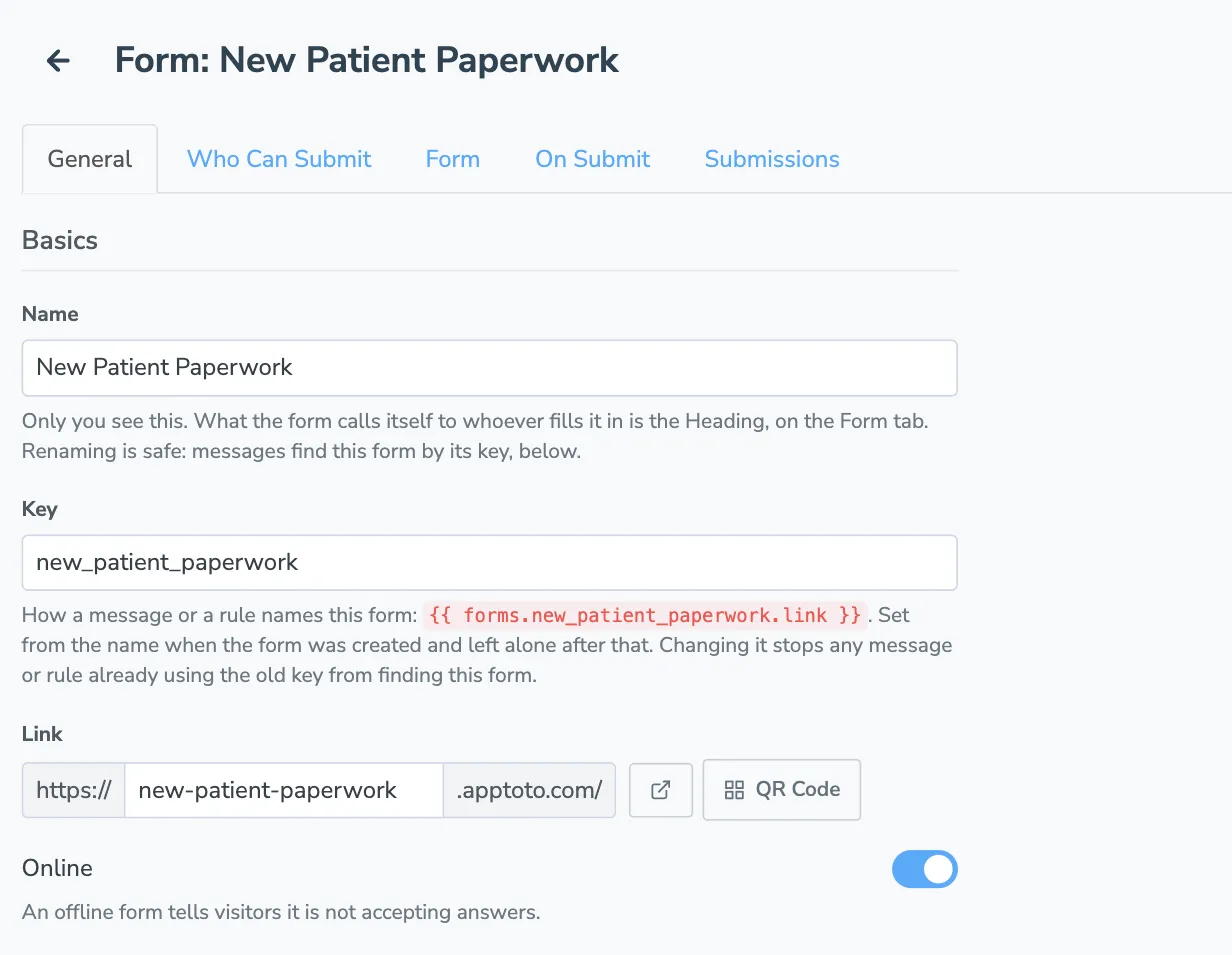
Nothing on this tab is shown to the person filling the form out. What the form calls itself to them is its Heading, at the top of the Form tab, along with the description that goes under it.
The key
Section titled “The key”Every form has a key shown on its General tab, set from the name when the form was created and then left alone. Messages and rules name a form by its key, never by its name, so renaming a form never breaks a message that already uses it.
A form named “New Patient Paperwork” gets the key new_patient_paperwork, and a message inserts its link as:
{{ forms.new_patient_paperwork.link }}You can change the key, but any message or rule already using the old one stops finding the form.
A QR code for the form
Section titled “A QR code for the form”Not everyone arrives from a message. For anyone standing in front of you, every form has a QR code that opens it on their own phone.
Click the small code in the Actions column of the Forms list, or the QR Code button next to the form’s Link on its General tab.
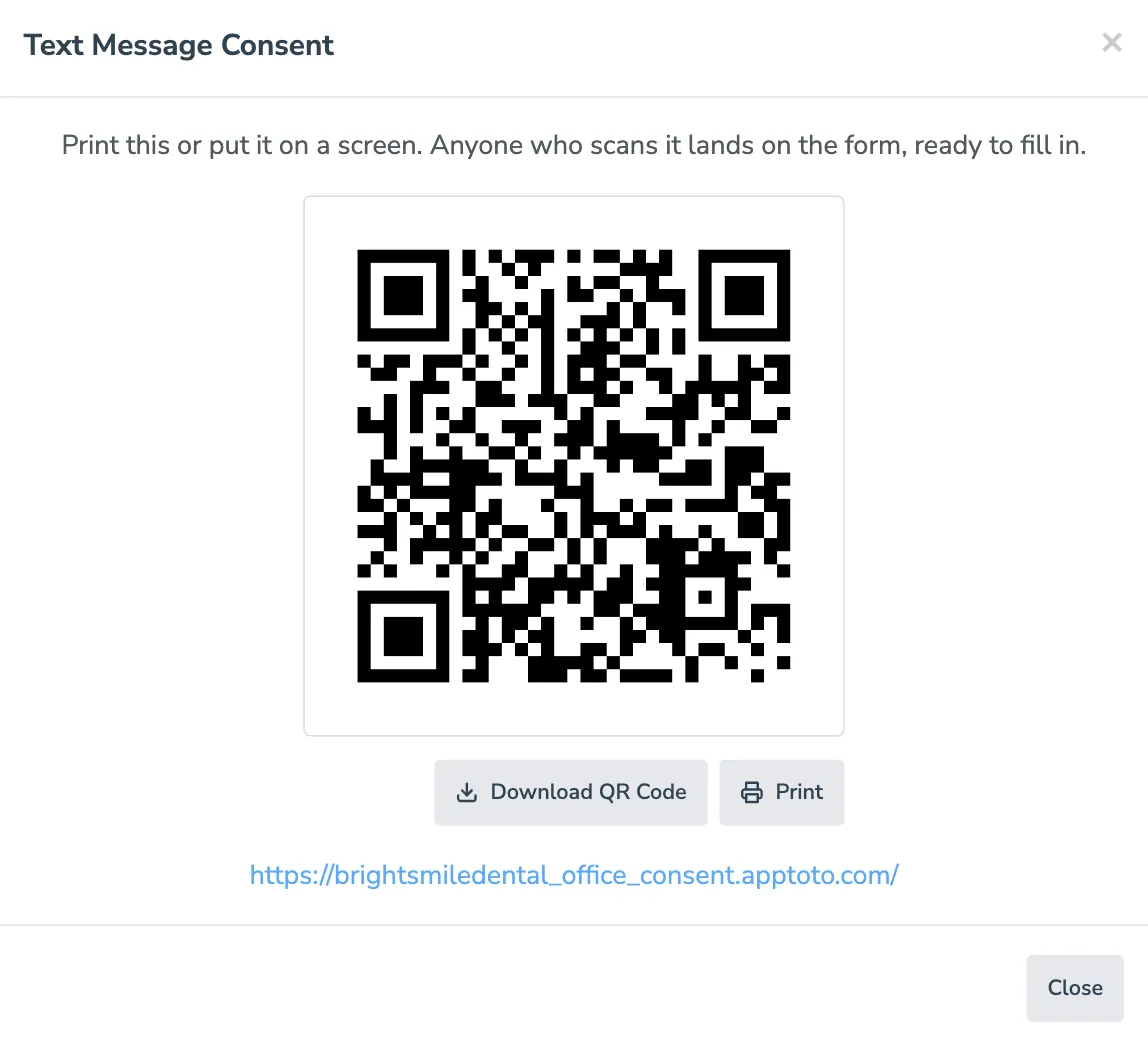
From there you can Download QR Code to get a PNG image to drop into a printed sheet, a poster or a slide, or Print to send the code straight to a printer. Put it on the front desk, a waiting room wall, the back of an appointment card, or a screen.
Who can submit
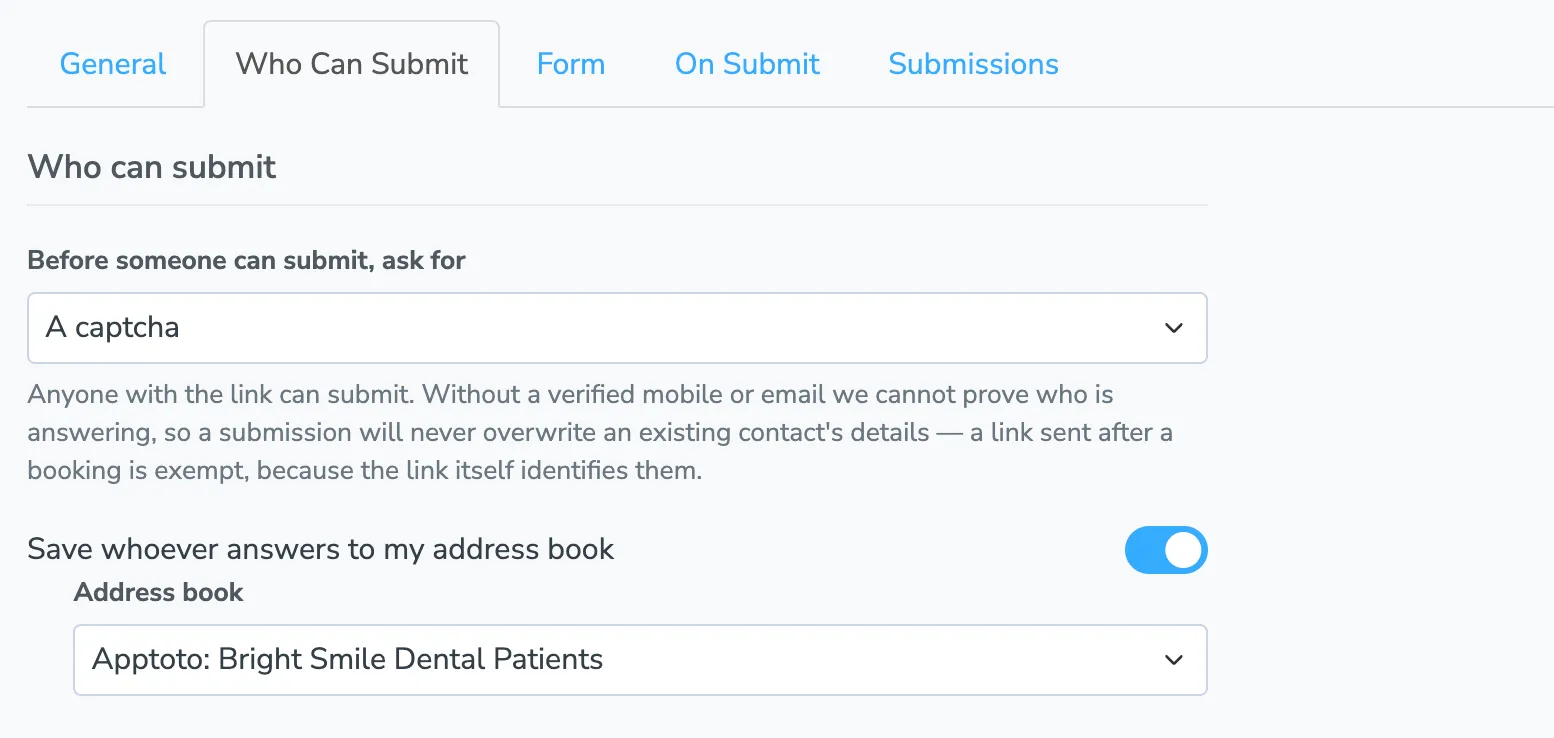
Section titled “Who can submit”A form’s link can be pasted anywhere, so the Who Can Submit tab decides how much you trust whoever opens it.
| Before someone can submit, ask for | What happens |
|---|---|
| Nothing | Anyone with the link can submit. |
| A captcha | Anyone with the link can submit, after proving they are not a robot. |
| Verify their mobile phone | A code is texted to them and has to be entered before the form is accepted. |
| Verify their email address | A code is emailed to them and has to be entered before the form is accepted. |
Verifying a mobile number or an email address also proves who is answering, and that is what lets a submission update someone’s existing contact. Without it, Apptoto will not overwrite a stored contact’s details on the word of whoever typed into the form.
Saving whoever answers to your address book
Section titled “Saving whoever answers to your address book”Turn on Save whoever answers to my address book and pick an address book, and anyone who fills out the form is added to it if they are not there already. Turn it off and submissions are kept on their own — though a form sent about an appointment still updates that appointment’s contact.
If you pick an address book that is not writable, Apptoto tells you so on the tab: nobody new will be added to it.
What happens on submit
Section titled “What happens on submit”The On Submit tab controls everything that happens the moment someone clicks send.
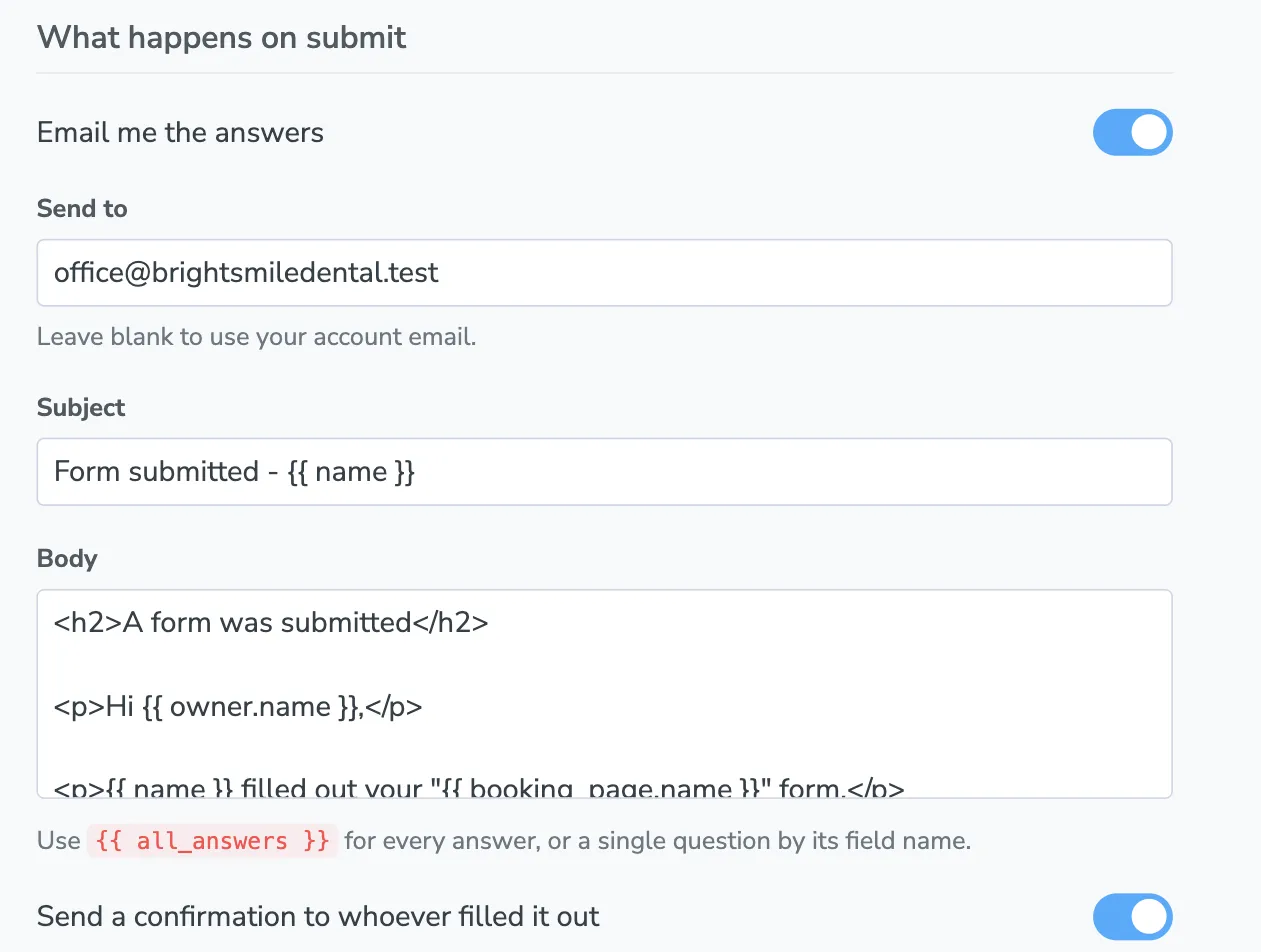
Email me the answers
Section titled “Email me the answers”On by default. Apptoto emails the answers to your office.
- Send to — one or more addresses, comma separated. Leave it blank to use your account email.
- Subject and Body — edit these like any other message template. Use
{{ all_answers }}for every answer at once, or name a single question by its field name.
Send a confirmation to whoever filled it out
Section titled “Send a confirmation to whoever filled it out”Off by default. Turn it on to email the person a confirmation with your own subject and body. It goes out from your account’s sending address and threads onto the same conversation as the submission, so you see the whole exchange in one place.
Thank you message
Section titled “Thank you message”What the person sees on the page once the form is sent. Every form starts with a plain thank-you, which you can replace with anything you like.
Where the answers go
Section titled “Where the answers go”Every submission is recorded in full, whatever else you do with it. You will find it:
- In your Inbox, as a note on that person’s conversation, tagged Form
- On the Forms tab, under that form’s Submissions tab, and across all your forms under the All Submissions button
- On the contact, in a Forms section on their contact page
- On the appointment, in a Forms tab in the appointment editor, when the form was sent about one
Individual answers can also update the contact or the appointment directly — that is set per question, and is covered in Form Questions.