Google Calendar & Contacts
Apptoto reads your Google Calendar events and extracts participant contact information so it can send reminders on your behalf. No appointments are messaged automatically until you turn on auto messages.
Sign up with Google
Section titled “Sign up with Google”The fastest way to connect is to sign up using the Google account that owns the calendar you want to use.
-
Navigate to the Apptoto sign up page, then click the blue “Sign Up with Google” button.

-
Sign into Google. Enter your Google email address and password when prompted.
-
On the permissions screen, check Select All to allow Apptoto to access your Google Calendar and Contacts. Apptoto requires both permissions to function correctly.
Note: If you skip or dismiss the permissions screen without granting access, Apptoto will show a calendar access error when you try to add your first calendar. You can re-grant access by reconnecting your calendar under Settings > Calendars.
-
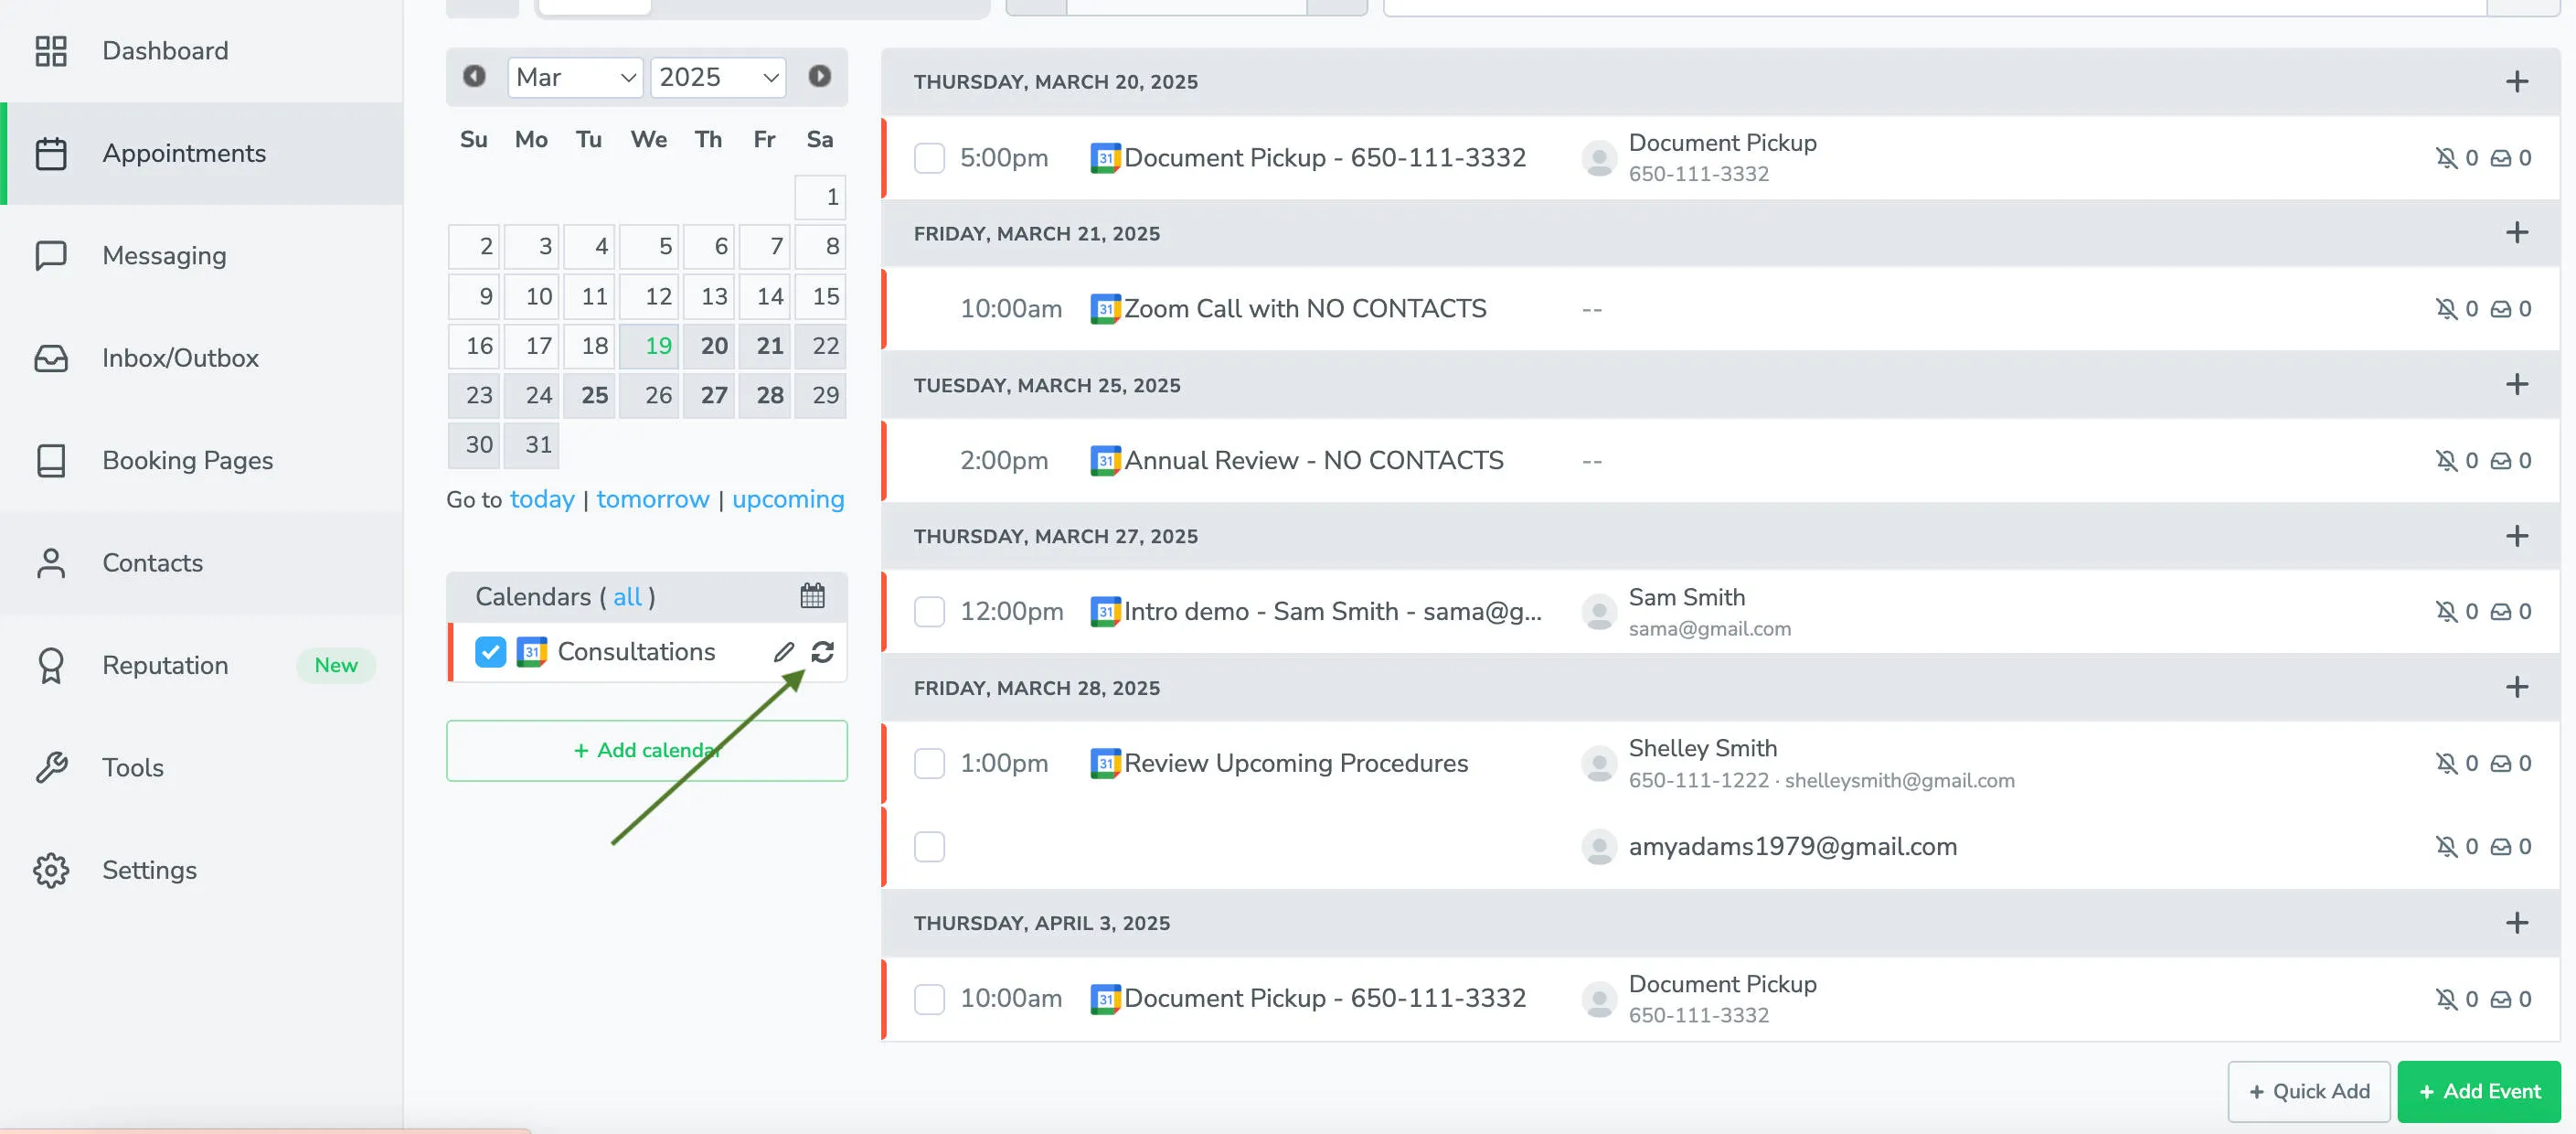
Select the Google calendars you wish to add to Apptoto and fill in Calendar details such as the name, availability hours, and timezone. Then, after you connect, review all the appointment events and extracted contact information Apptoto found on the Appointments tab.
Connecting your first Google Calendar
Section titled “Connecting your first Google Calendar”Since you signed up with your Google Account, Apptoto assumes you want the Google Calendar you used to sign up with connected. Apptoto will not send messages automatically until you enable auto messages.
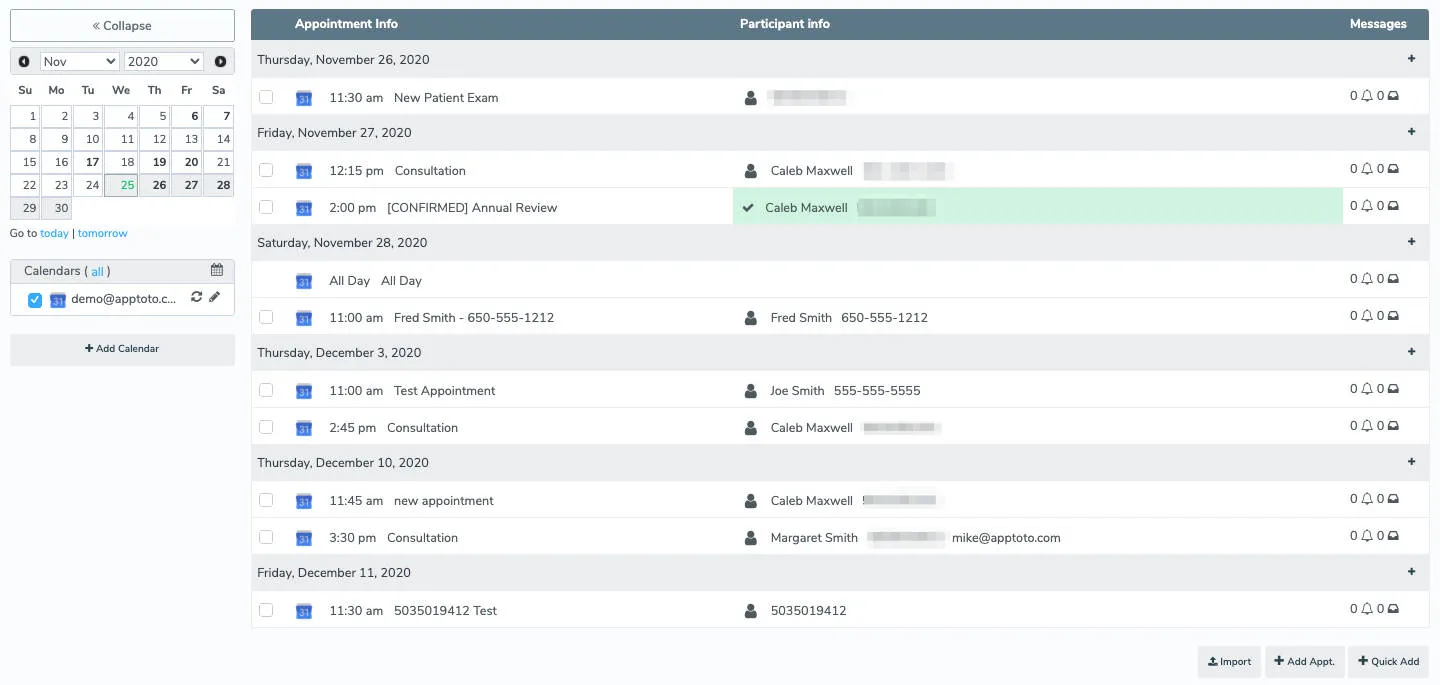
After the calendar is added, you’ll access your Appointments tab, where you can see upcoming appointments Apptoto has found and contact information extracted from them. The Appointment Info column displays the appointment title, and the Participant Info shows extracted contact details.
Connecting a Google Calendar after signup
Section titled “Connecting a Google Calendar after signup”To reconnect your Google Calendar after initial signup or to connect a new one:
-
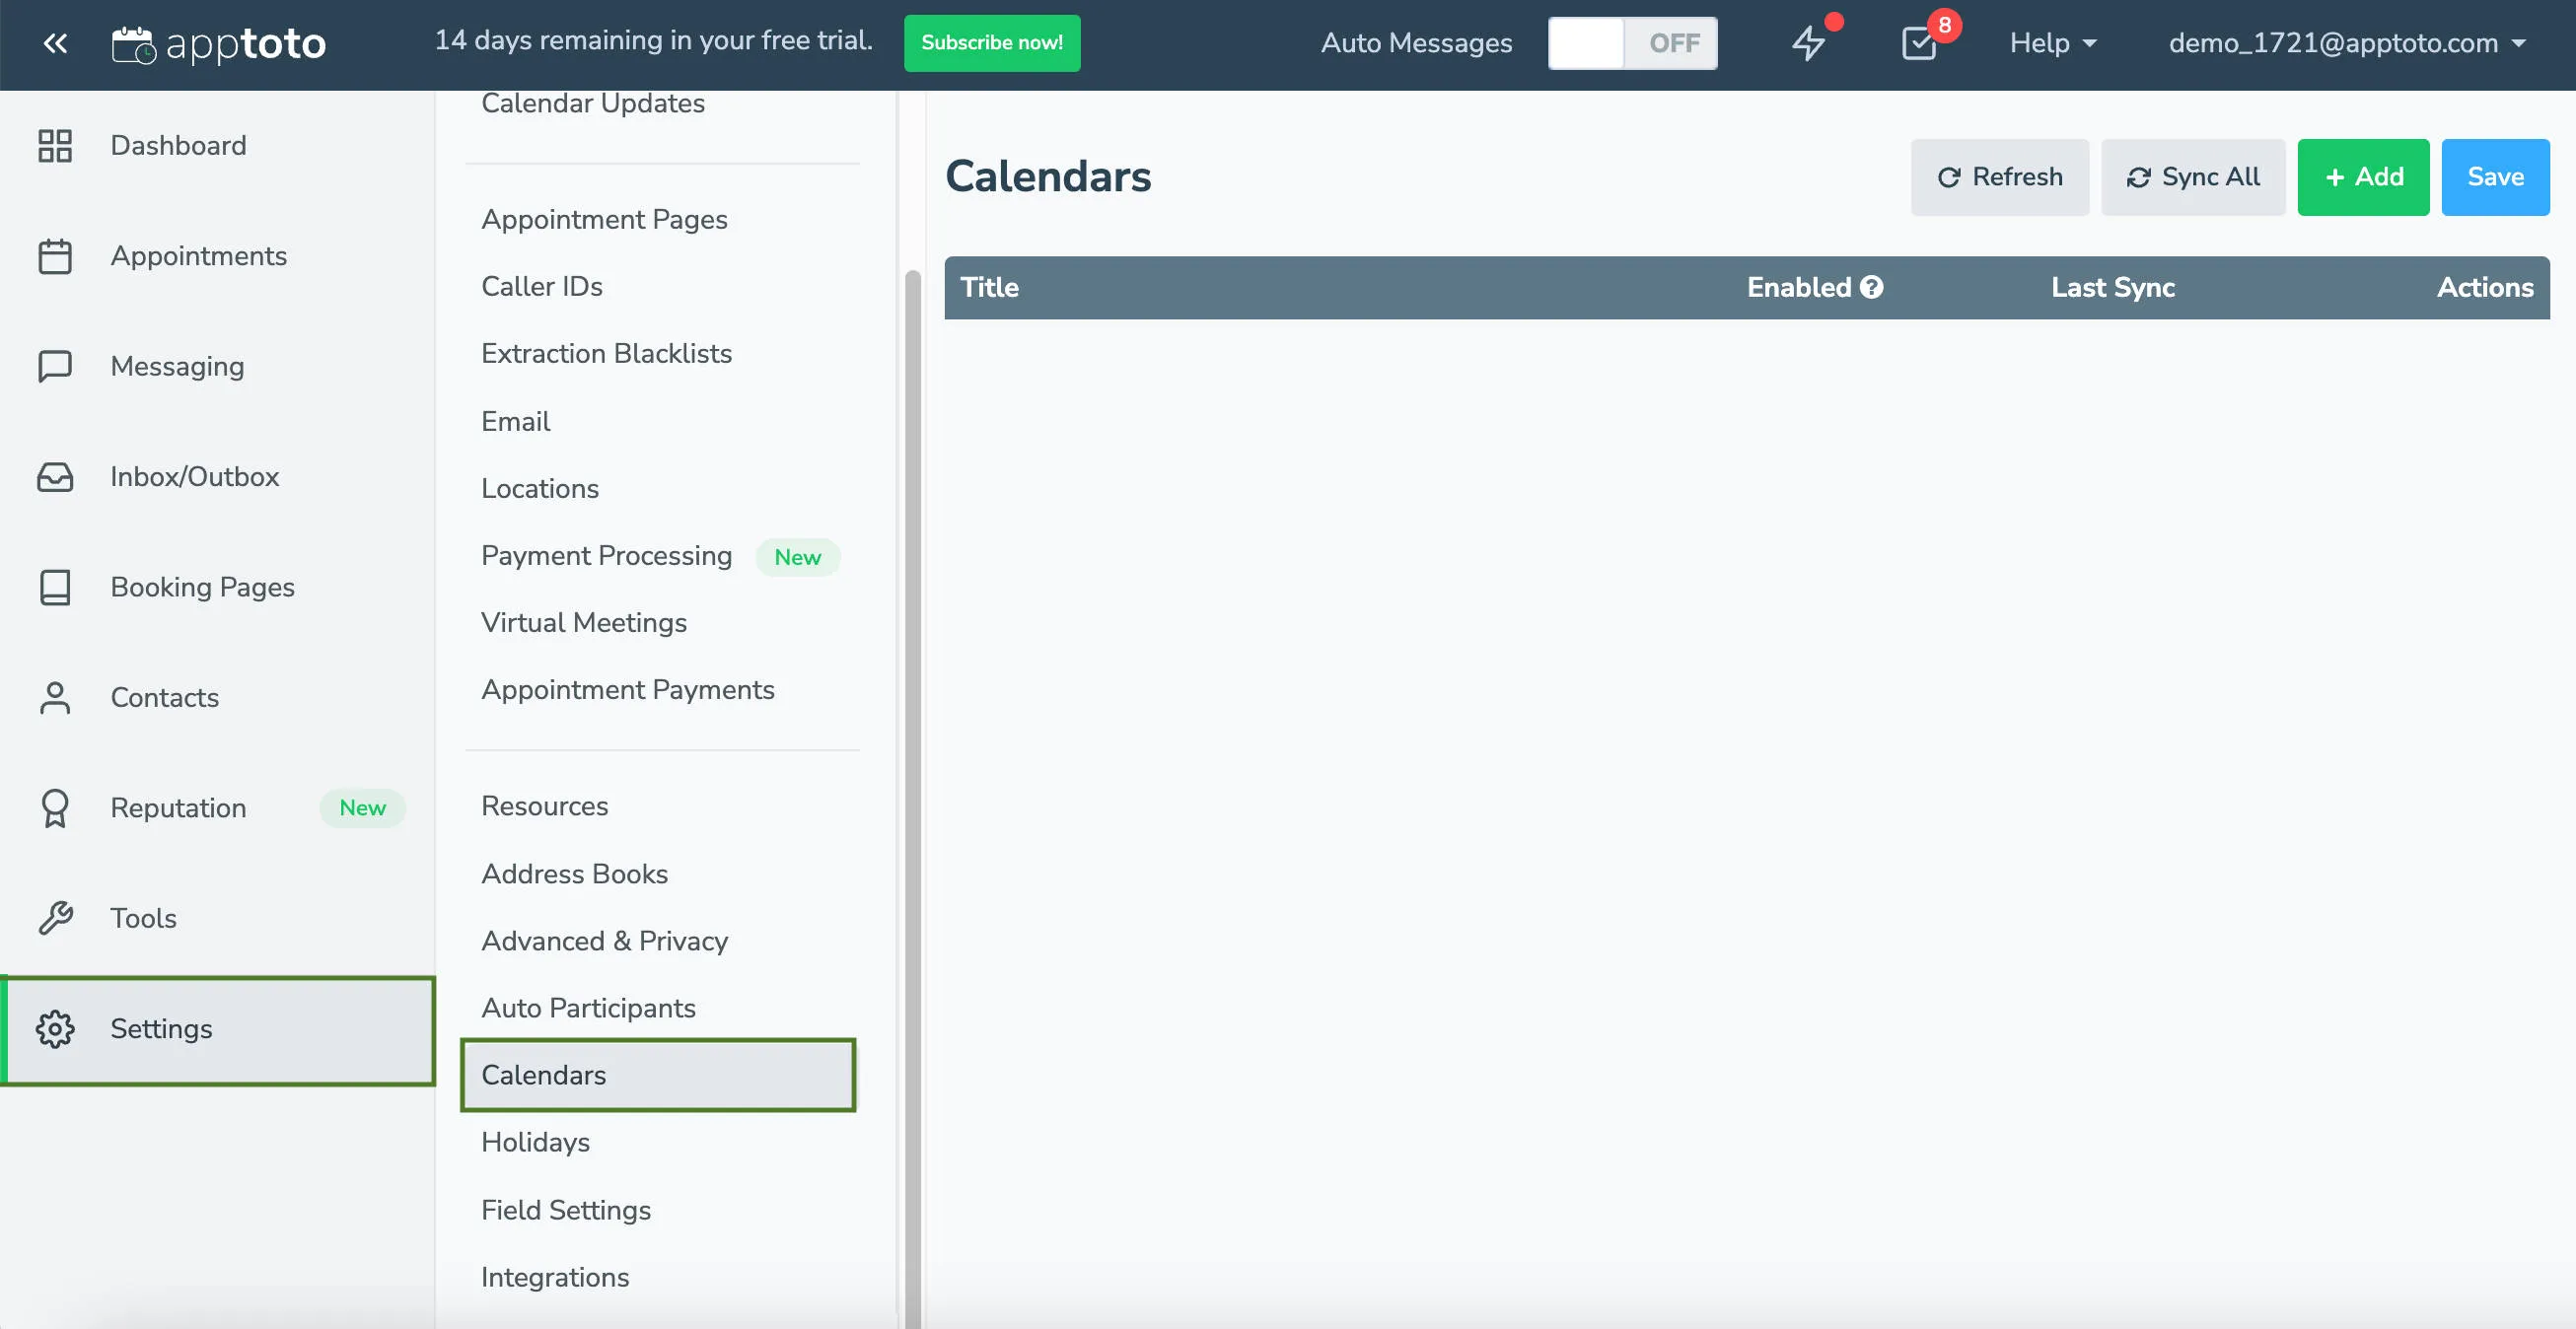
Log into Apptoto and click the Settings tab.

-
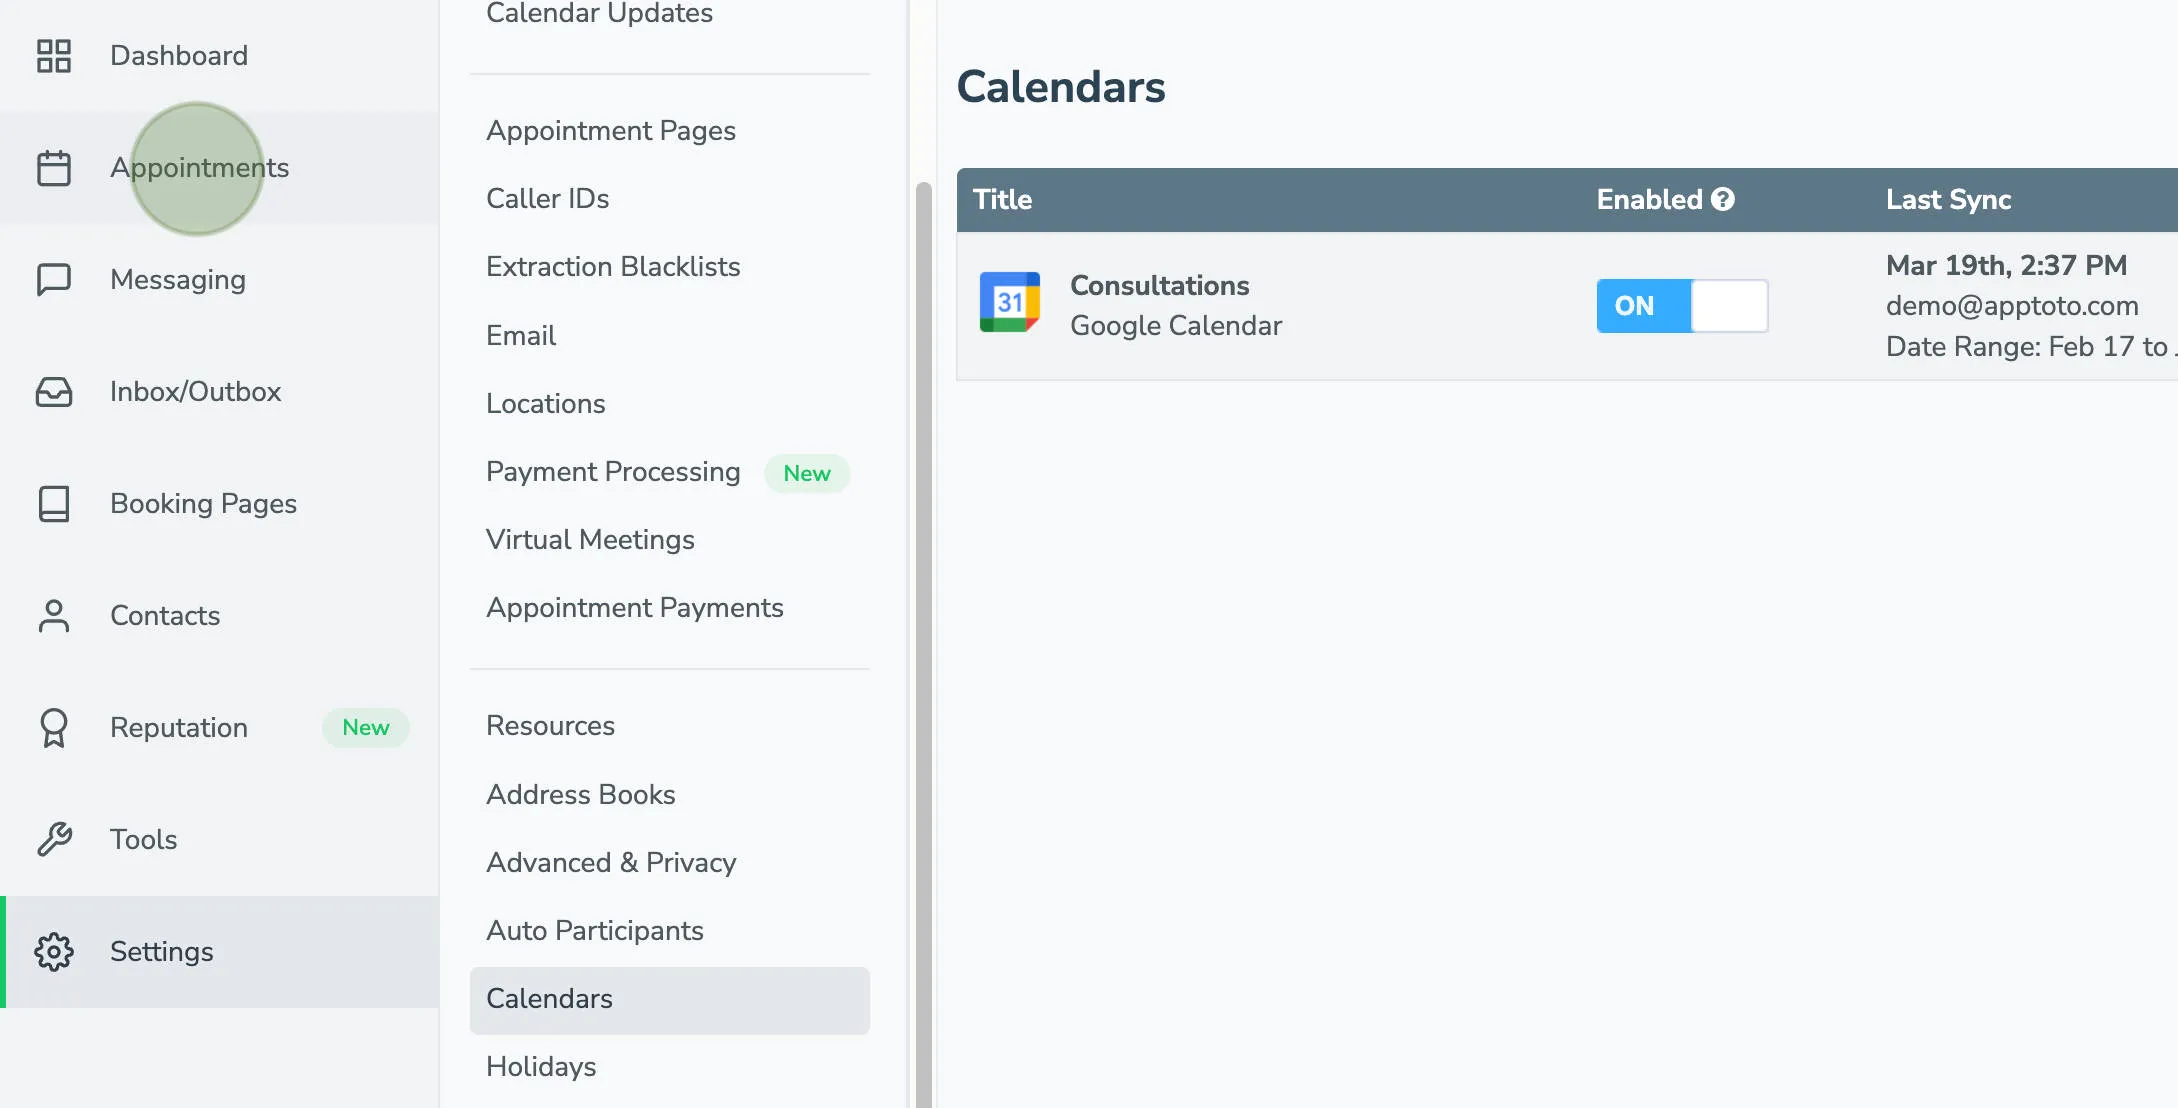
Click the Calendars tab.
-
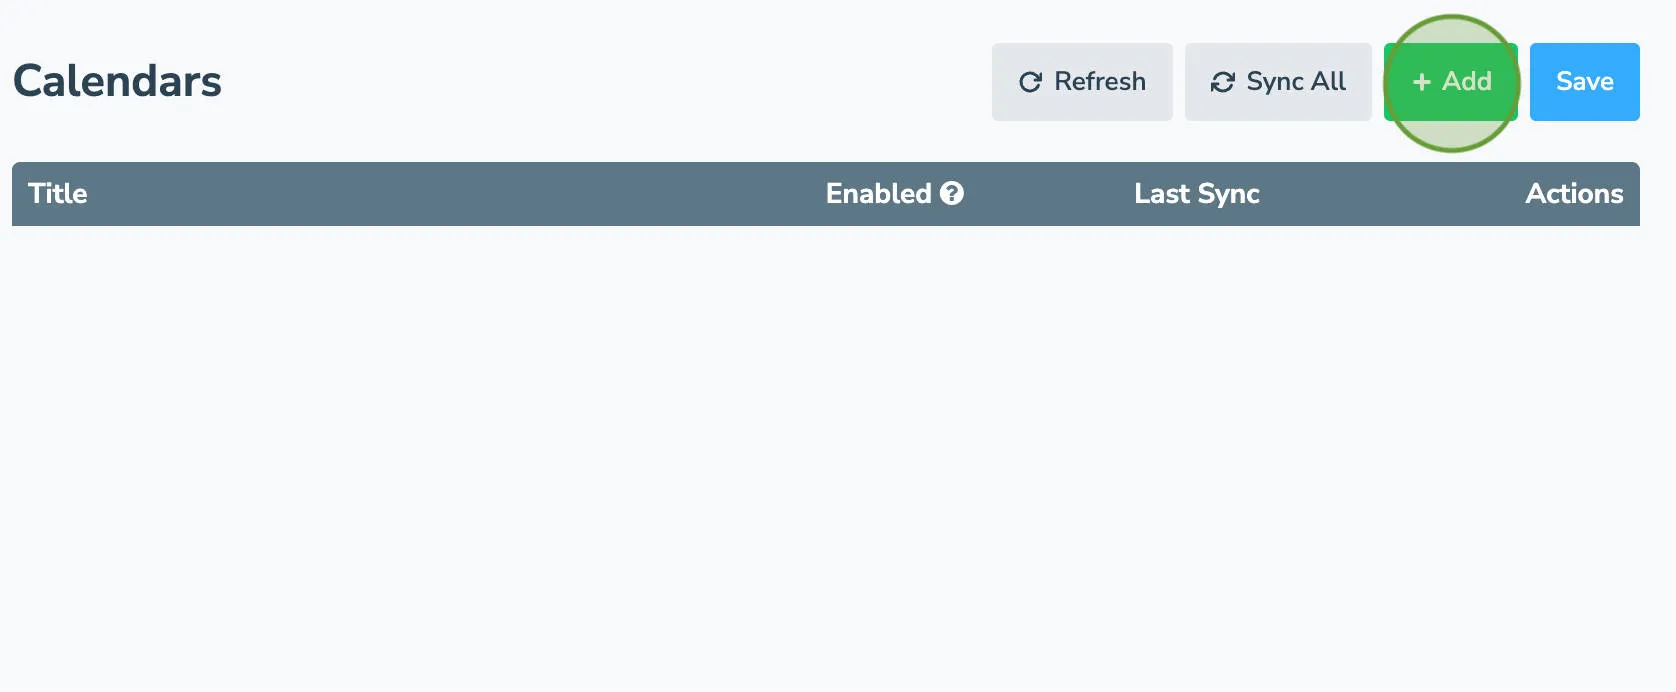
Click + Add to add a new appointment calendar.
-
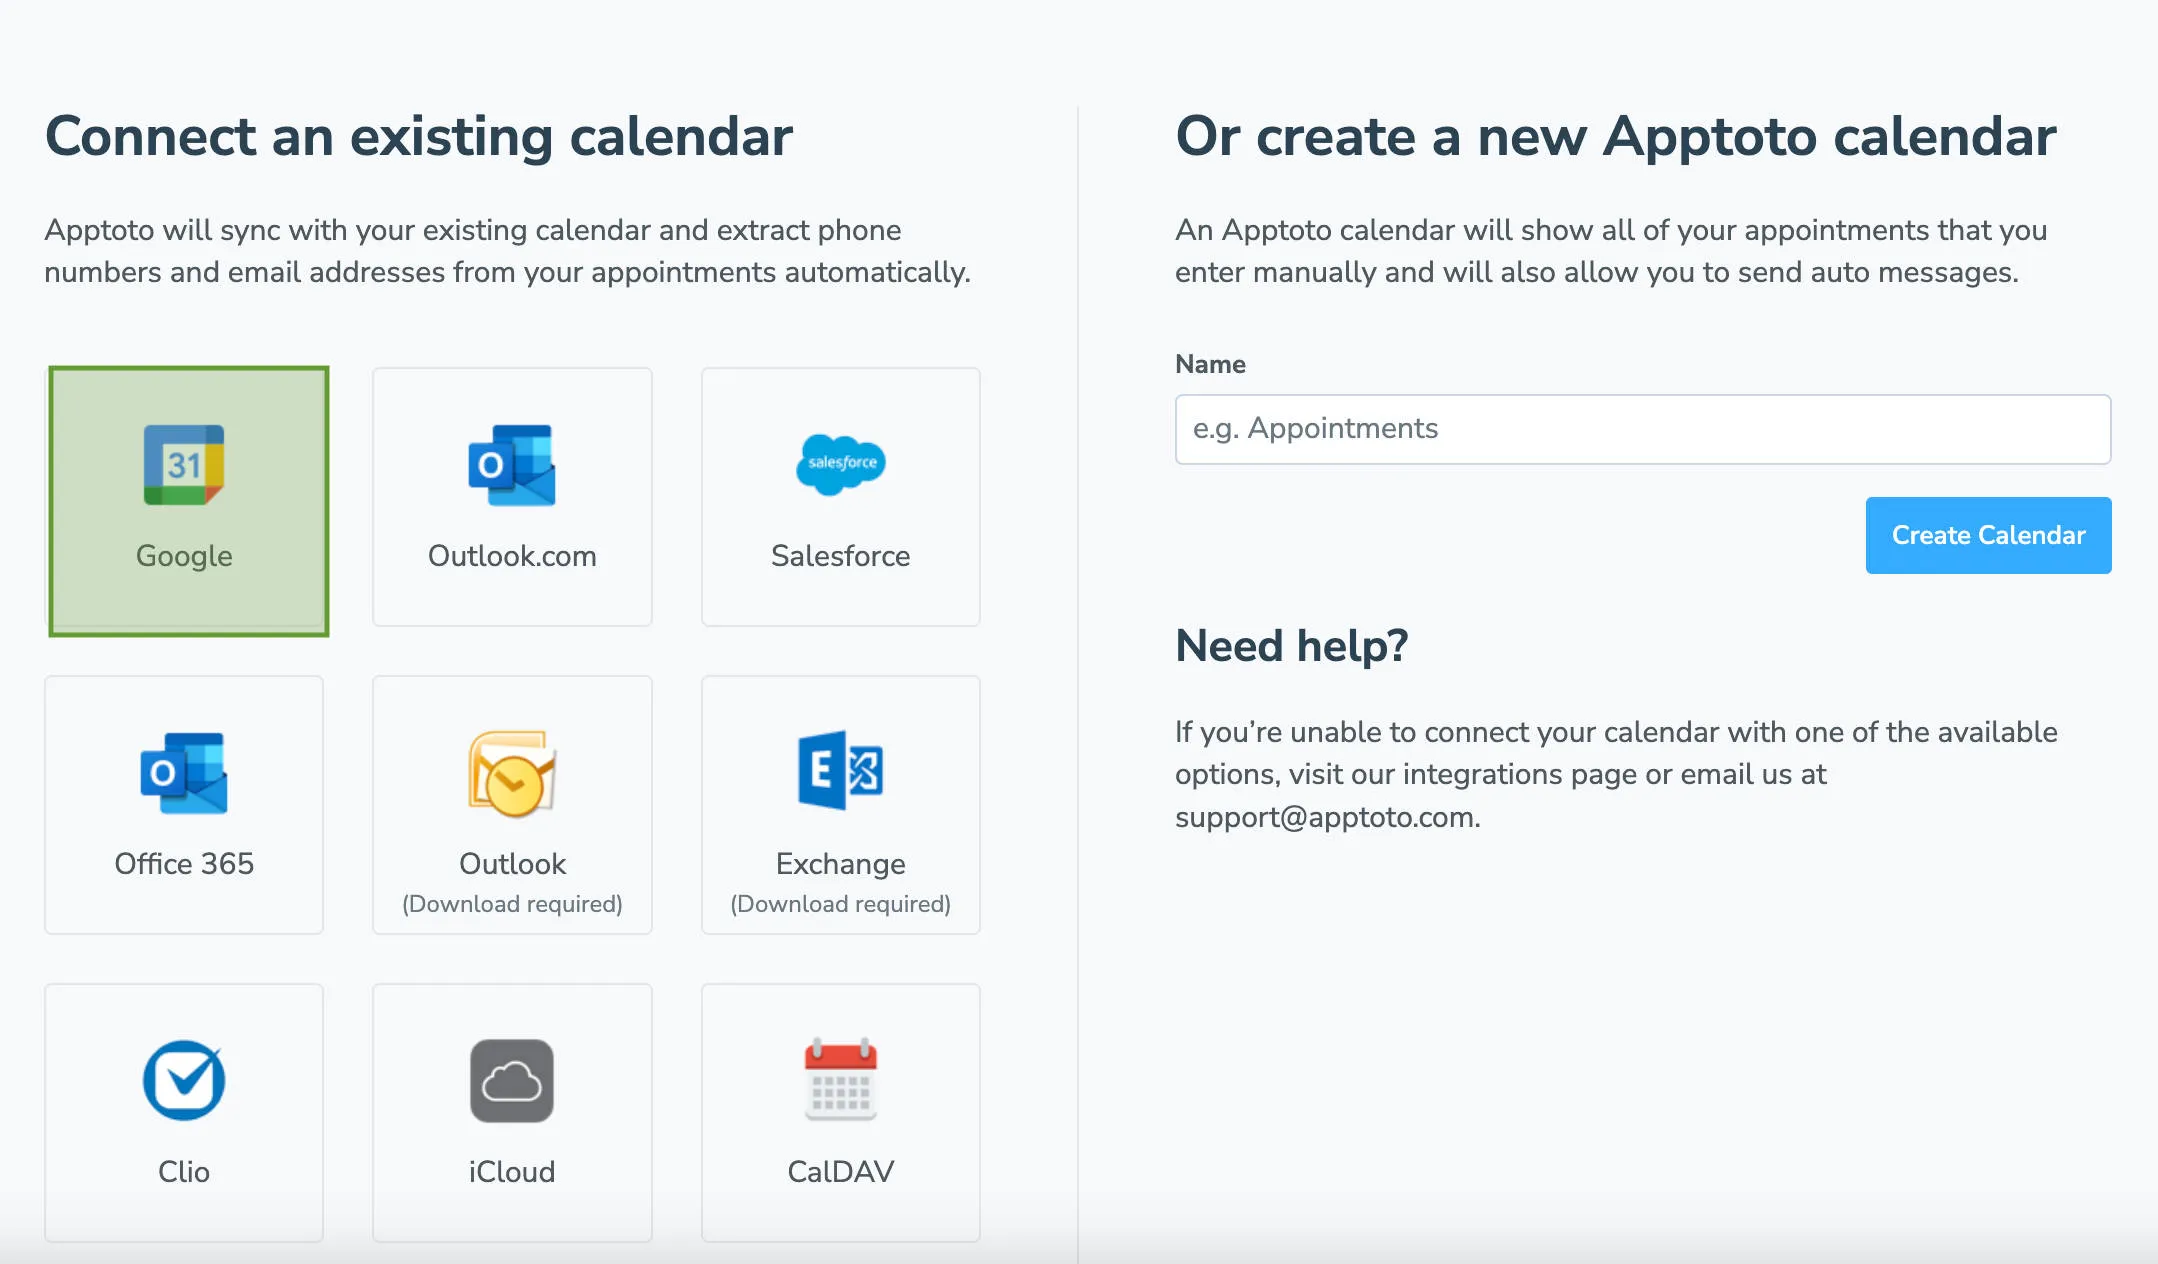
Select Google as the calendar type.
-
If prompted, choose the Google Account and grant appropriate permissions.
-
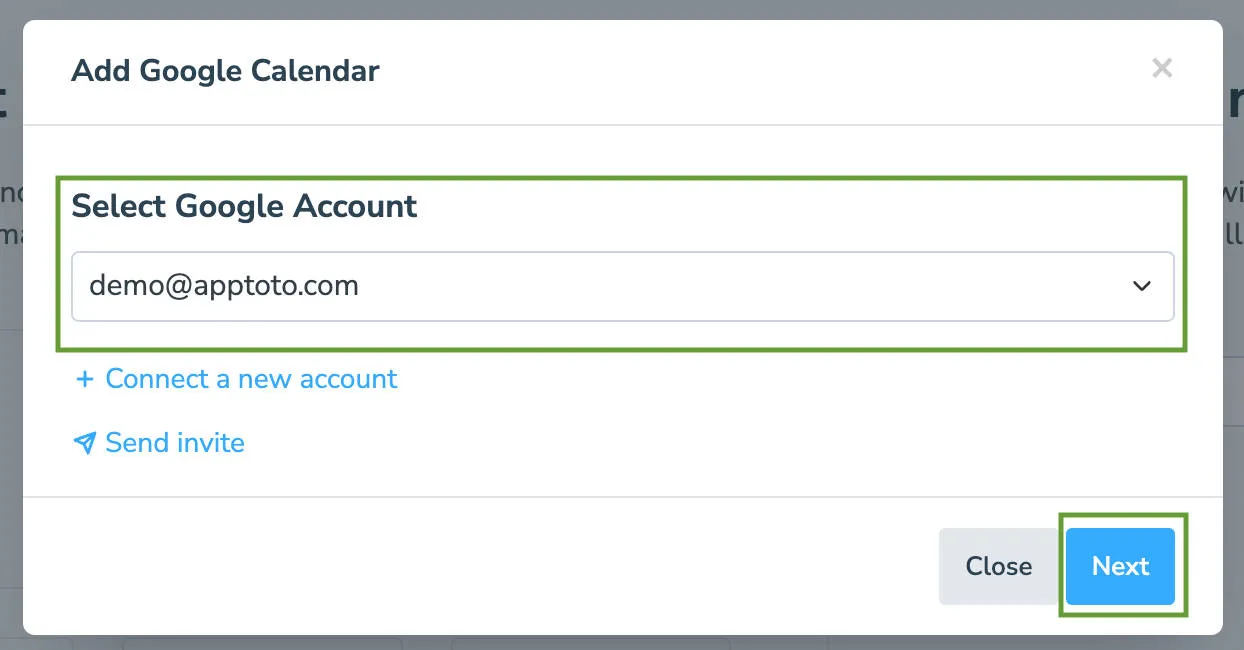
Back in Apptoto, select your Google Account from the dropdown and click Next.
-
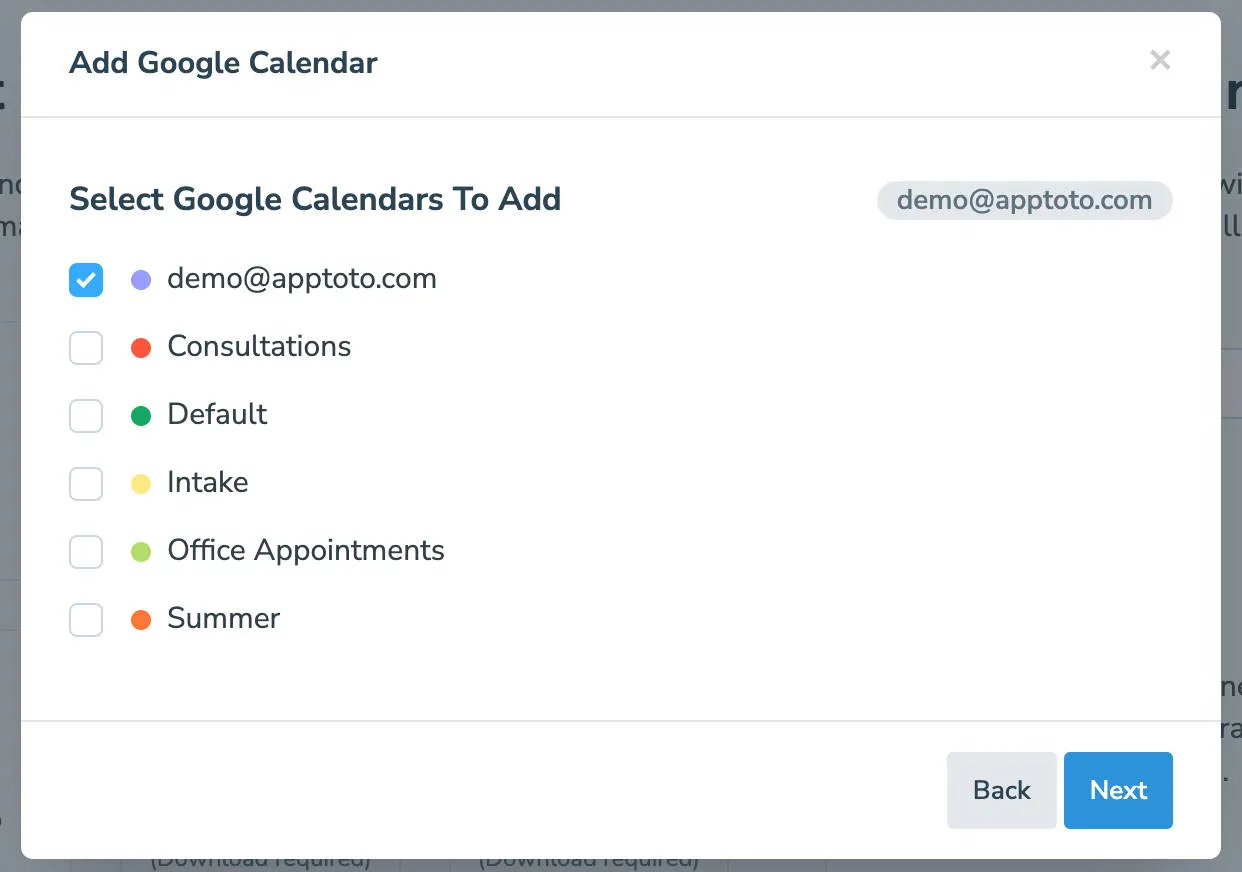
You’ll see all calendars associated with that account. Select which calendars to sync and click Next.
-
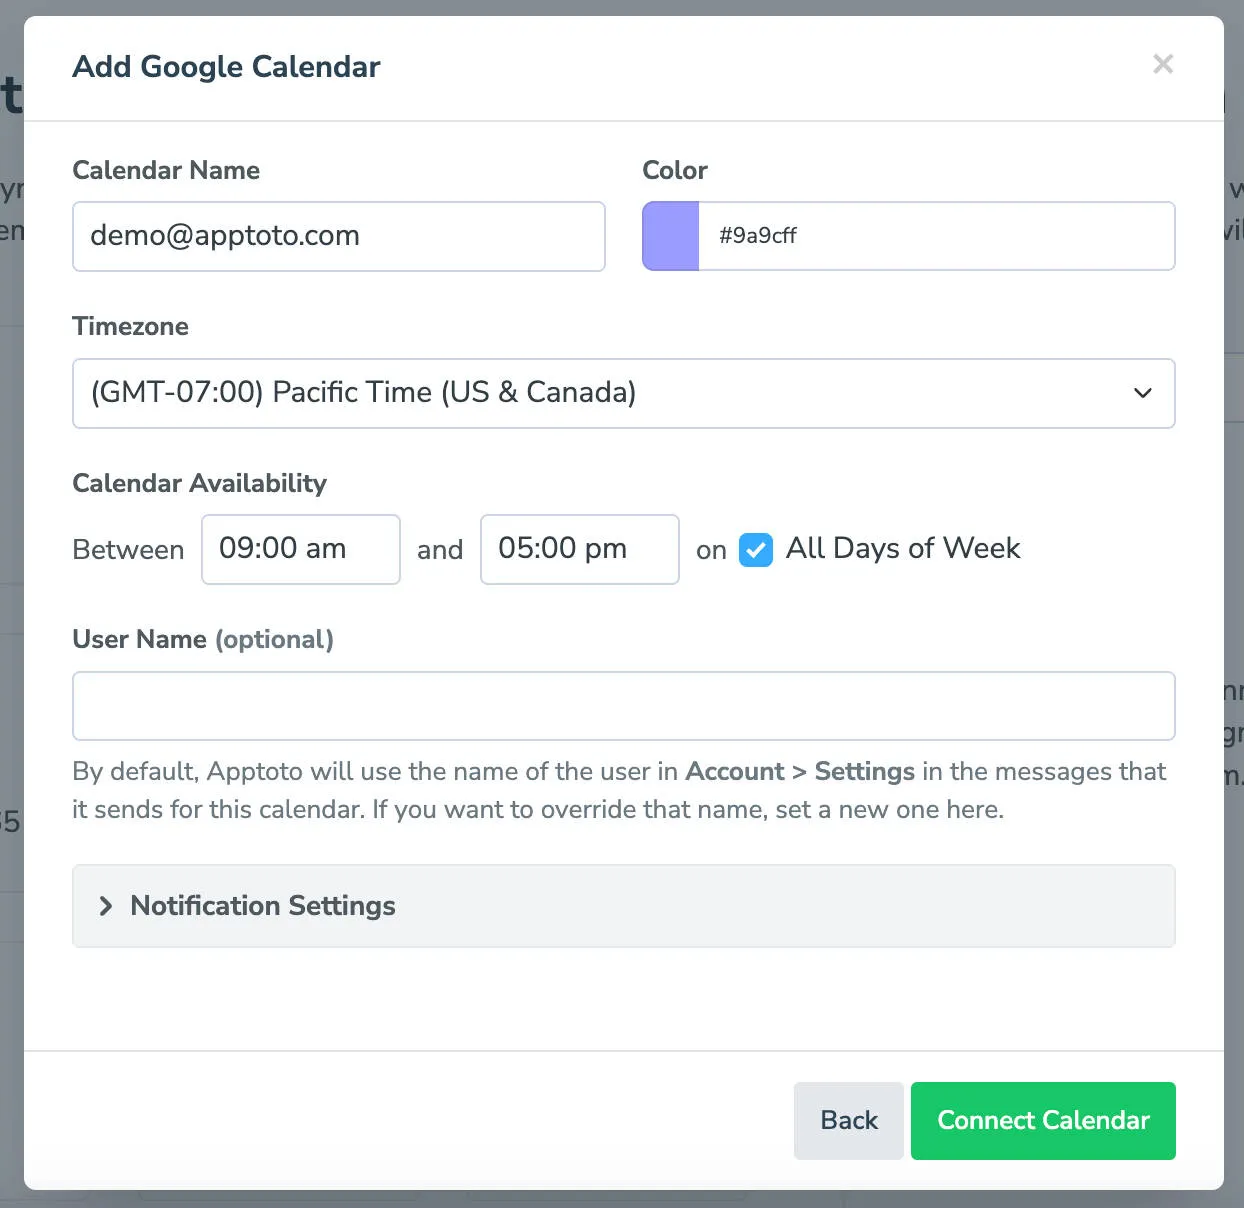
Enter additional details (calendar name, timezone, availability, user name, notification settings) and click Connect Calendar.
-
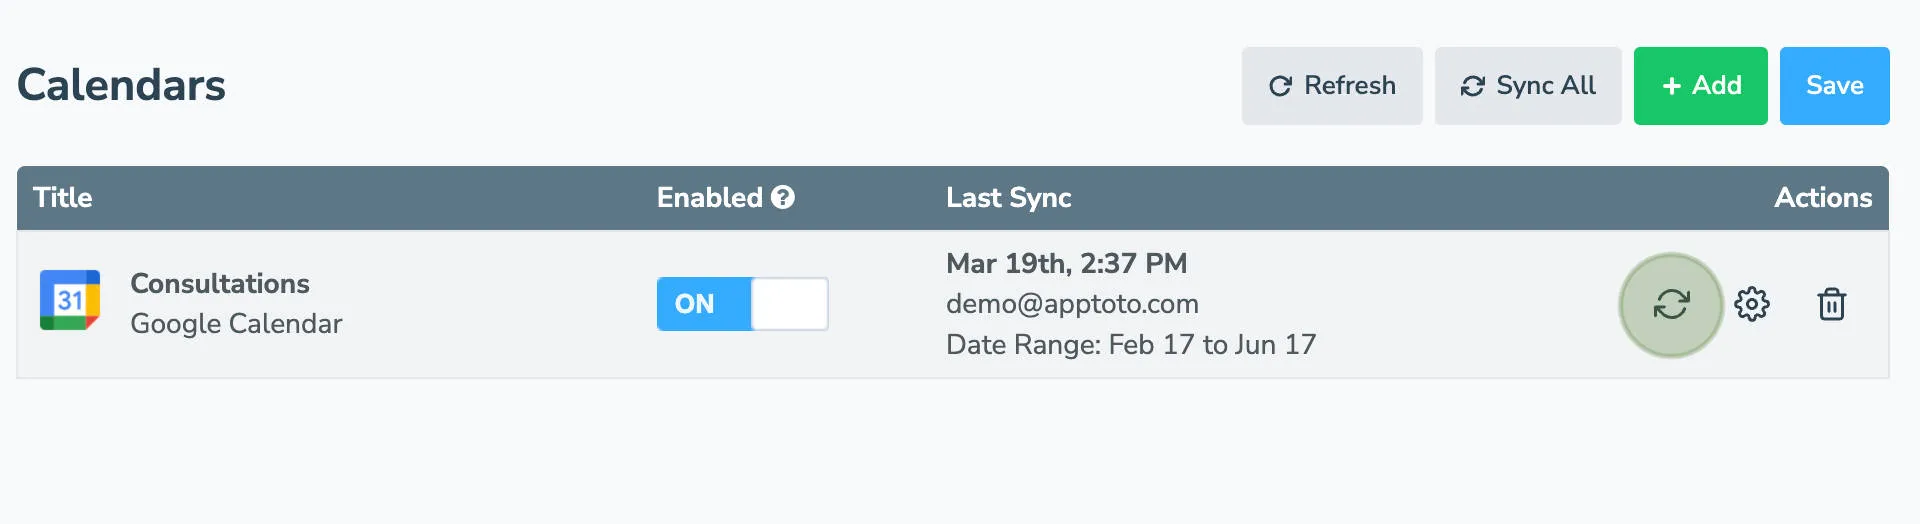
Your calendar now appears in Settings > Calendars. Syncing happens hourly automatically and in real-time for Google Calendars. Click Sync to force immediate syncing.
-
Review synced appointments by clicking the top-level Appointments tab.
-
You can also sync from the Appointments tab using the sync option there.
Google Calendar troubleshooting
Section titled “Google Calendar troubleshooting”Apptoto may not show appointments initially because it hasn’t synced enough of your calendar yet. Reload the page or click Sync to request immediate syncing. Apptoto automatically syncs your calendar once per hour.
You might schedule appointments on a different calendar than the default Google calendar. If so, click Add Calendar and select Google to add that calendar.
After connecting your calendars, configure your default messages. See Message Setup for guidance.