Multiple Appointment Types with Custom Availabilities
Managing multiple appointment types with unique availabilities can be challenging. Apptoto simplifies this process by allowing you to link multiple booking pages, each with its own custom hours of availability, to create a centralized and seamless booking experience for your clients. Follow this guide to set up a robust multi-step booking system in Apptoto.
Linking multiple booking pages so each appointment type has its own custom availability
Section titled “Linking multiple booking pages so each appointment type has its own custom availability”Create your first appointment type booking page
Section titled “Create your first appointment type booking page”-
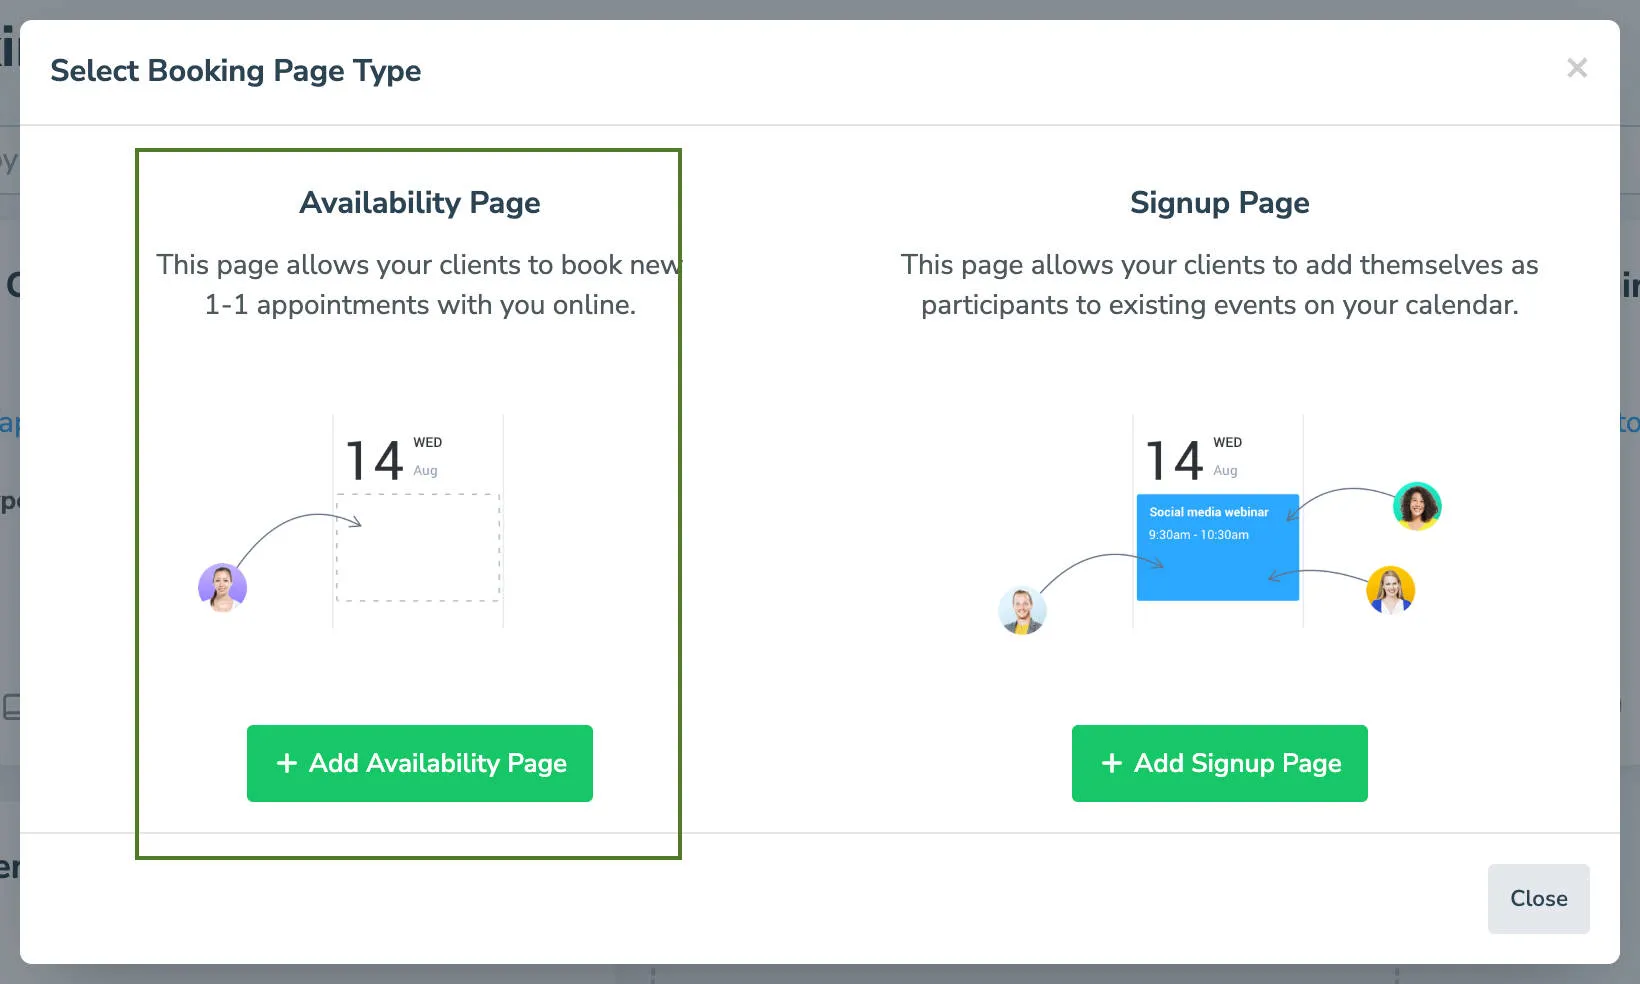
Navigate to the Booking Pages tab. Click Add Booking Page and select +Add Availability Page.
-
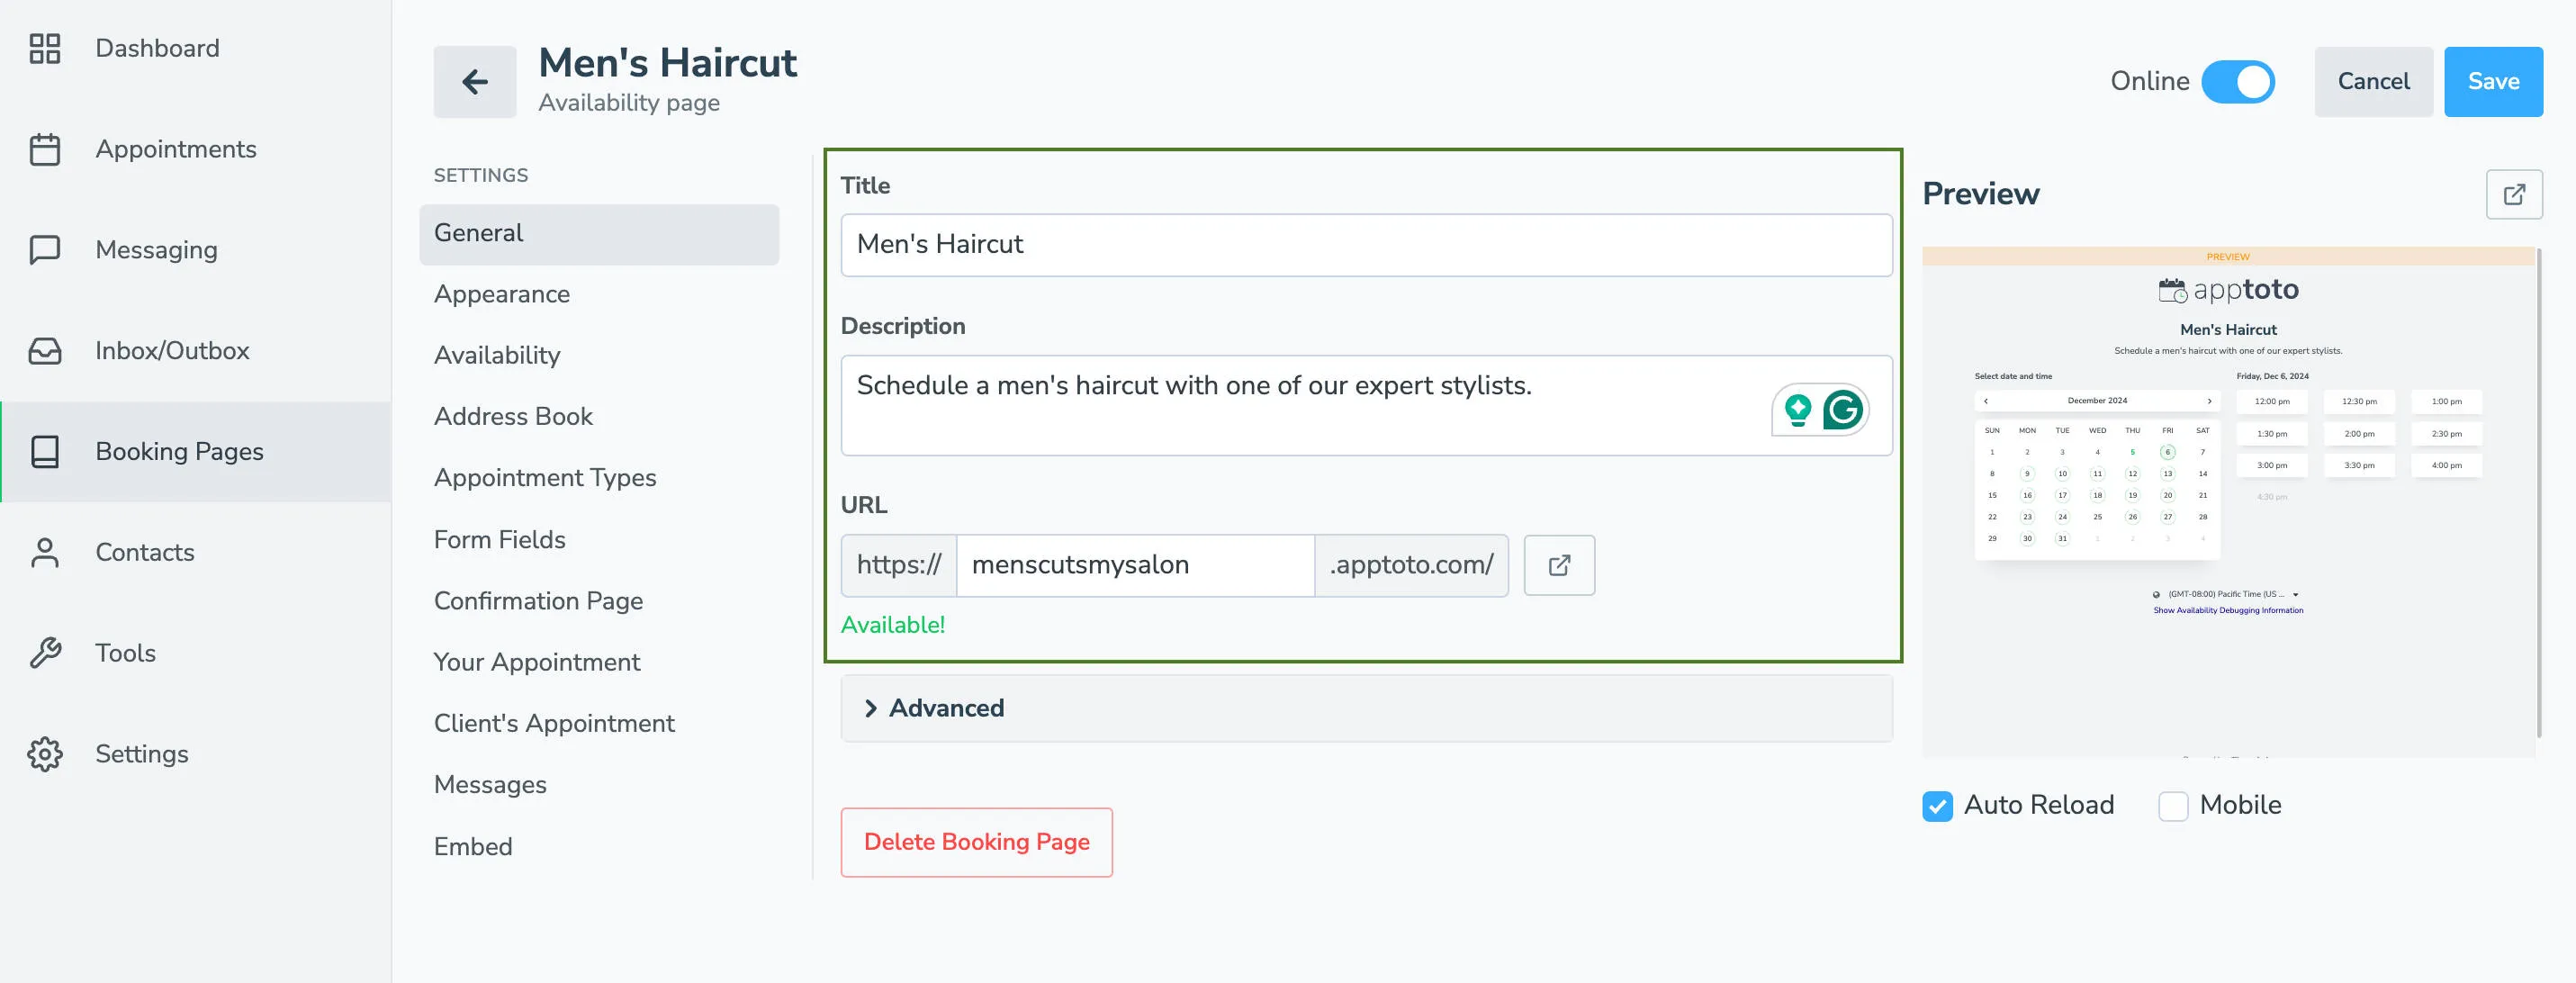
Add your booking page title, description, and URL for the first appointment type you want to create a custom page for.
Set availability for your first appointment type booking page
Section titled “Set availability for your first appointment type booking page”-
Navigate to the Availability tab.
-
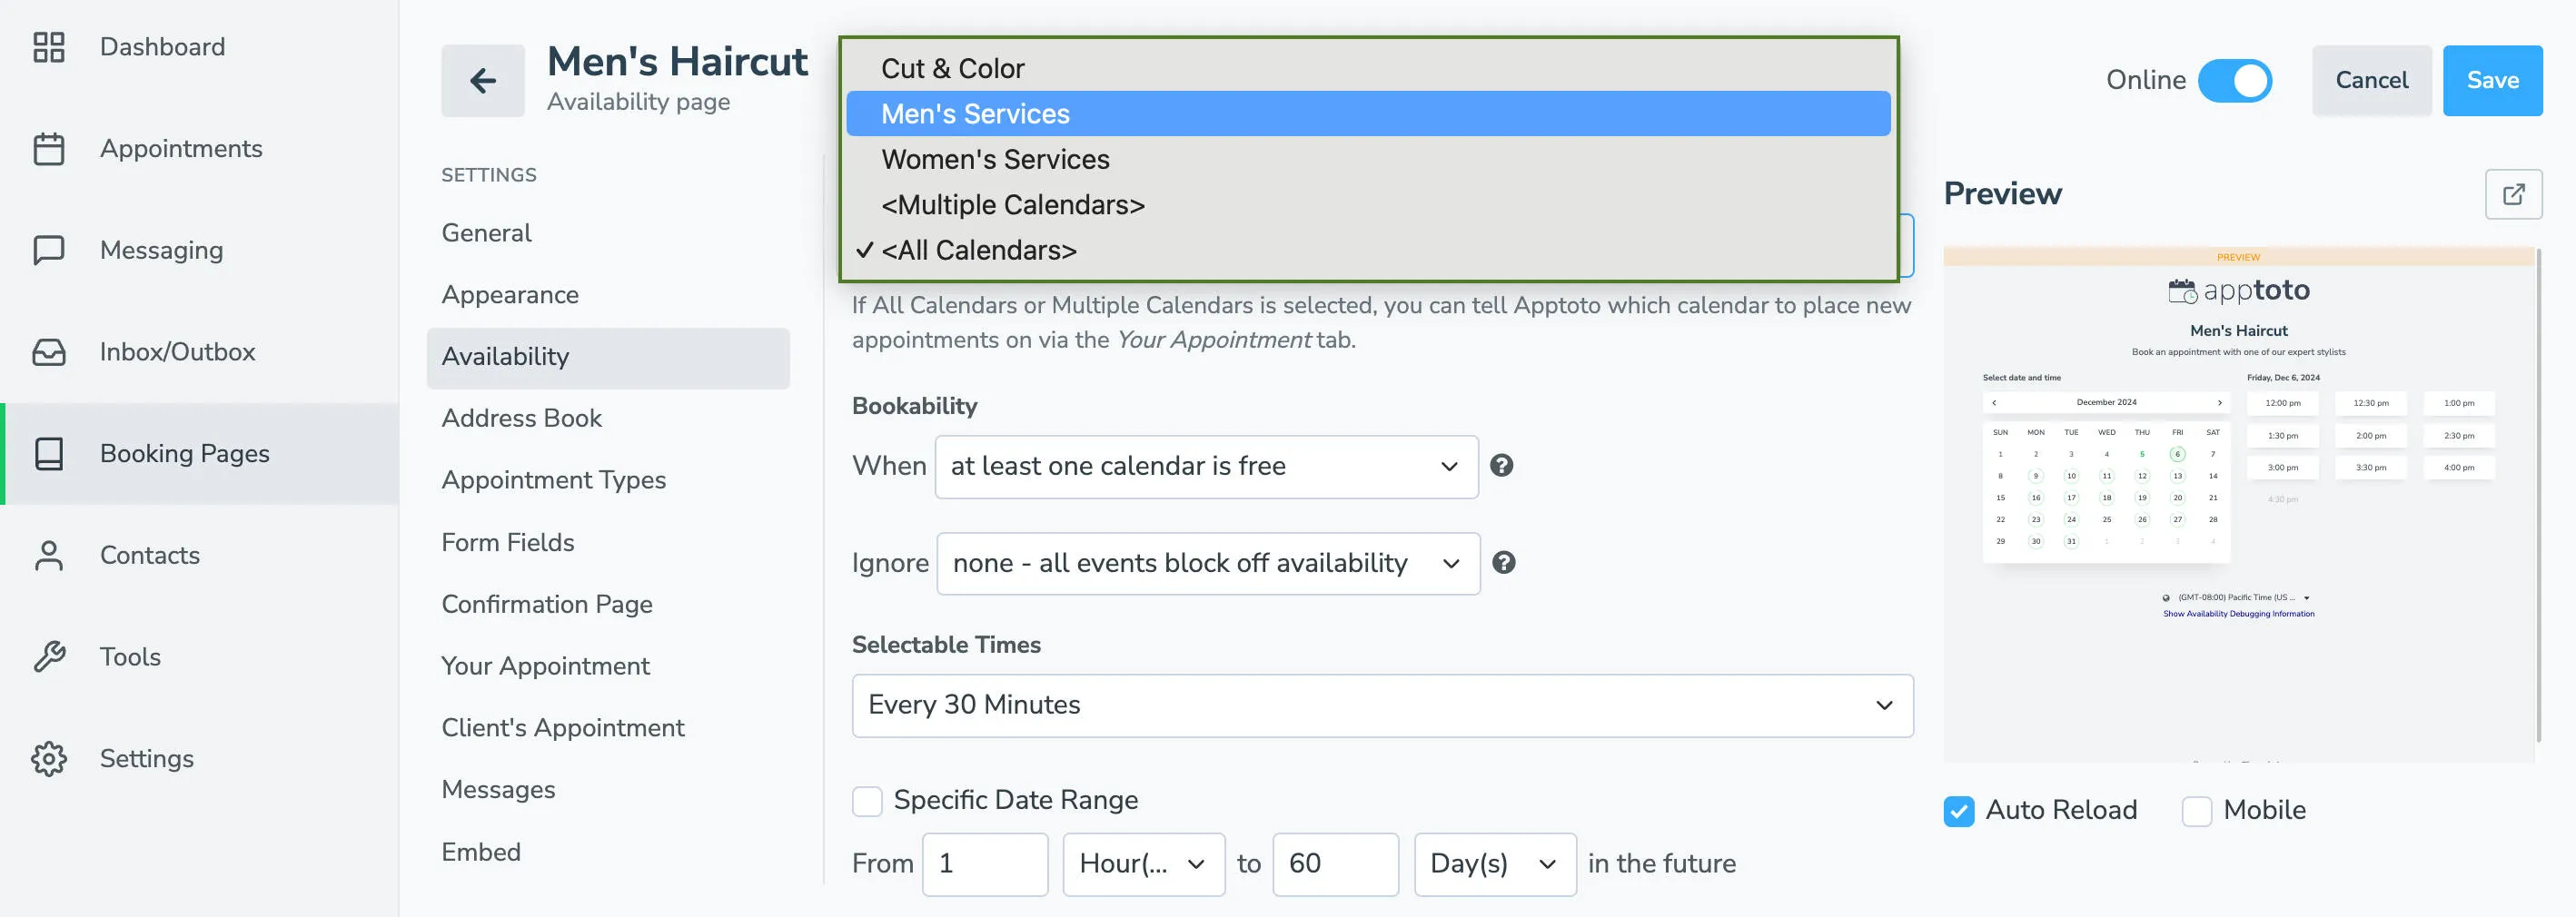
Use the Calendar dropdown to choose which calendars Apptoto will look at to determine if there are available appointment slots. You can sync one calendar, <All Calendars>, or <Multiple Calendars> (which allows you to select specific calendars you want Apptoto to check for availability).
-
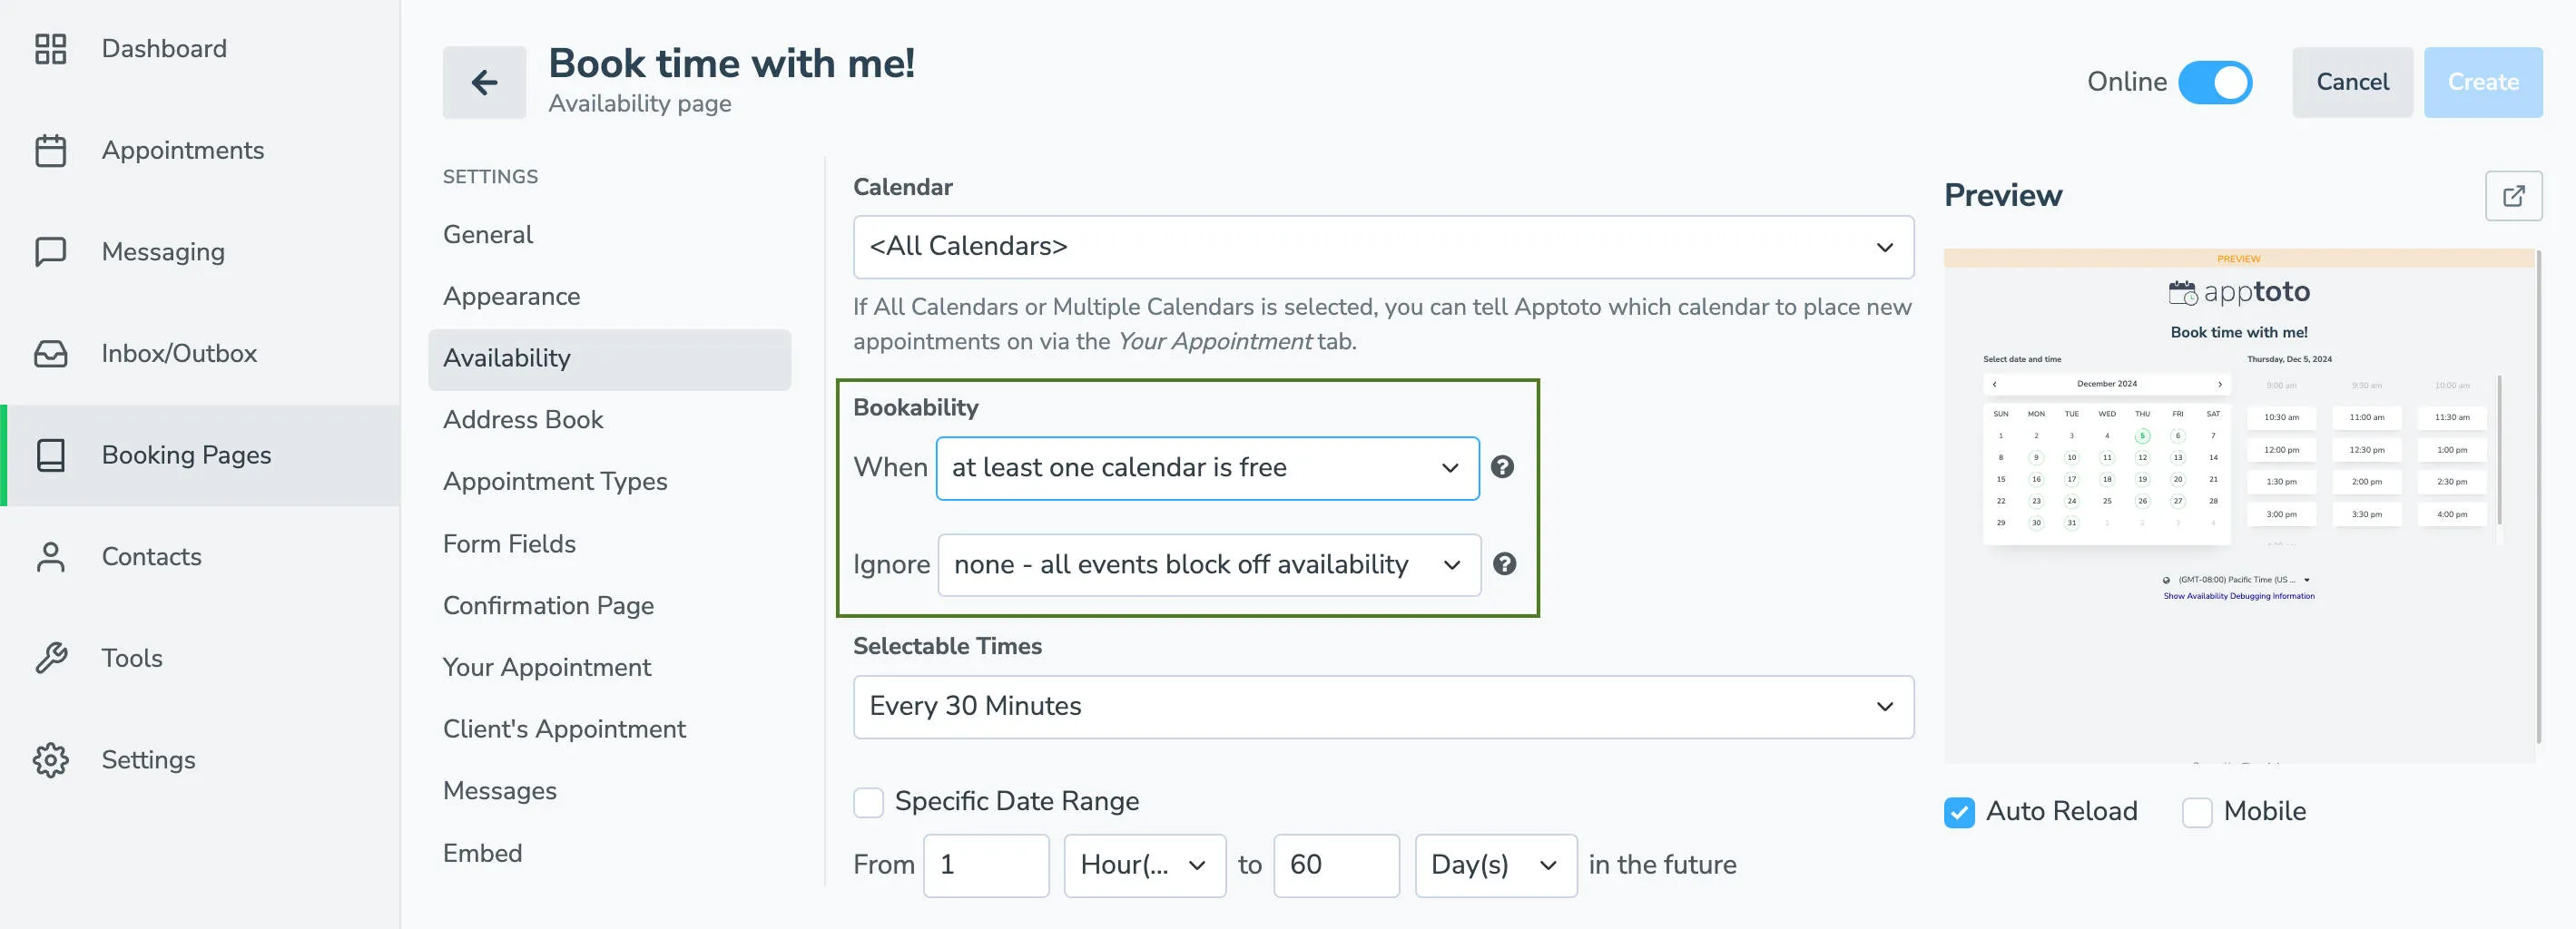
Set Bookability settings. Bookability settings determine when available appointment times will be shown on your booking page and can be highly customized. You can set your booking pages only to show appointments WHEN some or all synced calendars are free, or appointments have specific titles or conditions. Similarly, you can tell Apptoto to IGNORE certain appointments and show availability during that time if they meet certain criteria (i.e., title of “lunch break” or “email catchup”).
-
Using the Selectable Times section, set how frequently you want to set appointment start times and the date range you want to book appointments out for.
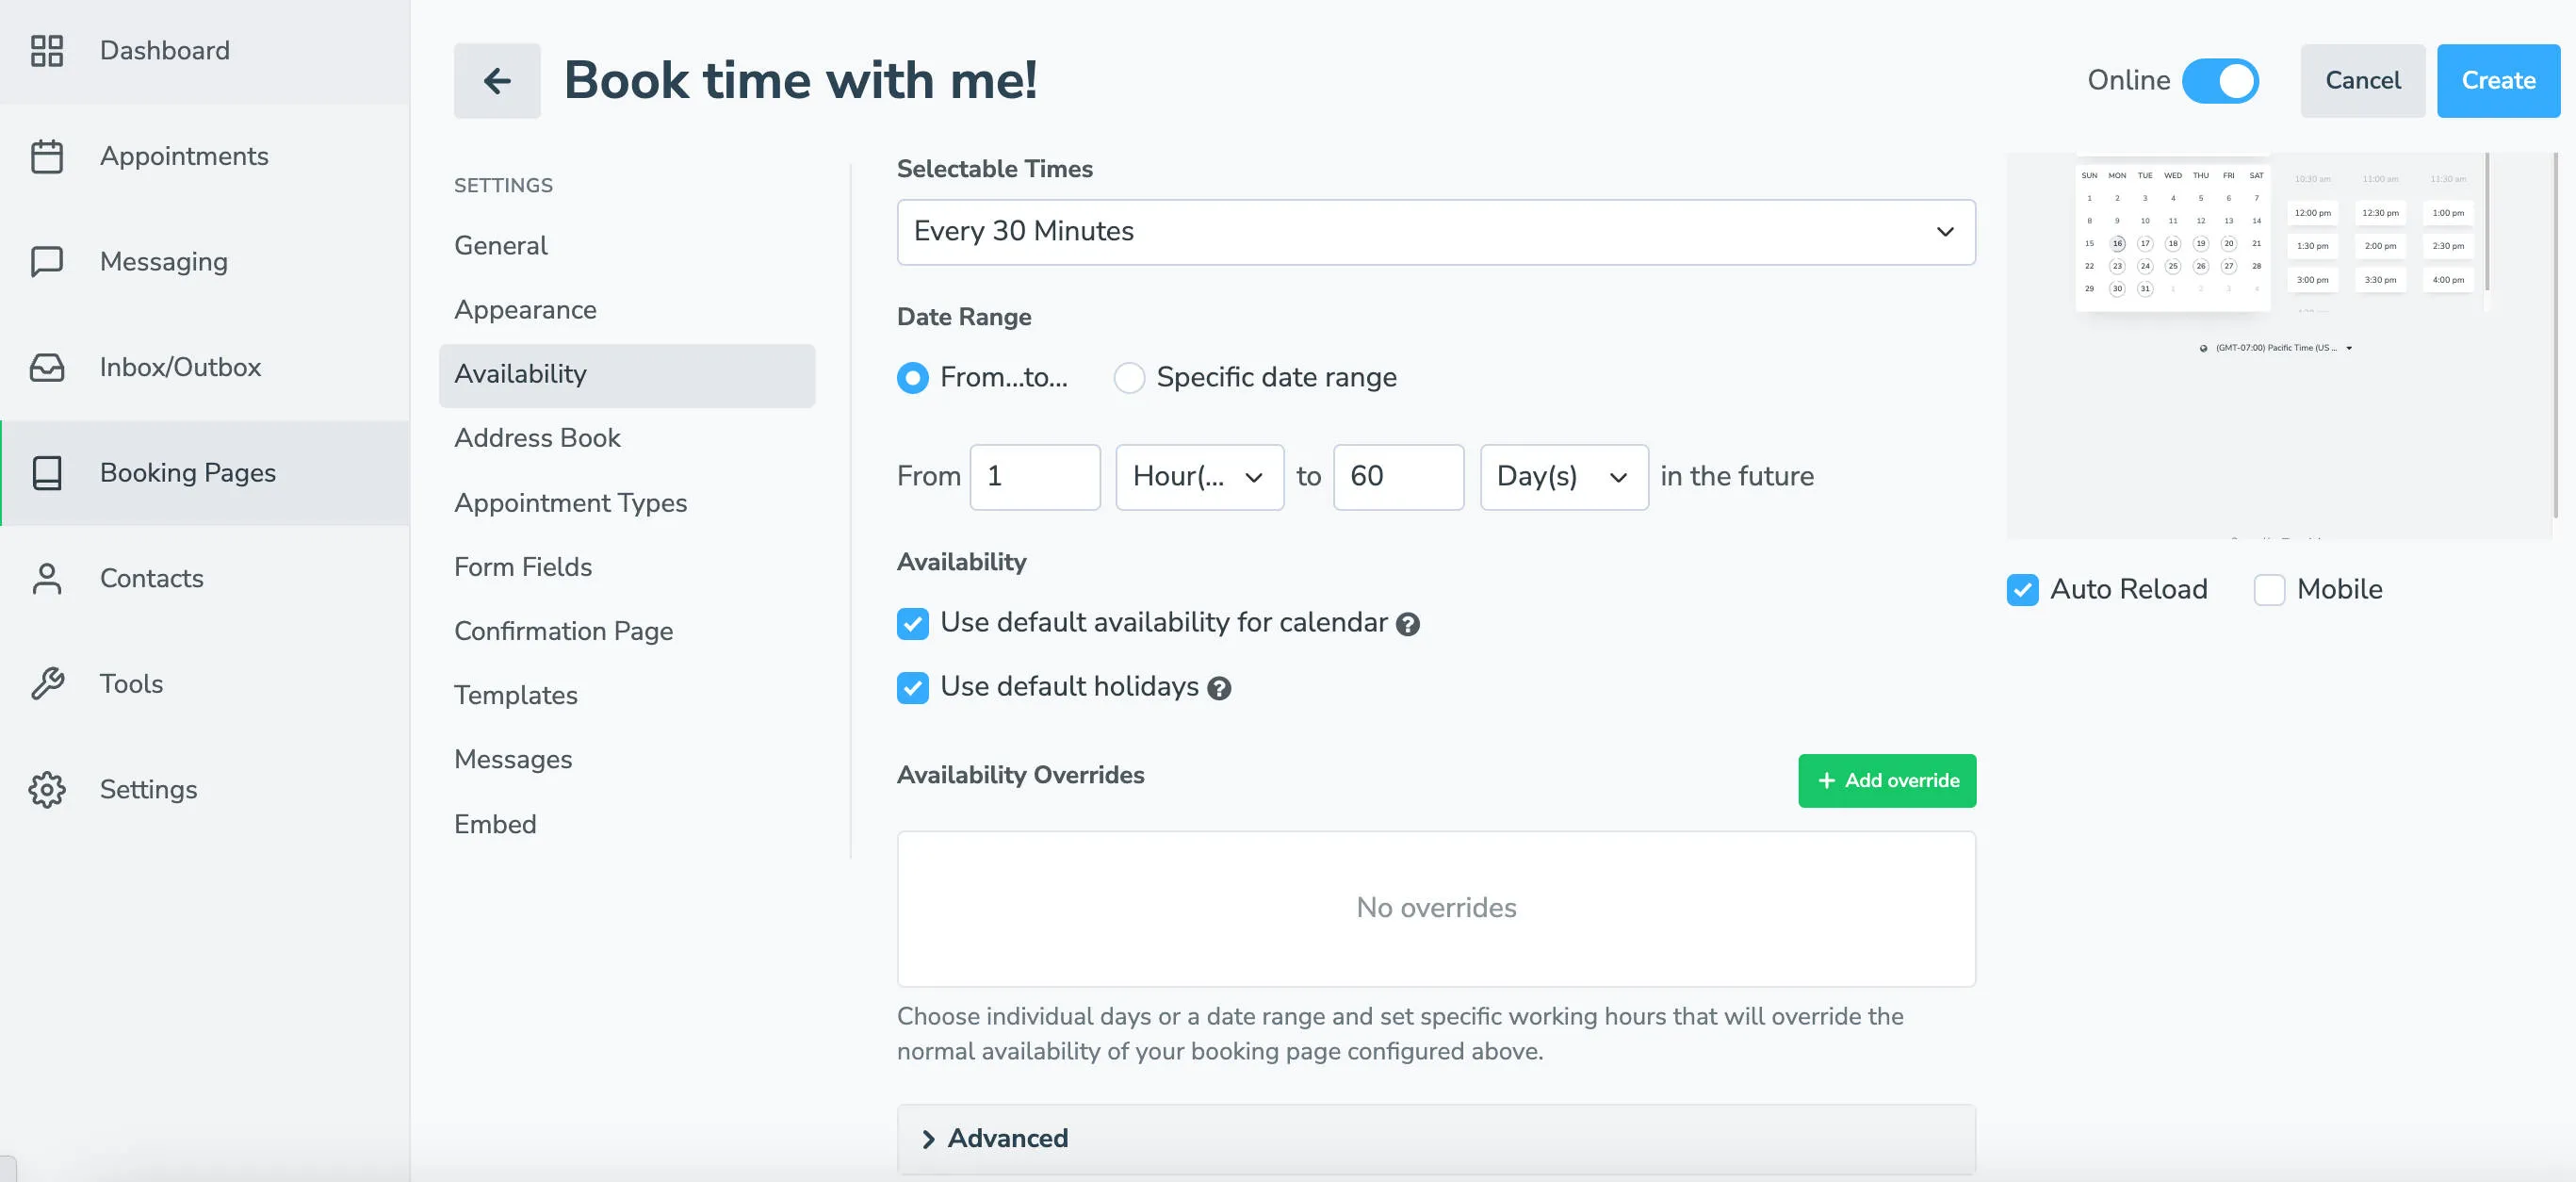
-
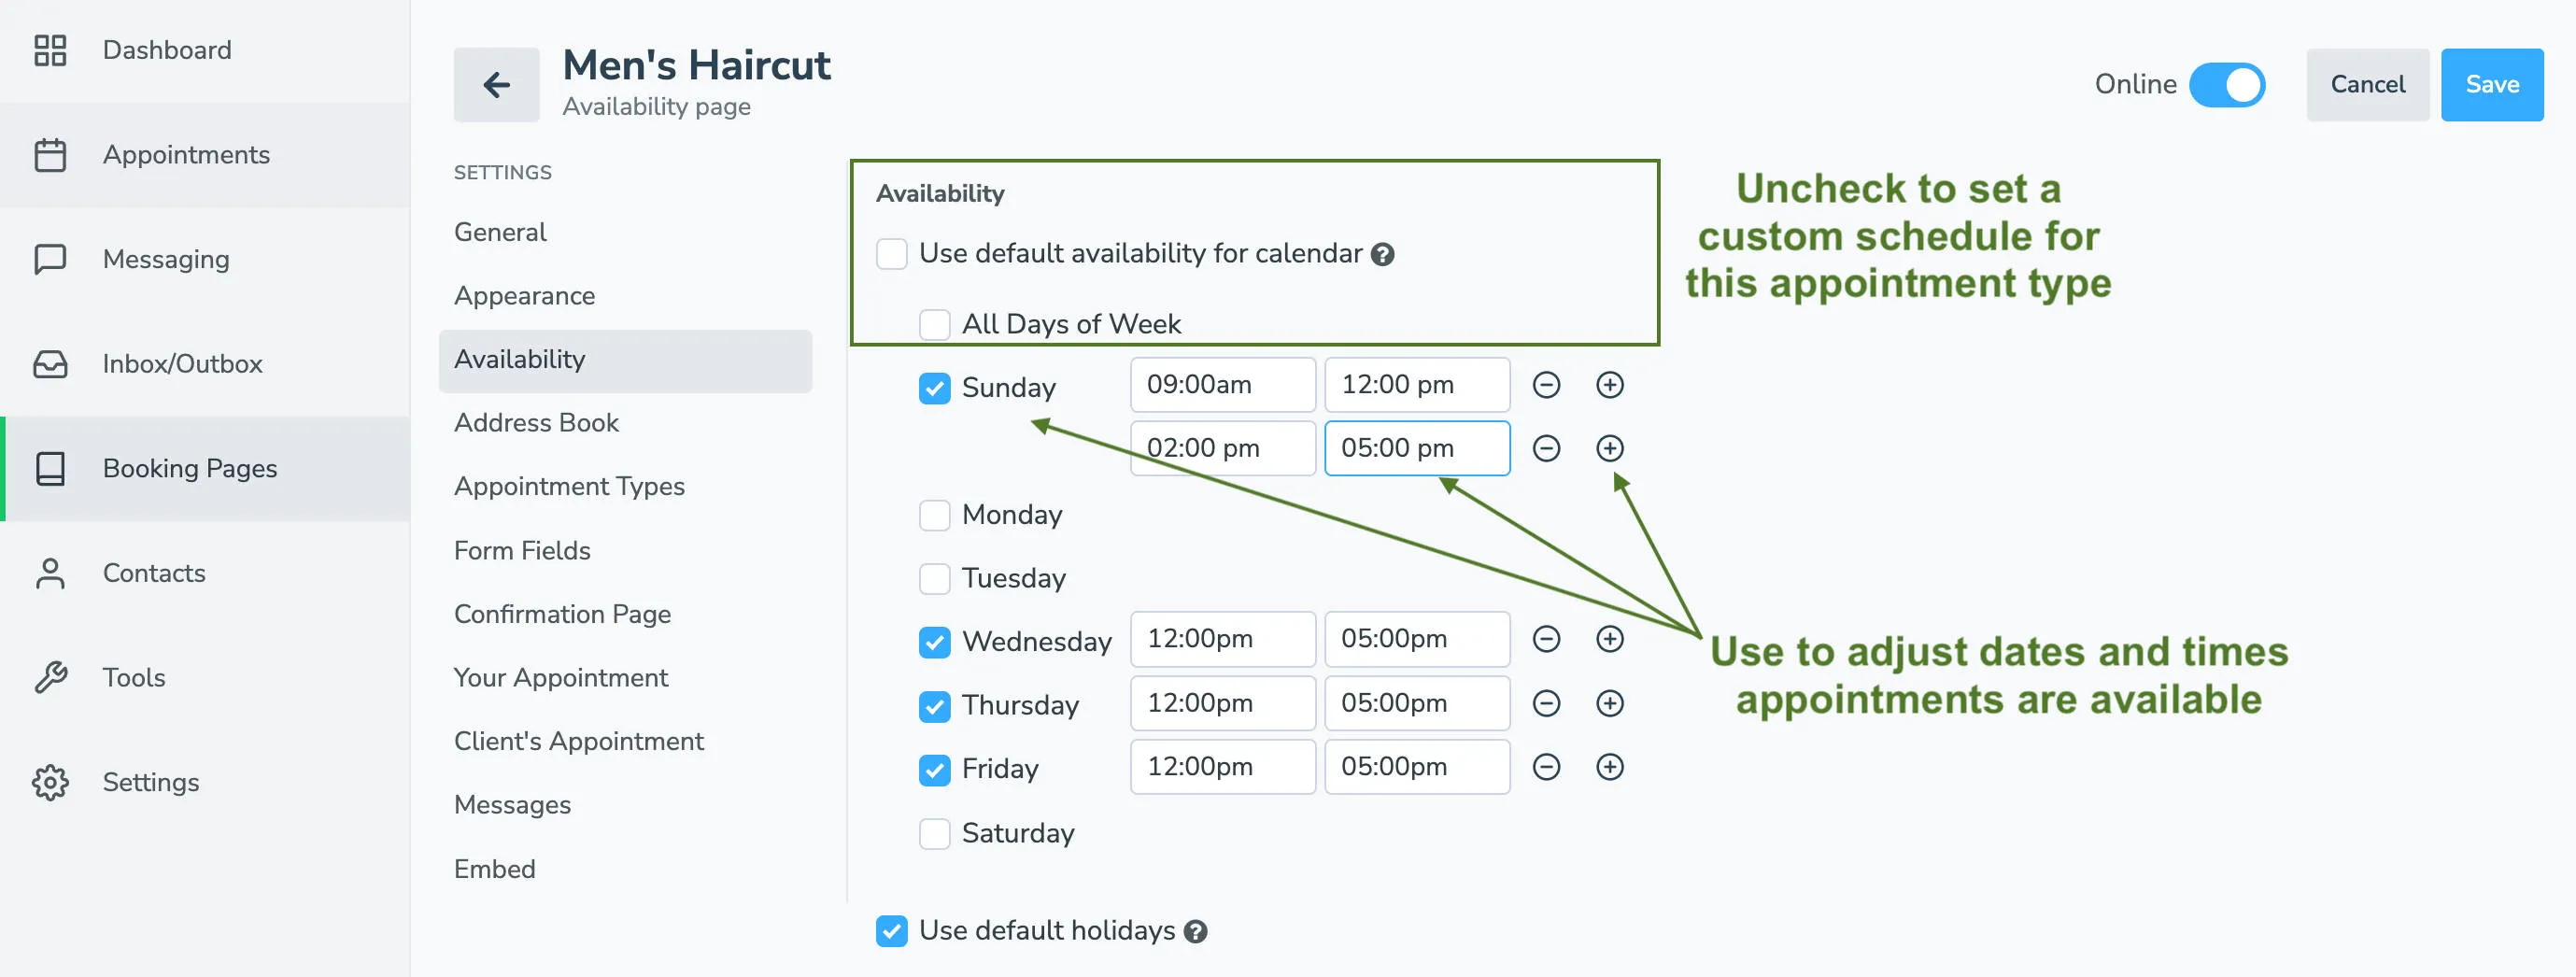
IMPORTANT: Use Availability Settings to control when each appointment type is offered. Uncheck “Use default availability for calendar,” uncheck “All Days of Week,” then select the times and dates you will offer this appointment type. You can set multiple time ranges per day using the + button.
-
Set the Holiday, Availability Overrides, and Advanced settings according to your needs.
Set appointment type details and other settings
Section titled “Set appointment type details and other settings”-
Navigate to the Appointment Types tab.
-
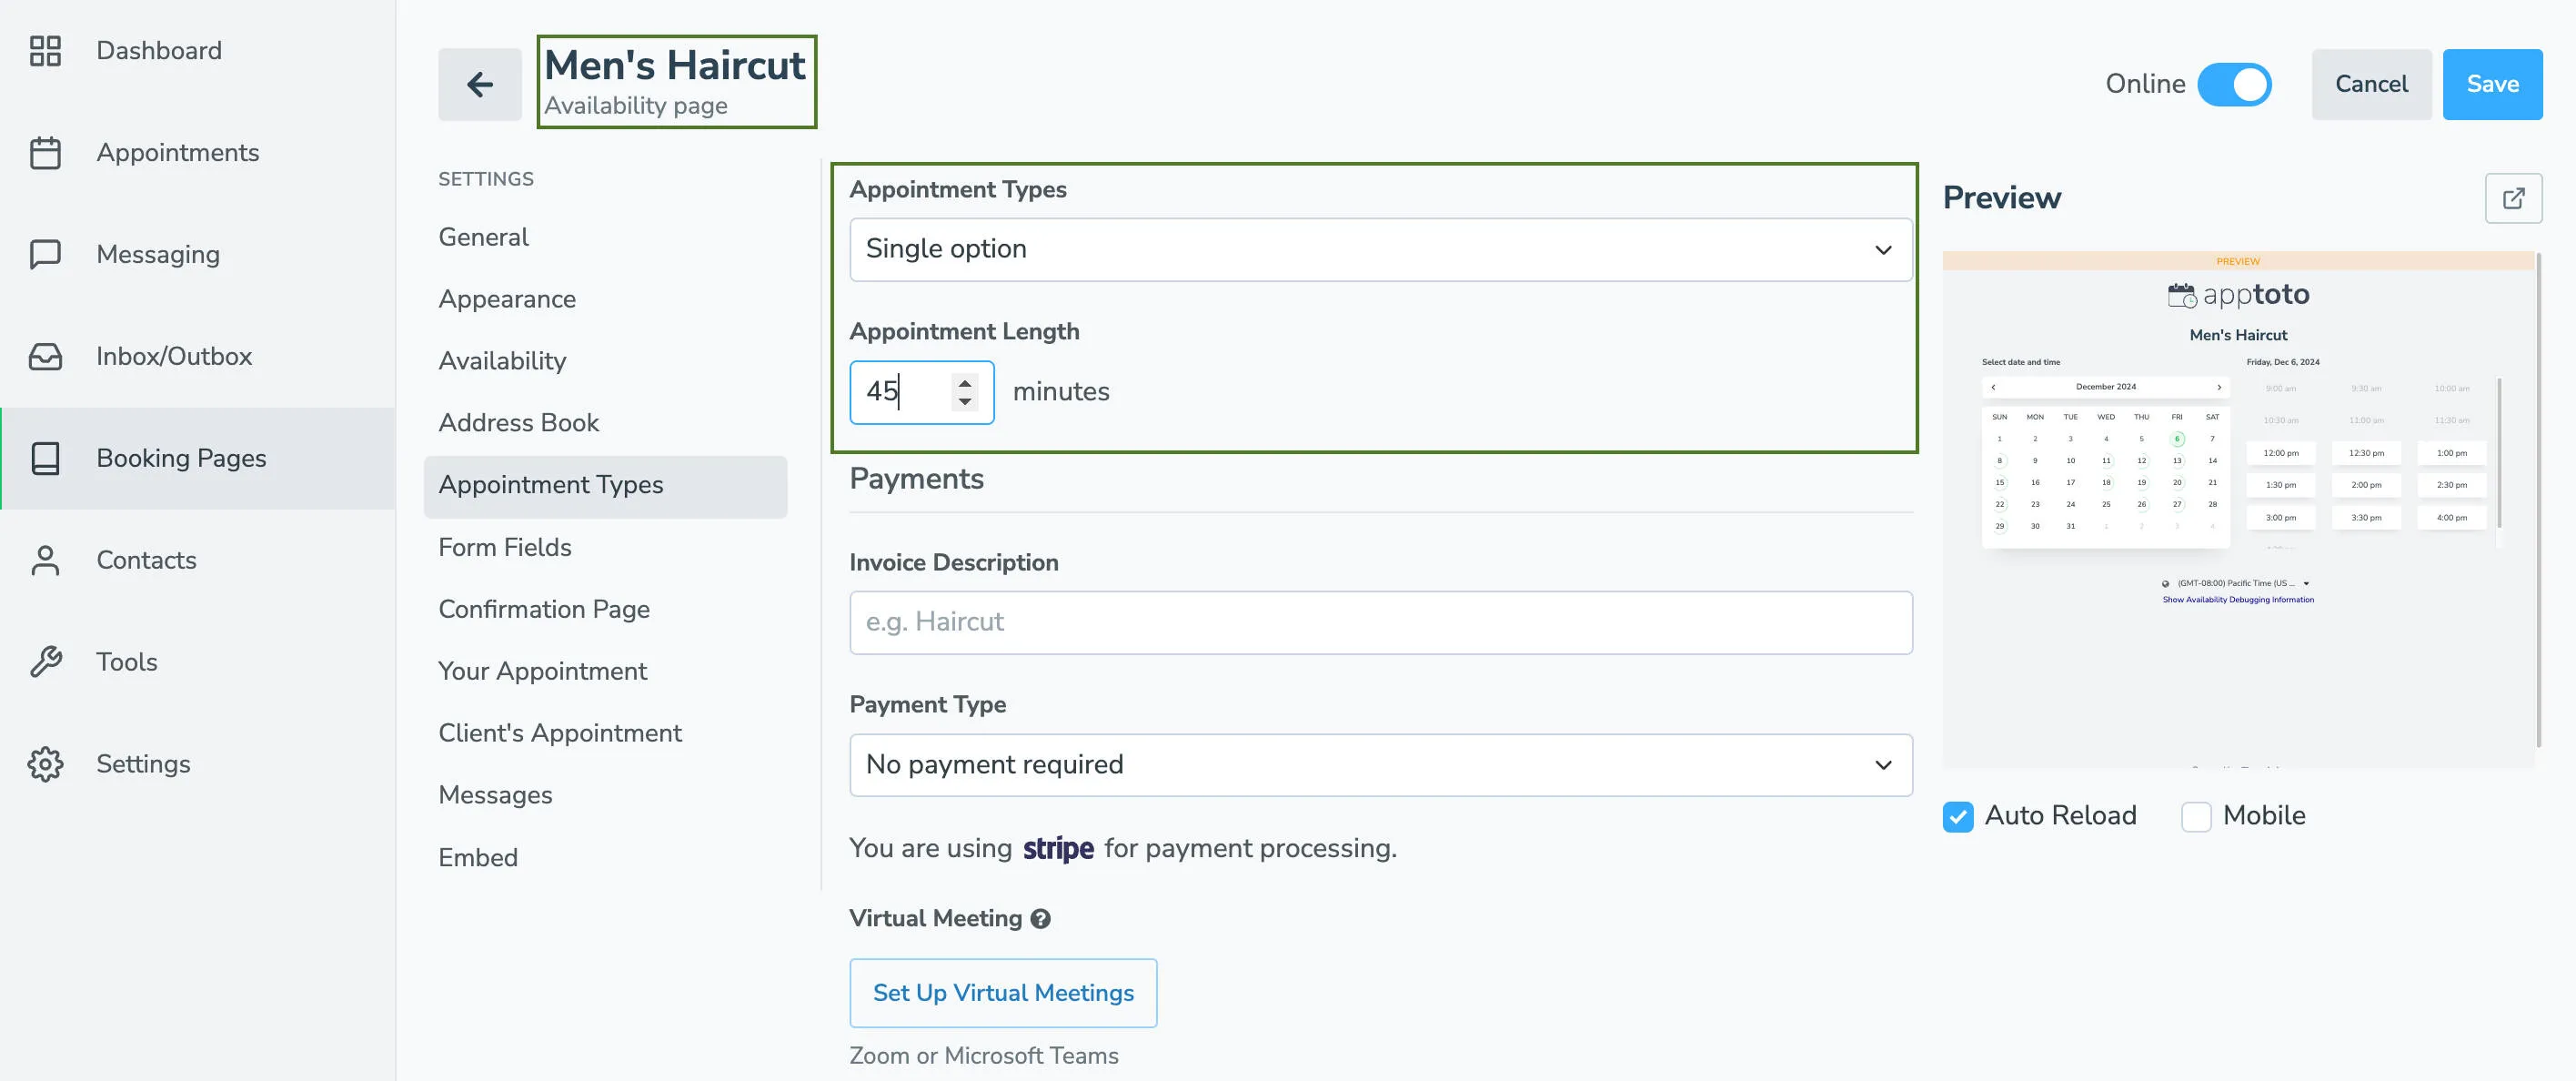
Leave Appointment Type as “Single Option.”
-
Set the appointment length. Add payment and virtual meeting details if needed. Under “Advanced” settings, you can also add padding time (e.g., 10 minutes) between appointments if desired.
-
Continue adjusting settings on the remaining Settings tabs to your liking, including:
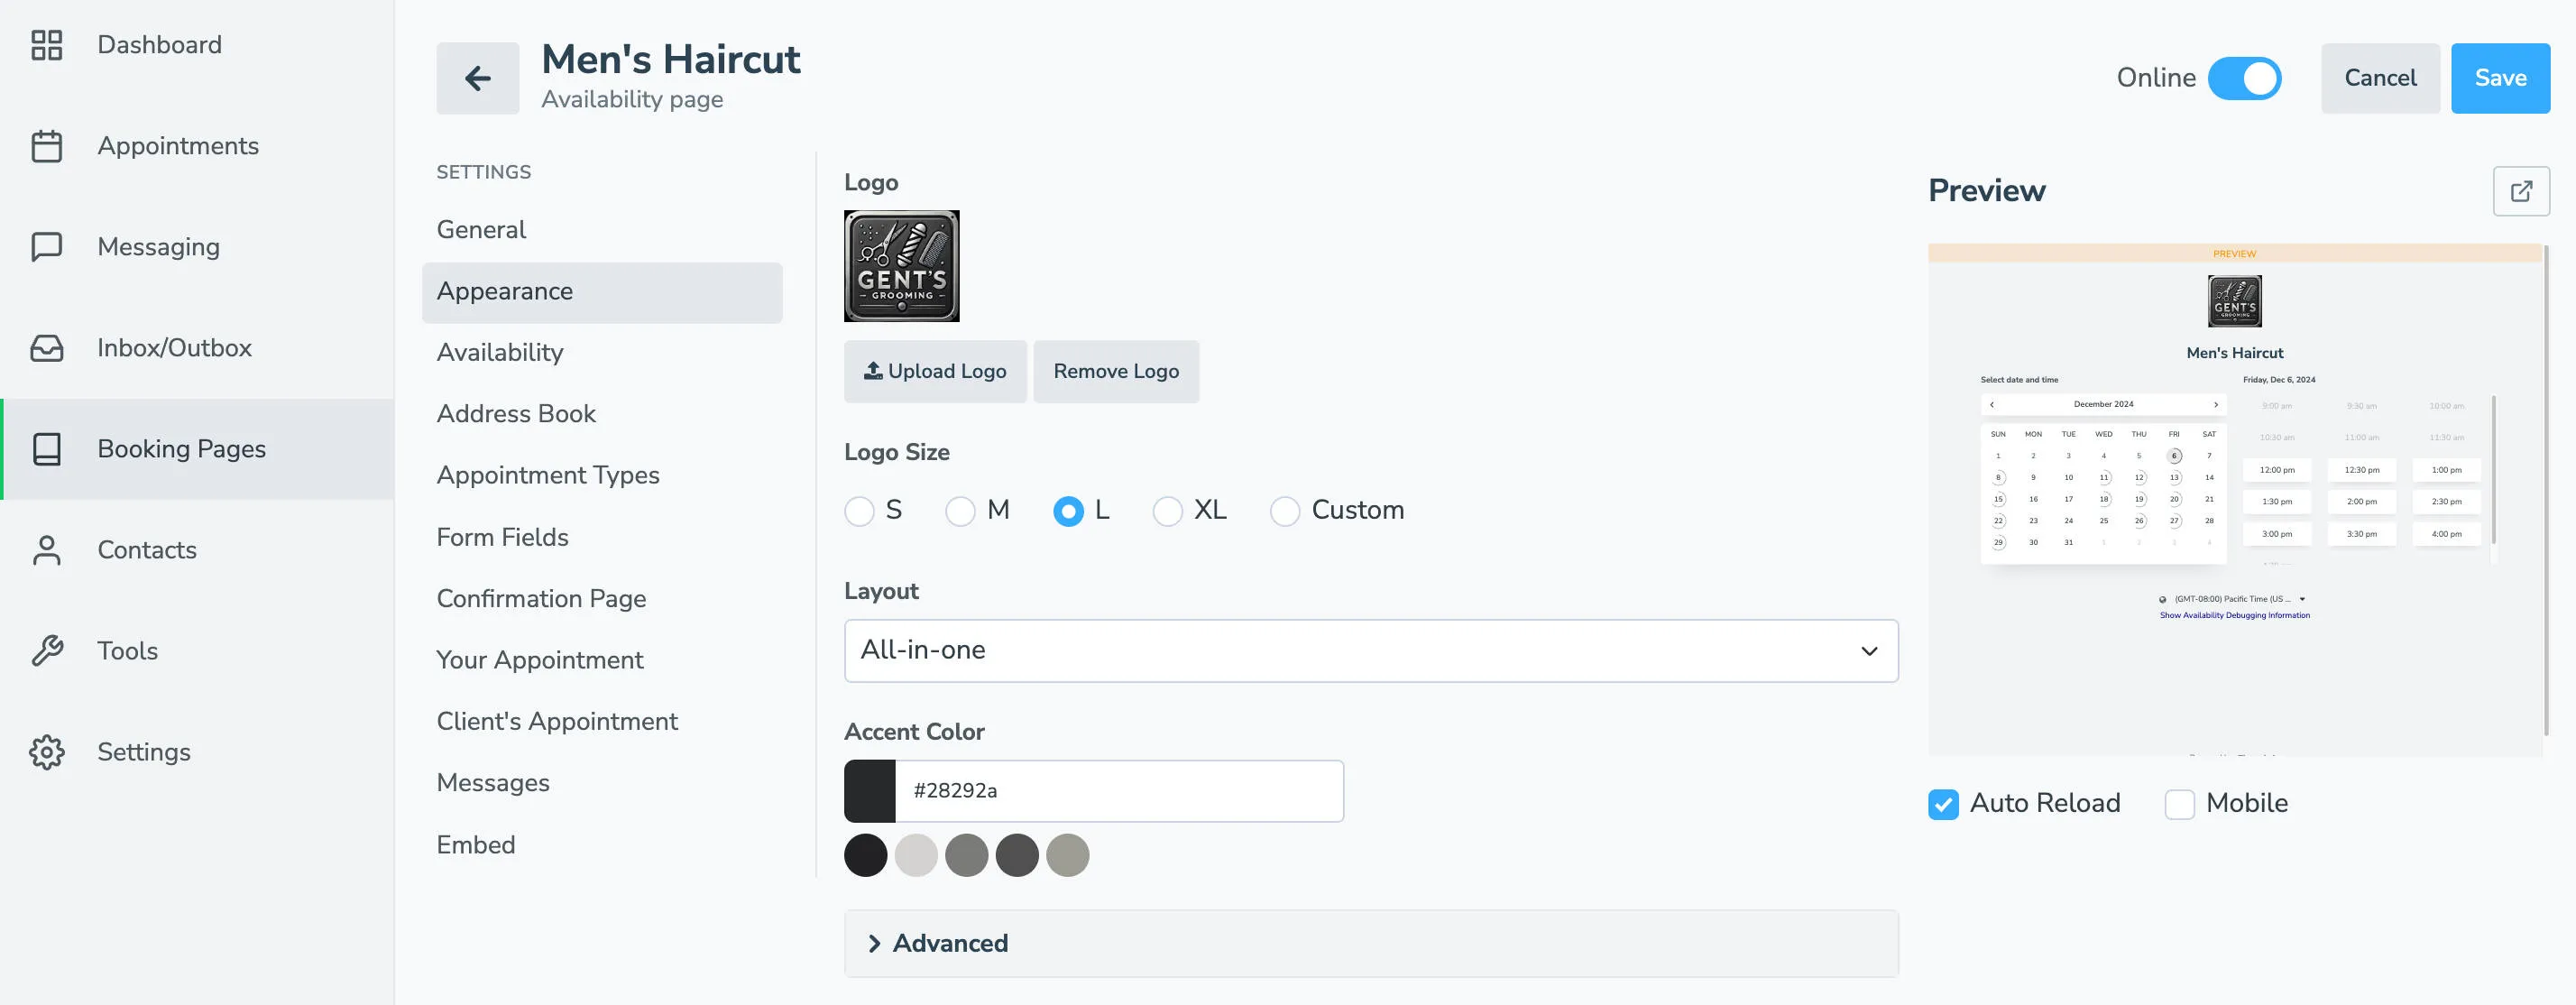
- Appearance: to adjust the look of your booking page
- Address Book: to set which address book new contacts are added to and set an authentication method (i.e., mobile phone, email, captcha)
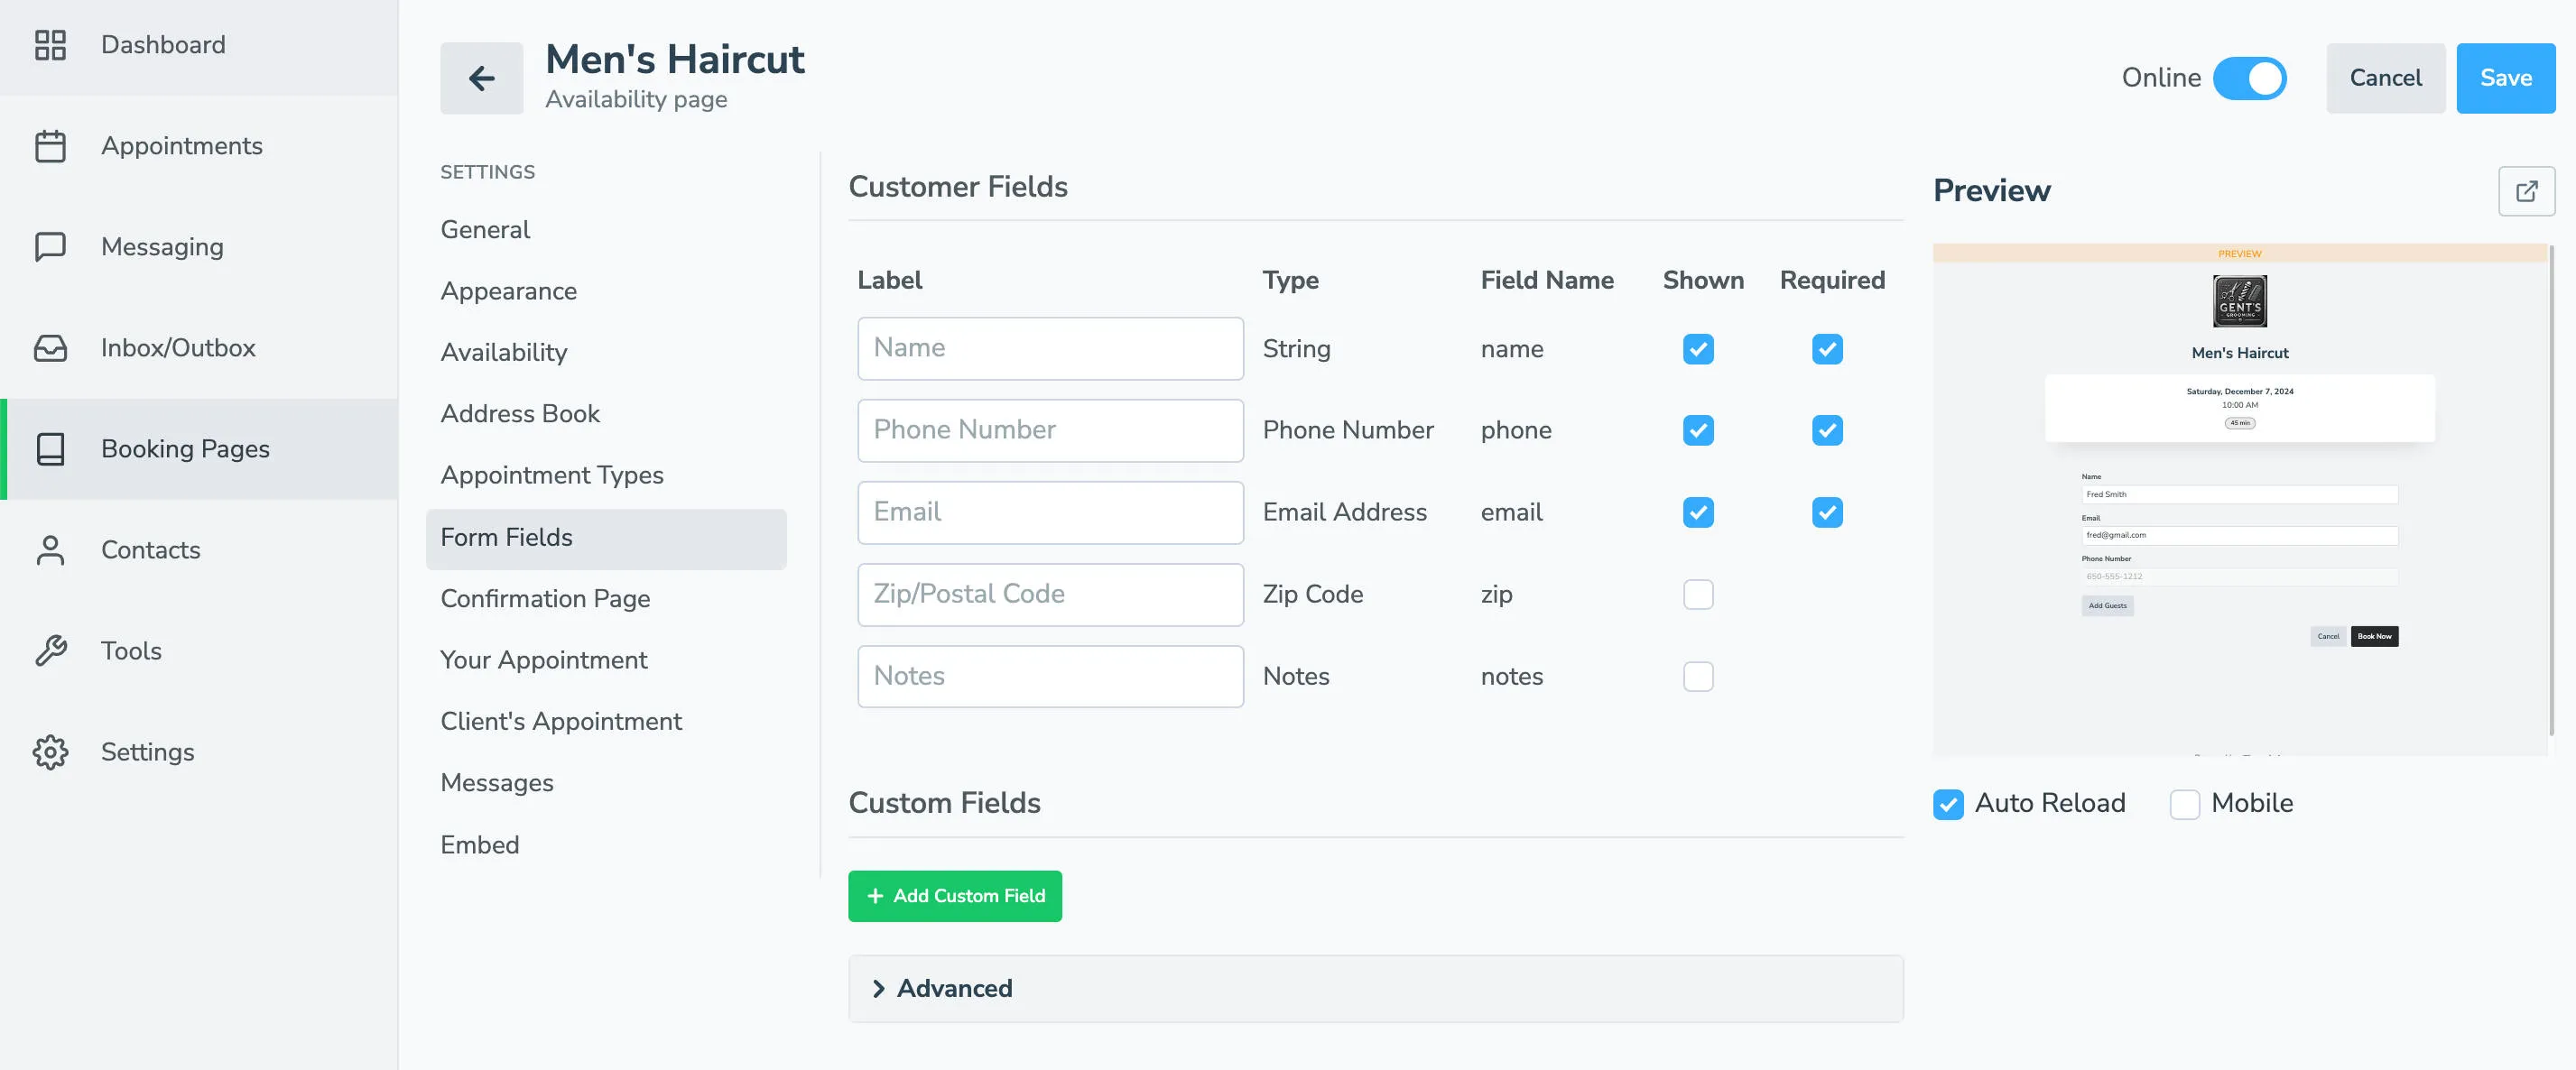
- Form Fields: to control what data you collect from someone when they book an appointment
- Confirmation Page: to control the page or verbiage someone sees after booking an appointment
- Your Appointment: to control how the booked event will appear on your calendar and what details will be included
- Client’s Appointment: to control what information is included on your client’s calendar event if they click “Add to Calendar” after receiving their booking confirmation
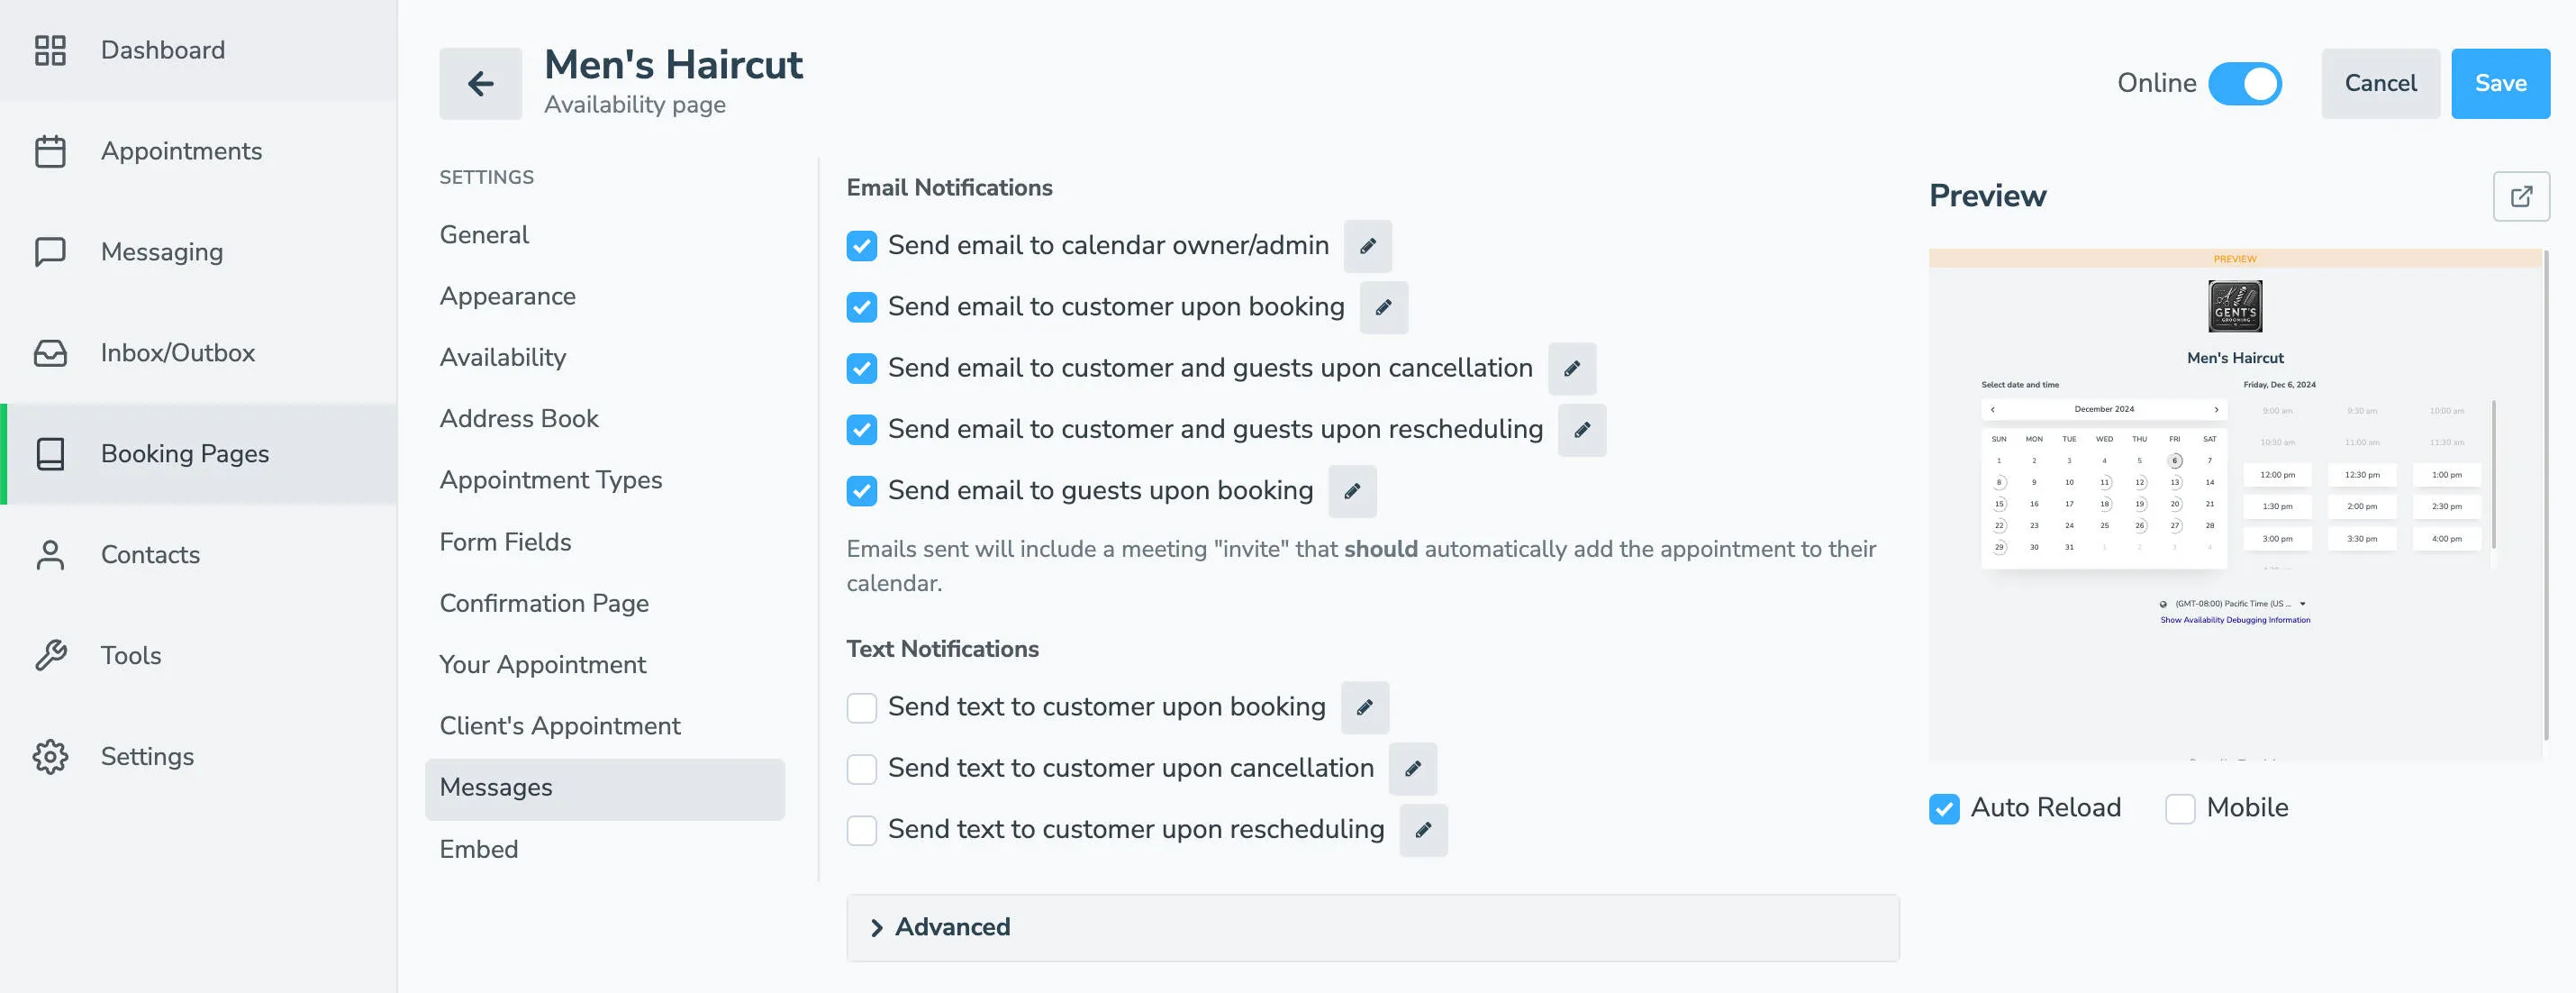
- Messages: to control the content of the email or text messages sent to you and your clients after they book an appointment, cancel, or reschedule
- Embed: generate an iframe or “Book Now” button to add to your website
- Appearance: to adjust the look of your booking page
-
Click Create to create your page.
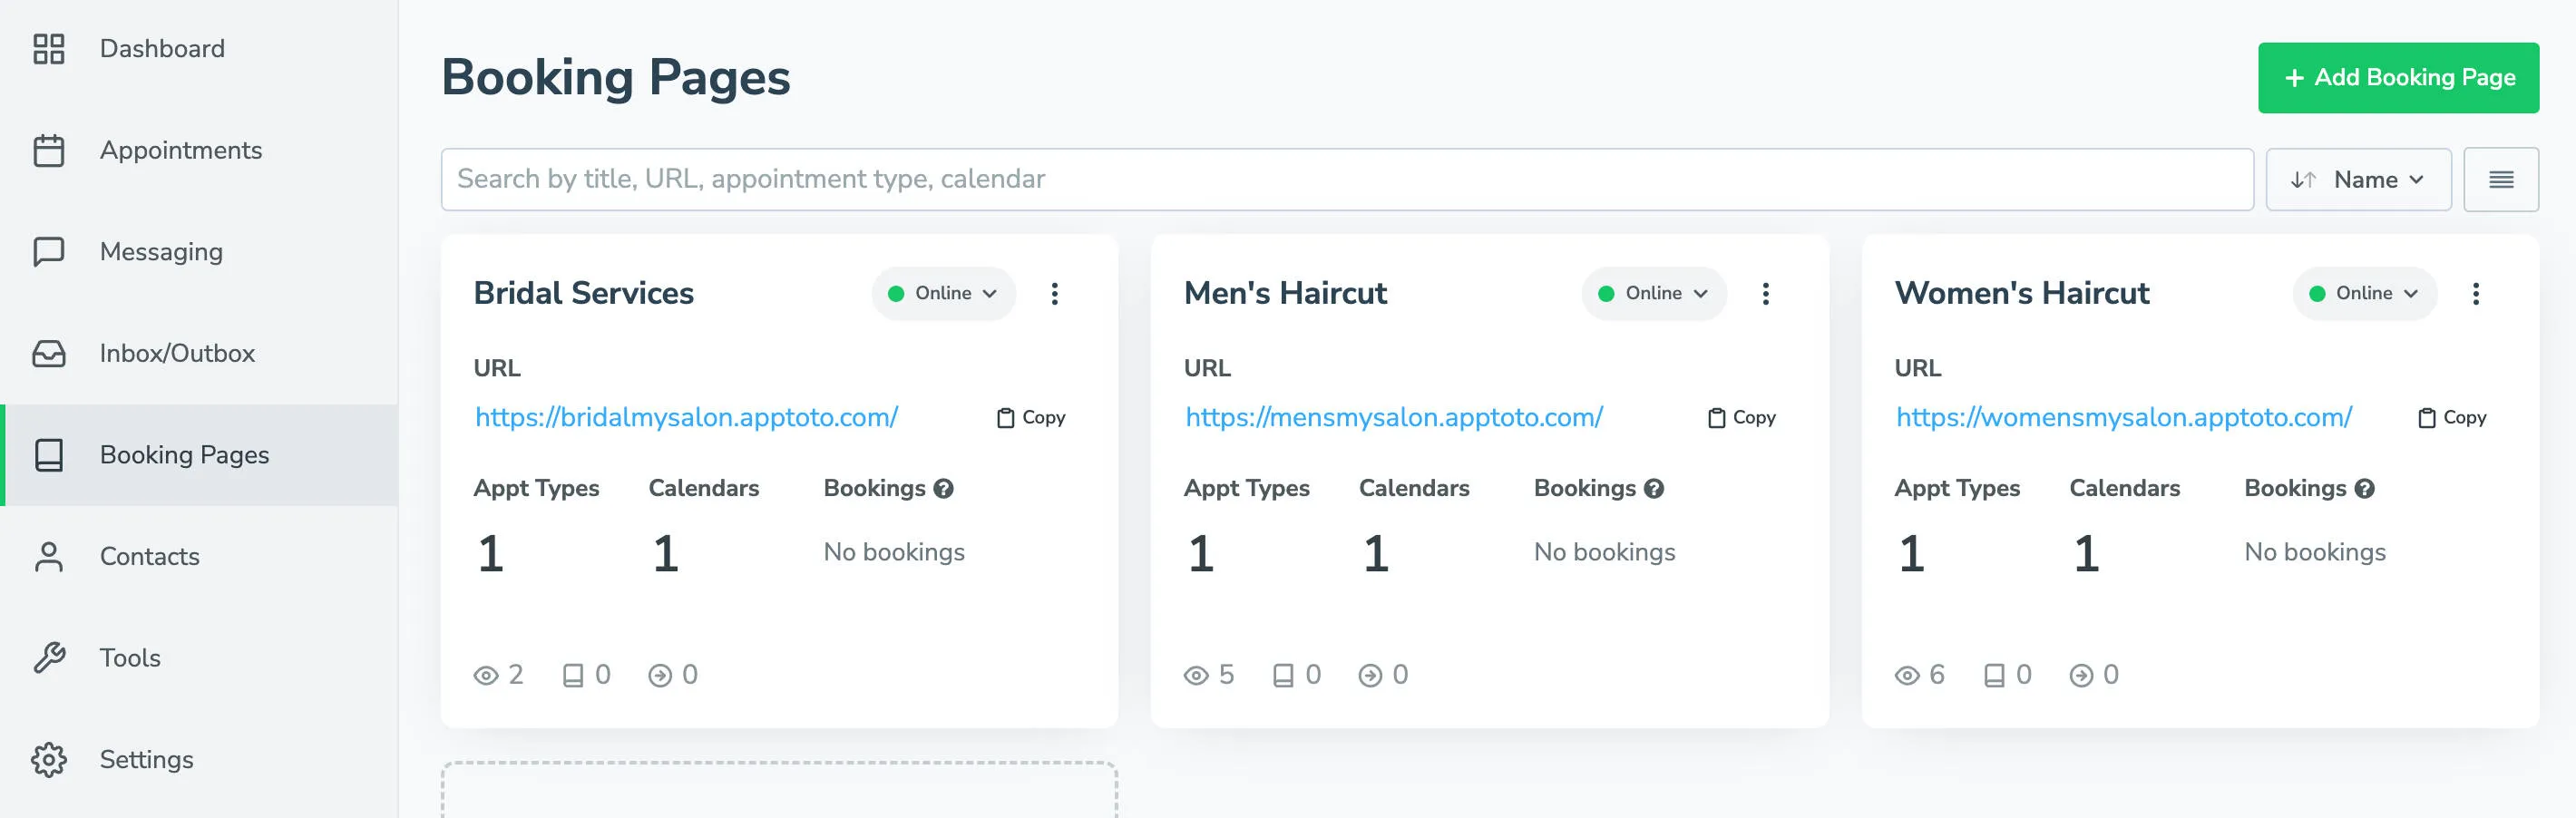
Create additional appointment type booking pages
Section titled “Create additional appointment type booking pages”-
Repeat steps 2 through 11 to create additional booking pages for your unique appointment types. Pay special attention to step 7 to customize each appointment type’s availability.
Link all your booking pages to the main booking page
Section titled “Link all your booking pages to the main booking page”-
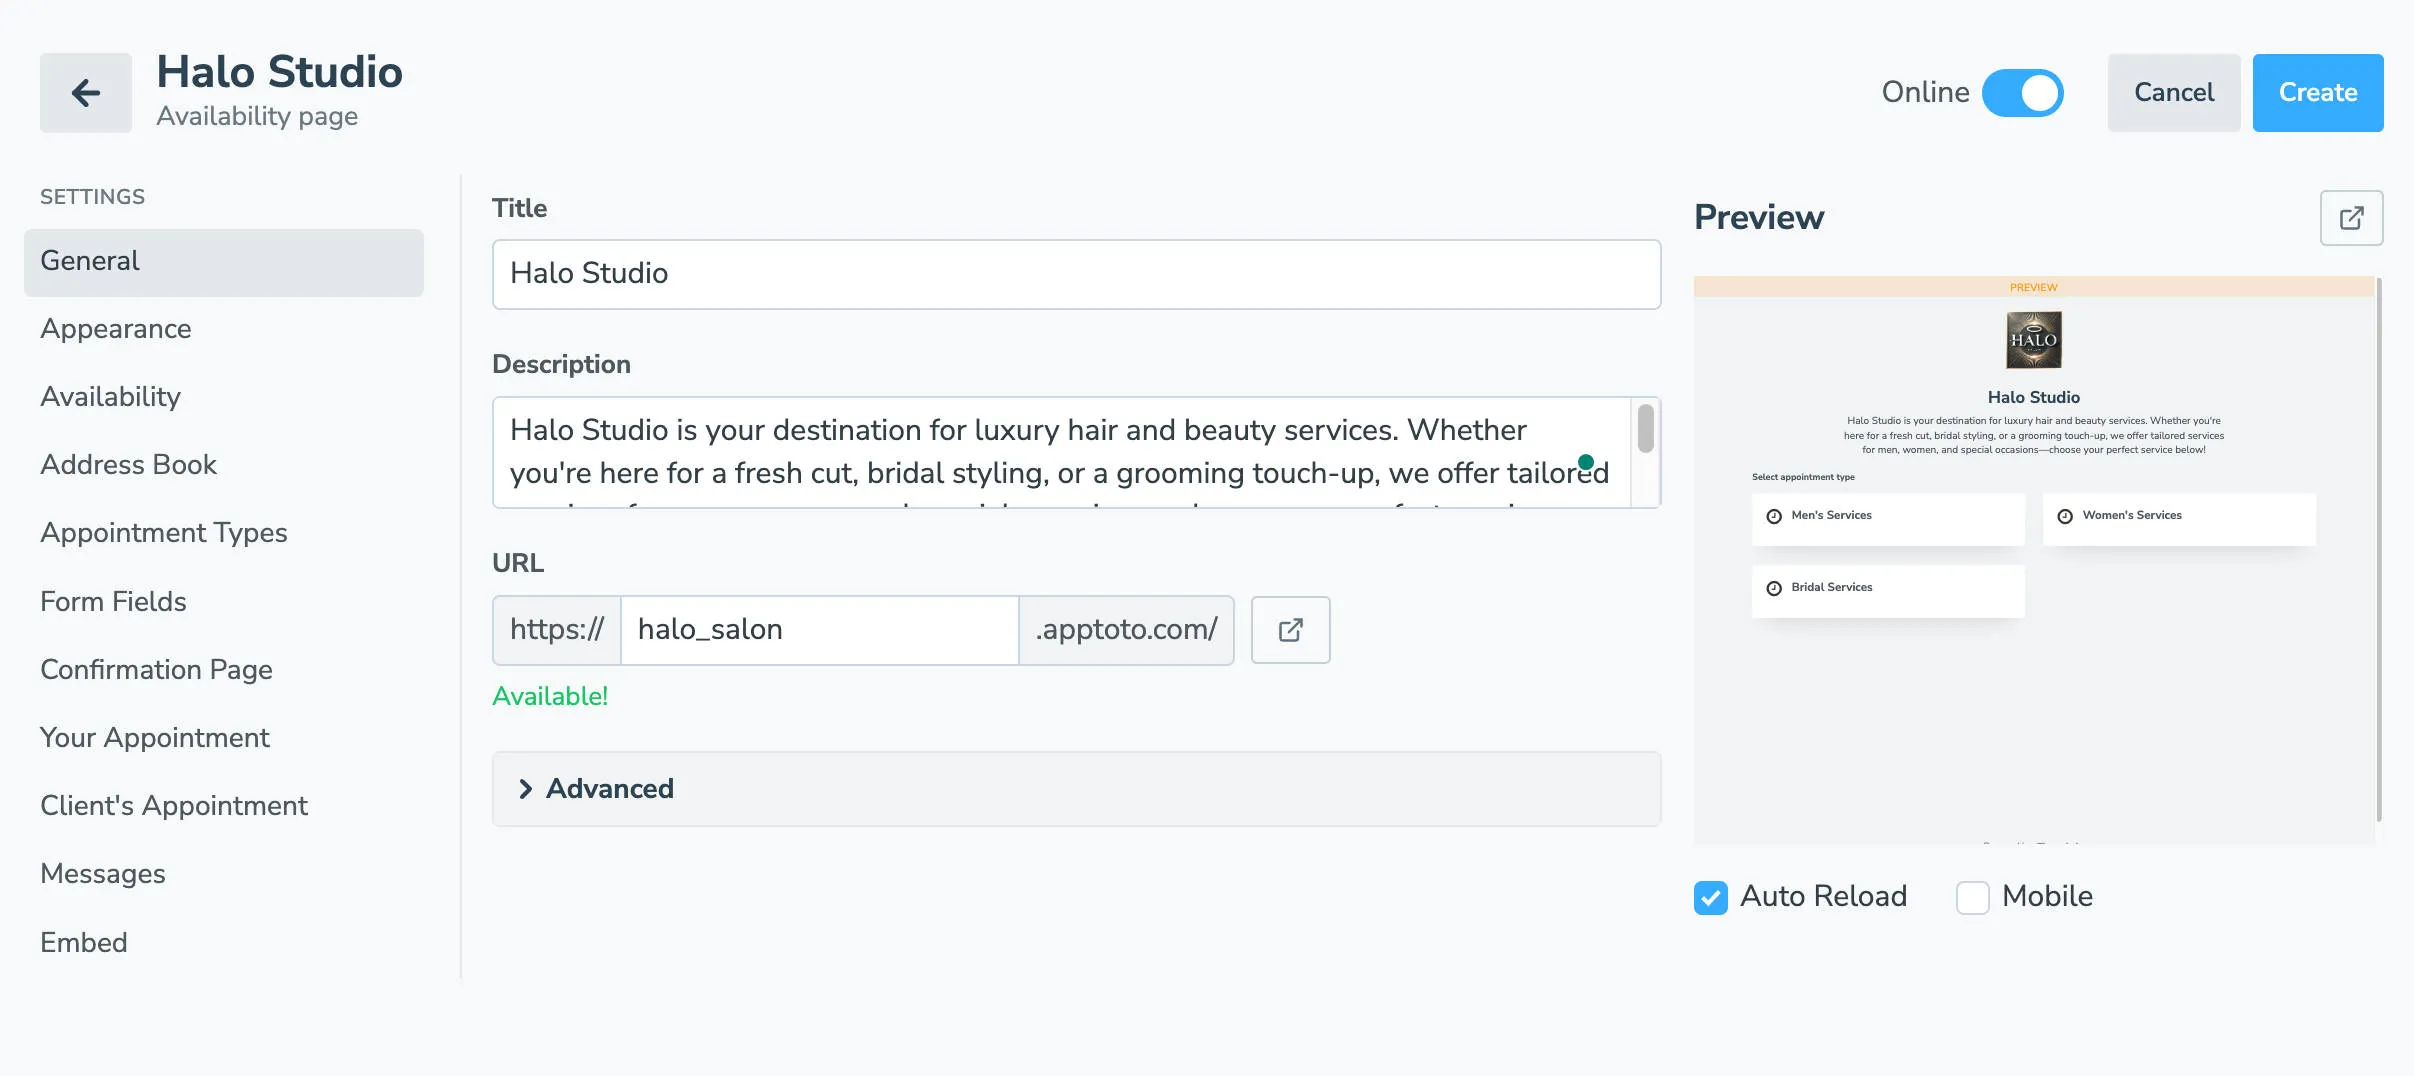
From the Booking Page tab, click the name of your Main/Primary booking page to open it, or follow steps 2–11 (skipping 10–12) to create a new one. For step 7, leave “Use default availability for calendar” checked.
-
Navigate to the Appointment Types tab.
-
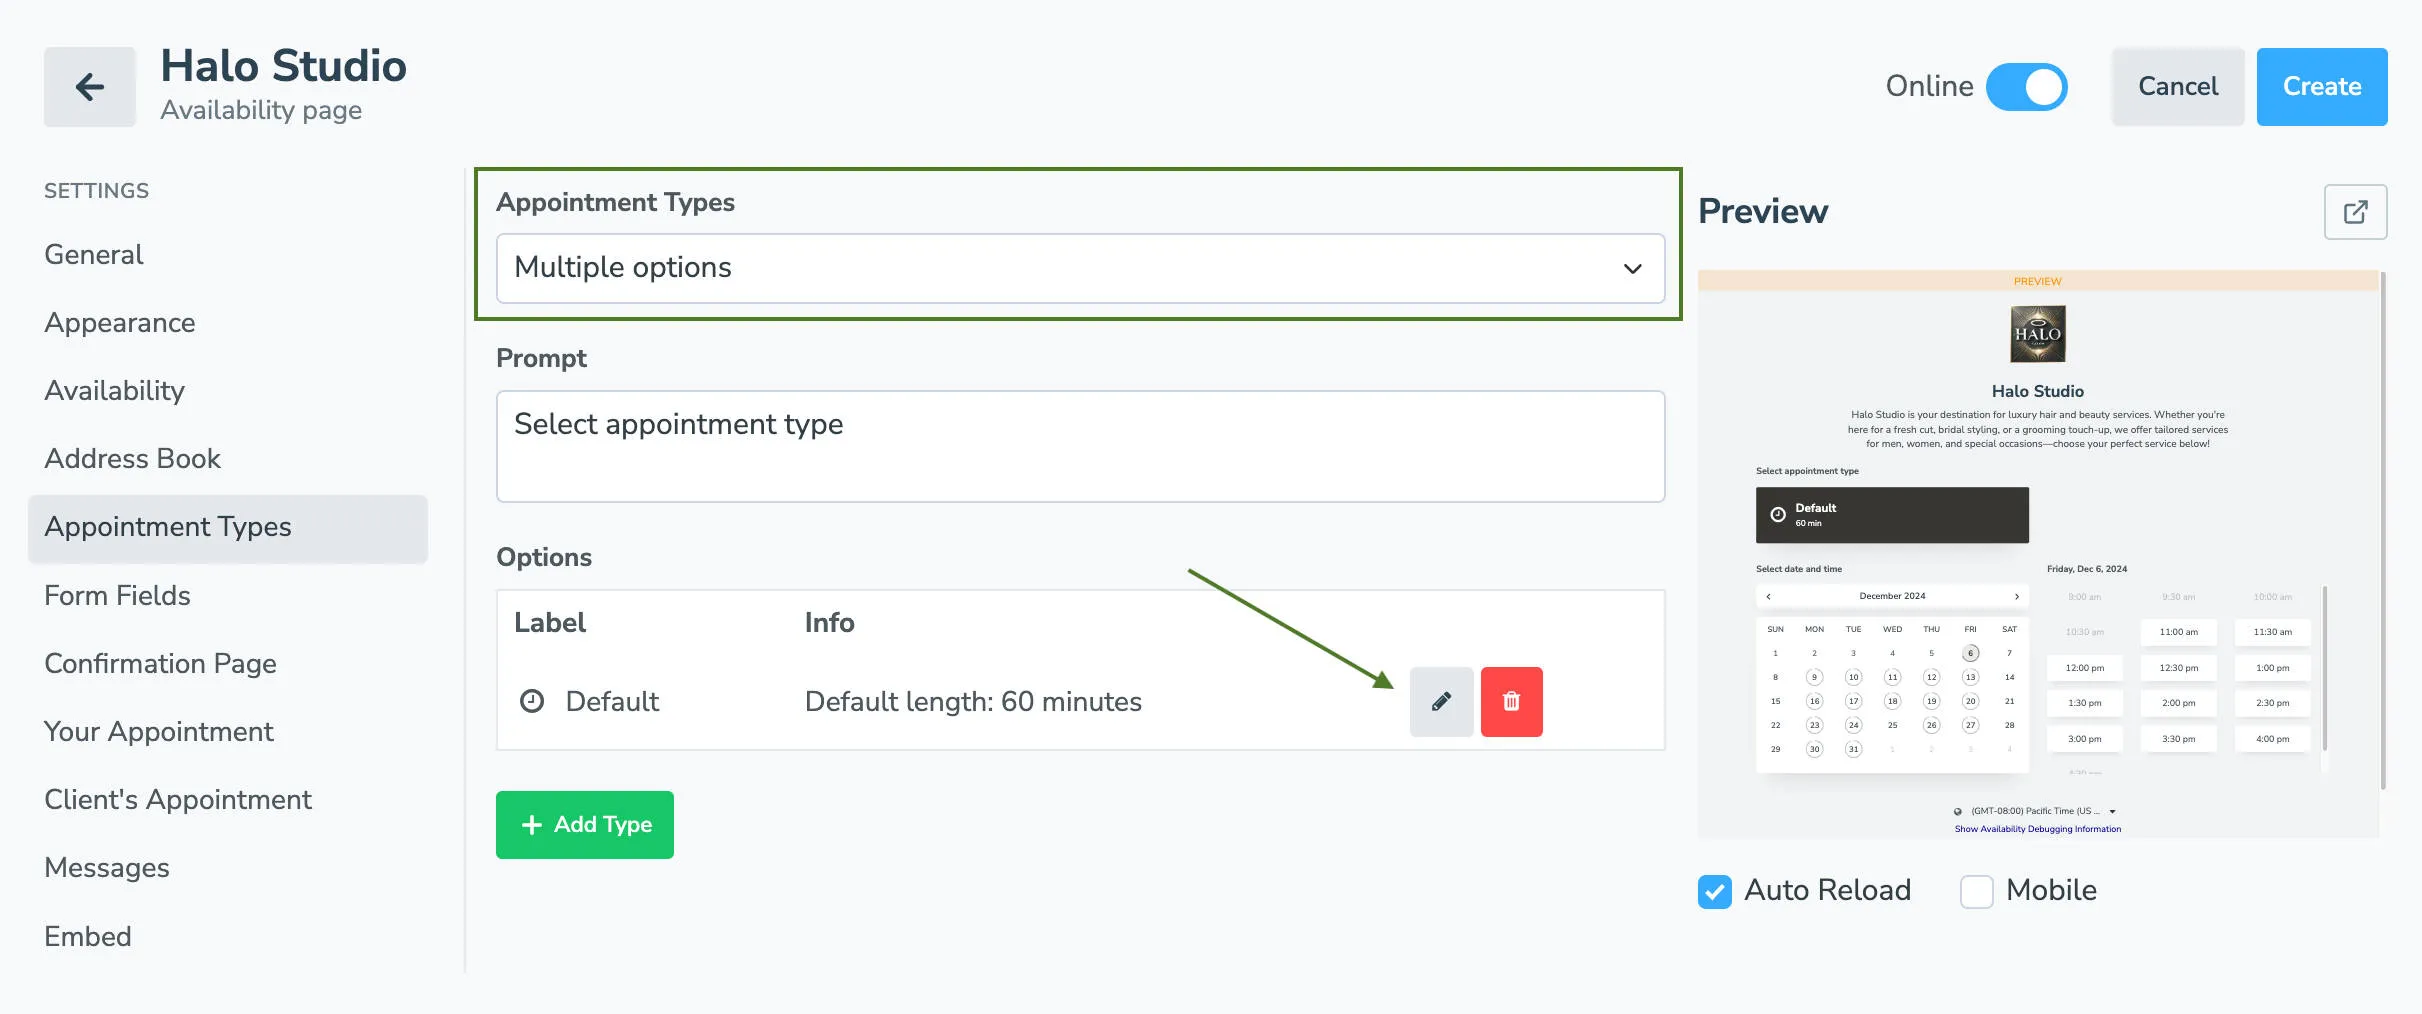
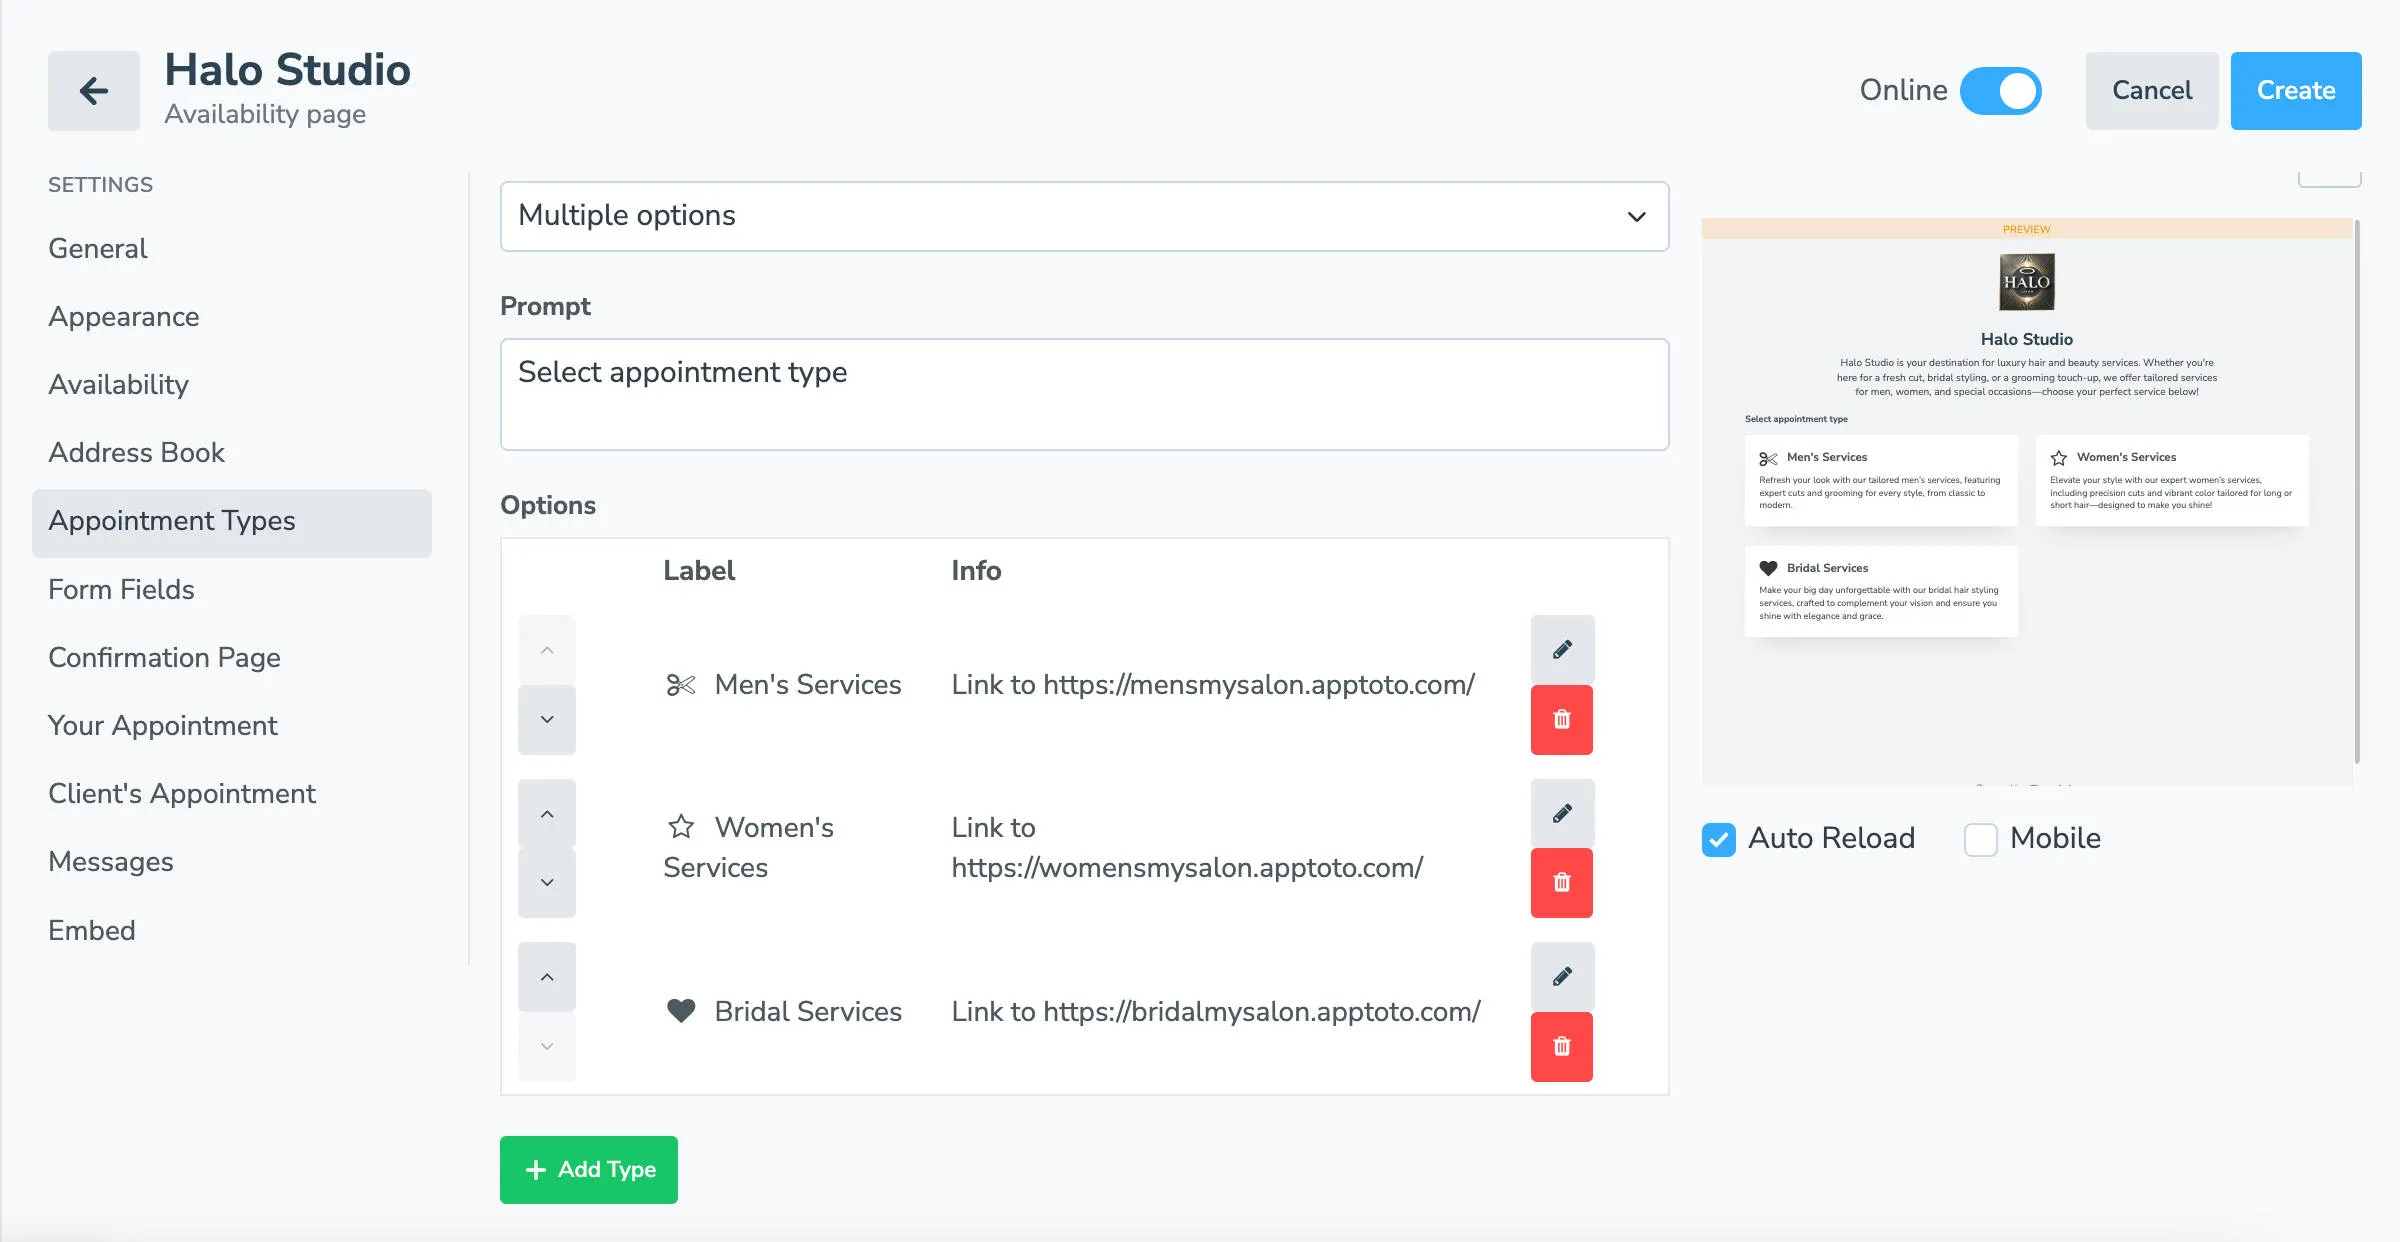
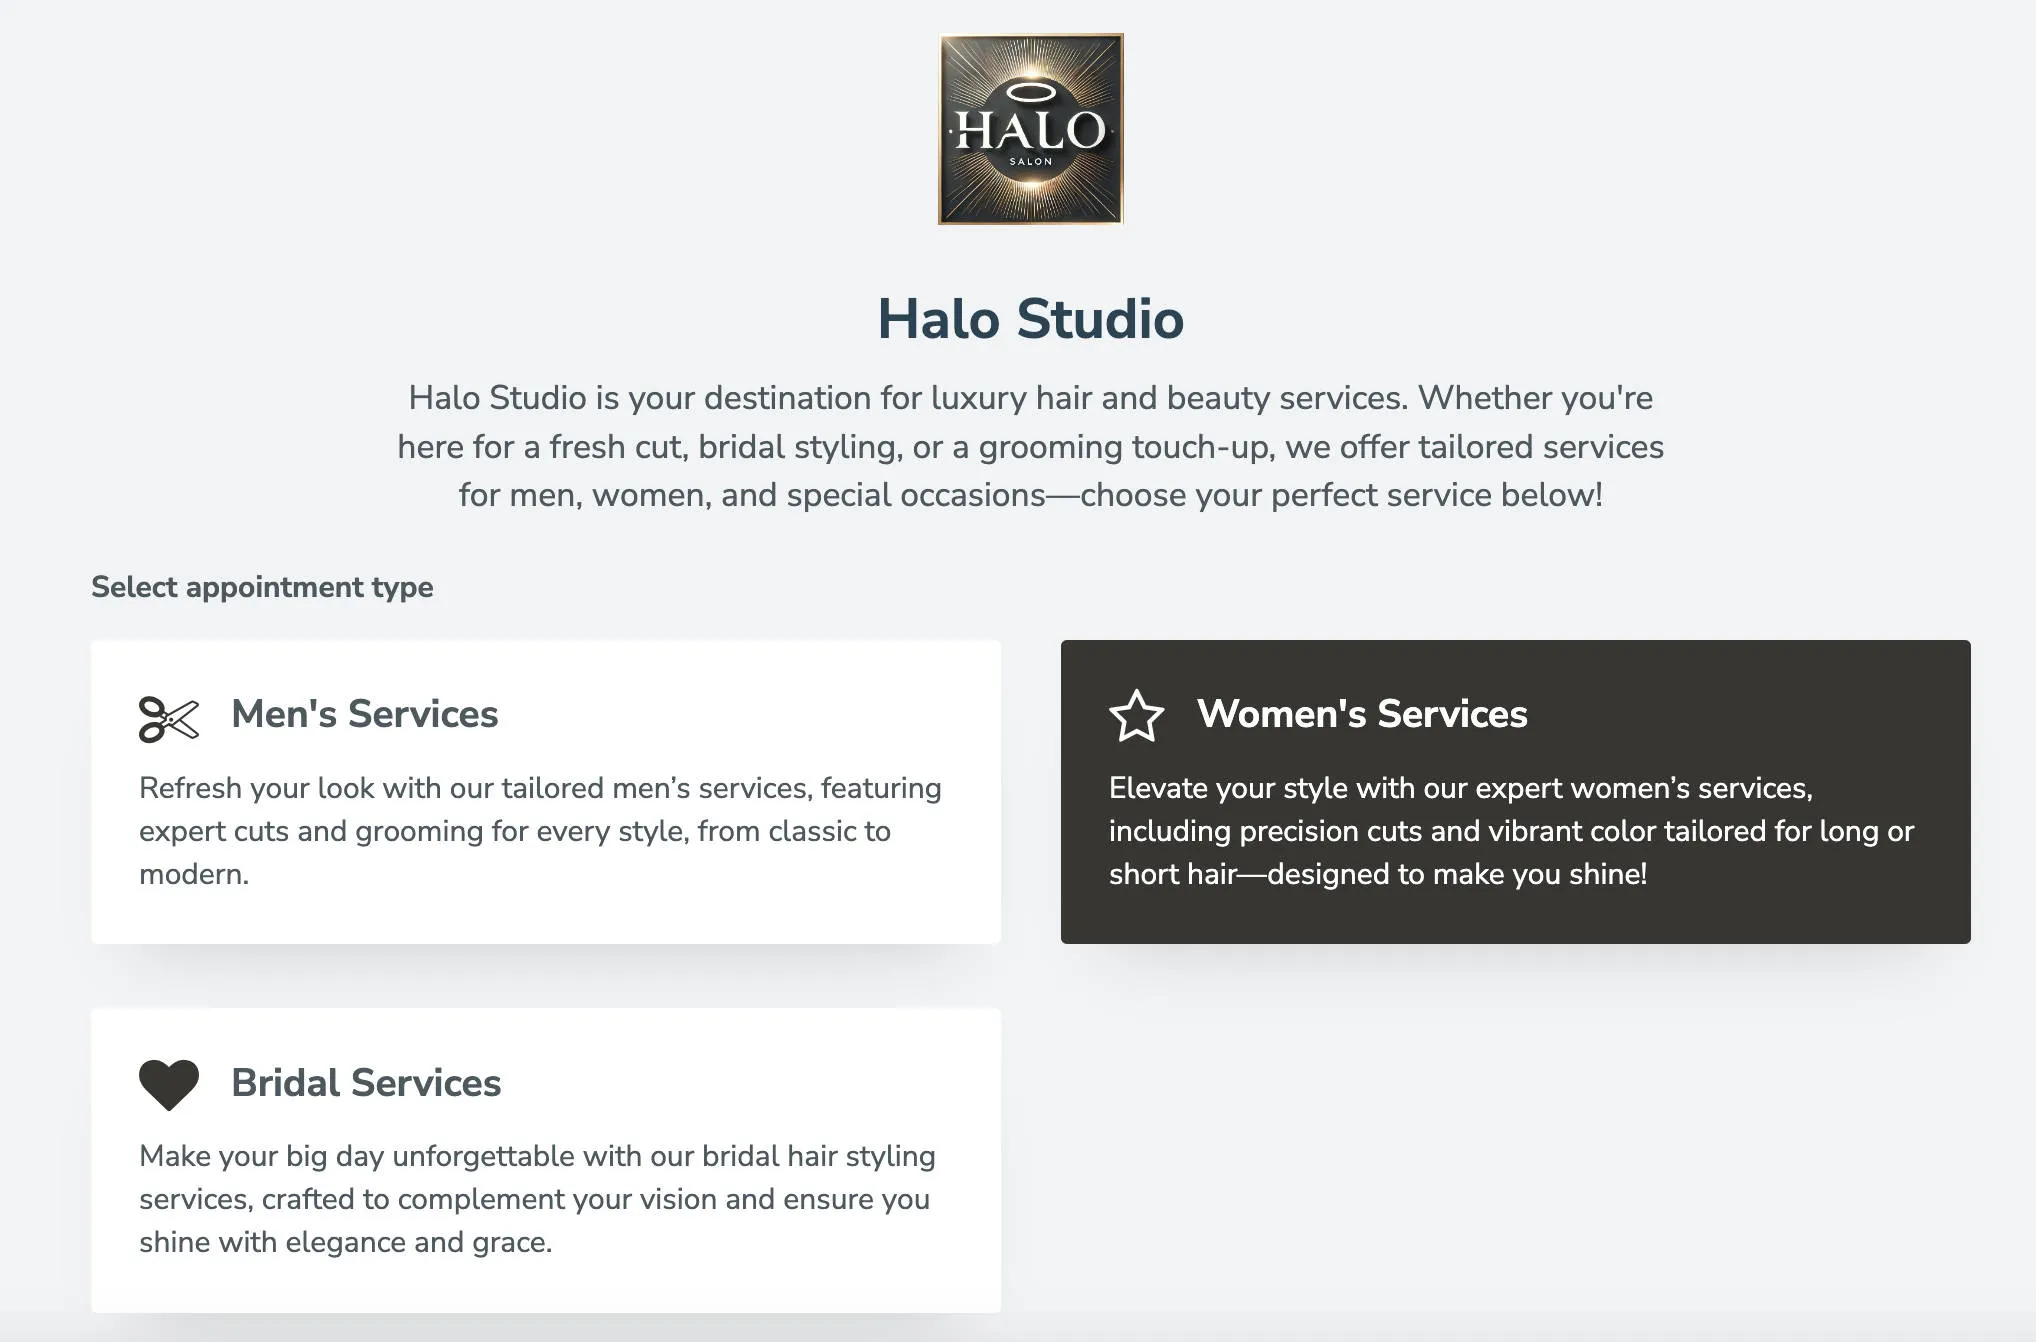
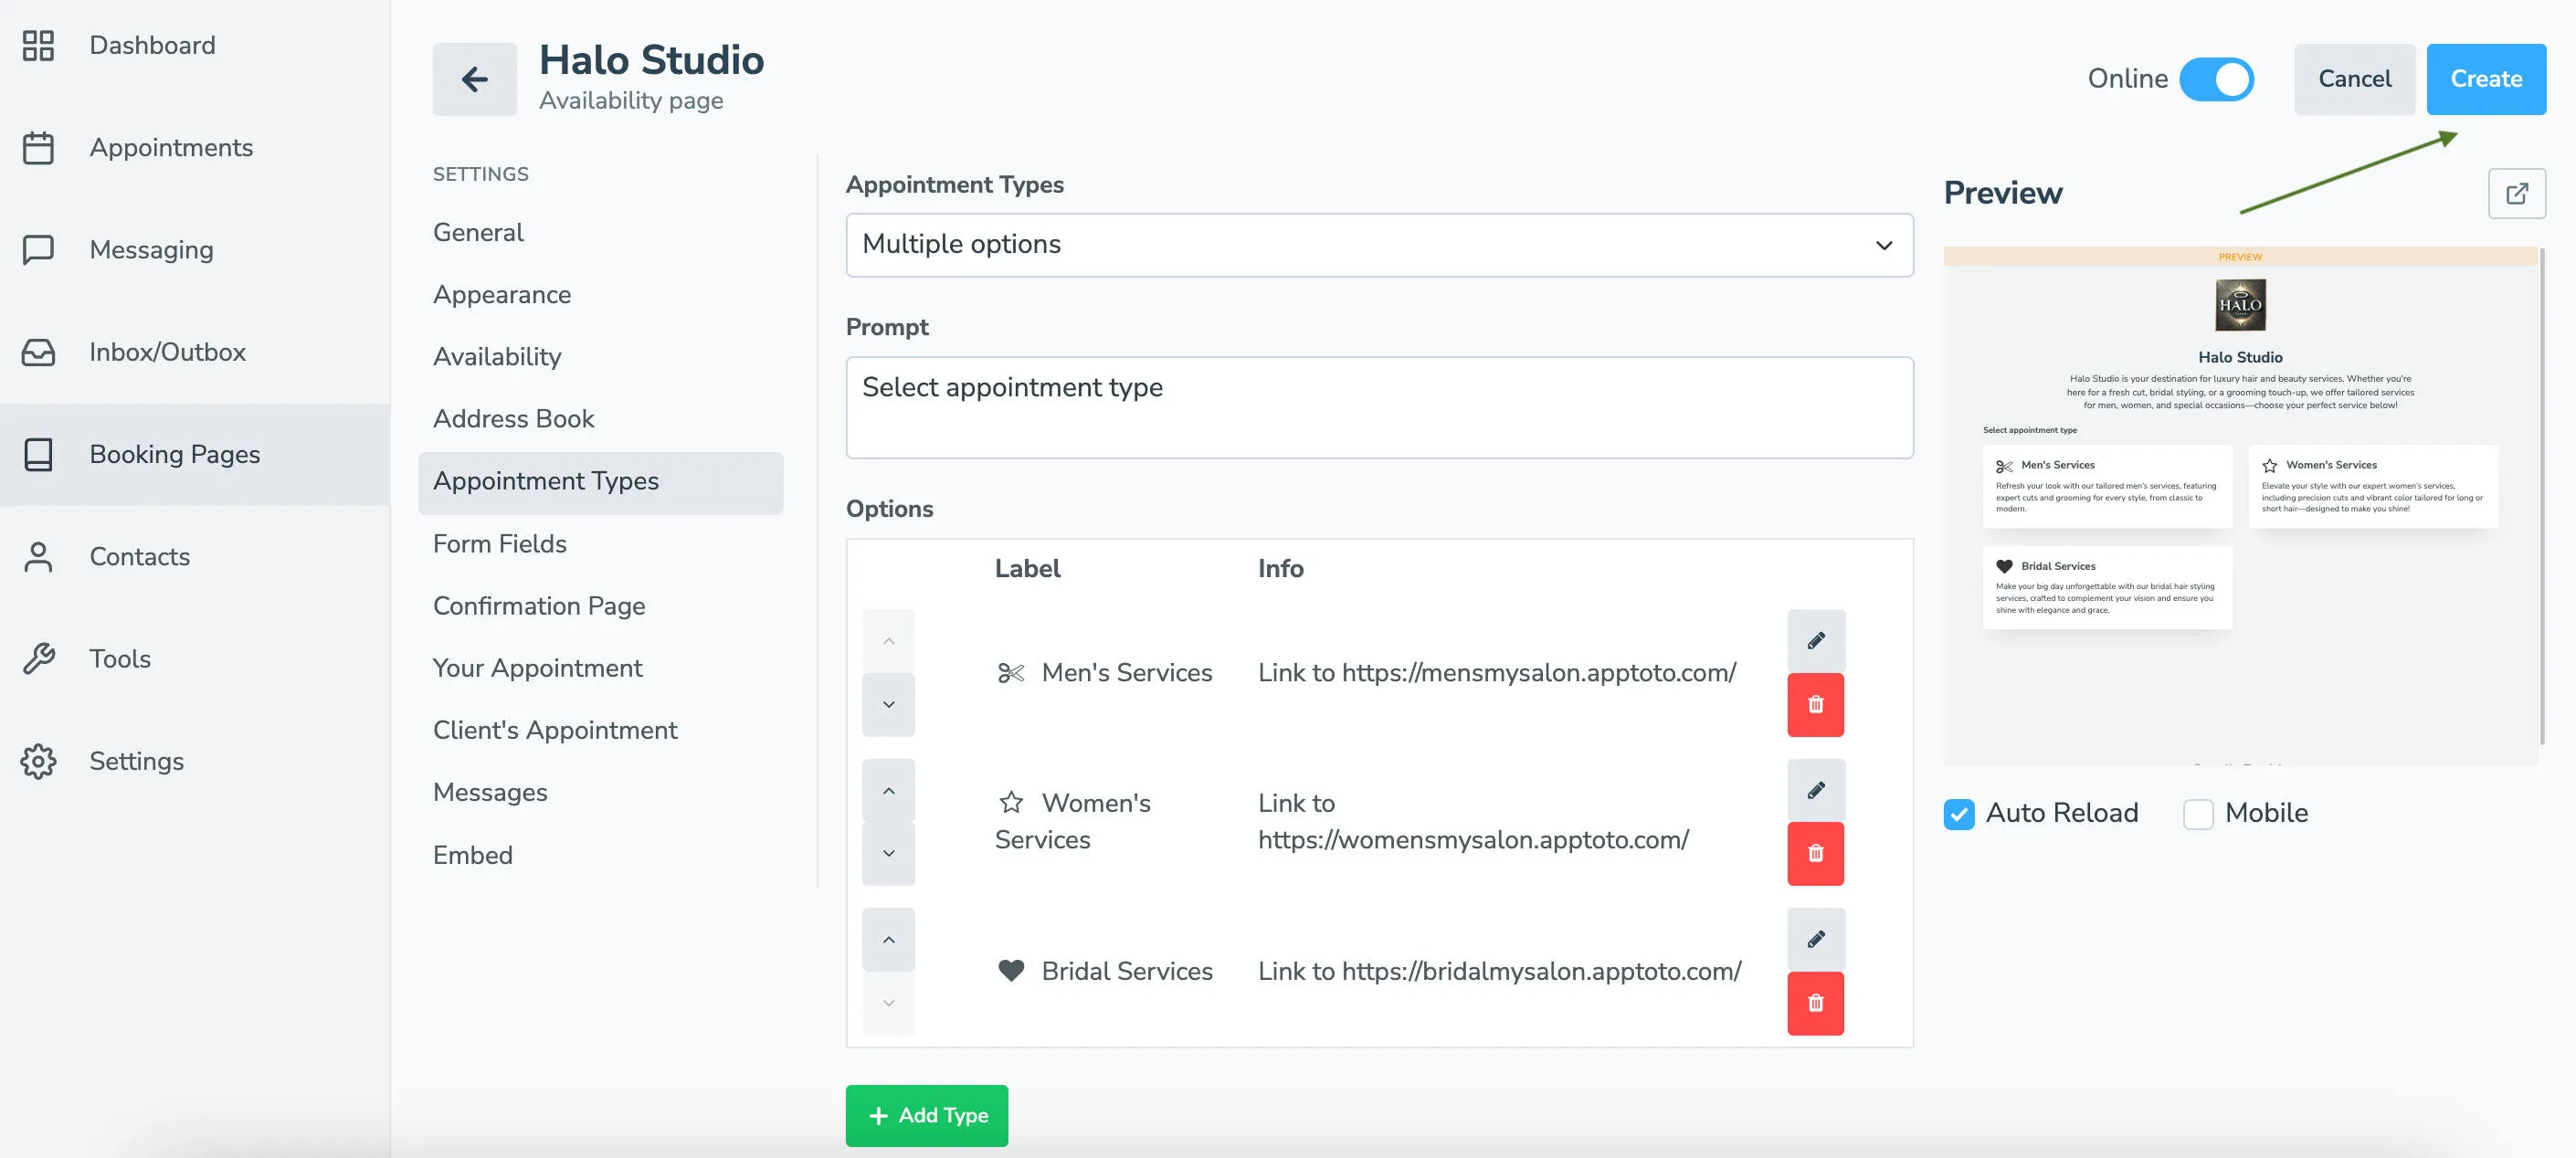
Set Appointment Type to “Multiple Options,” and enter a prompt for your page if desired.
-
Under Options, a “Default” appointment type will appear. Click the pencil to edit it.
-
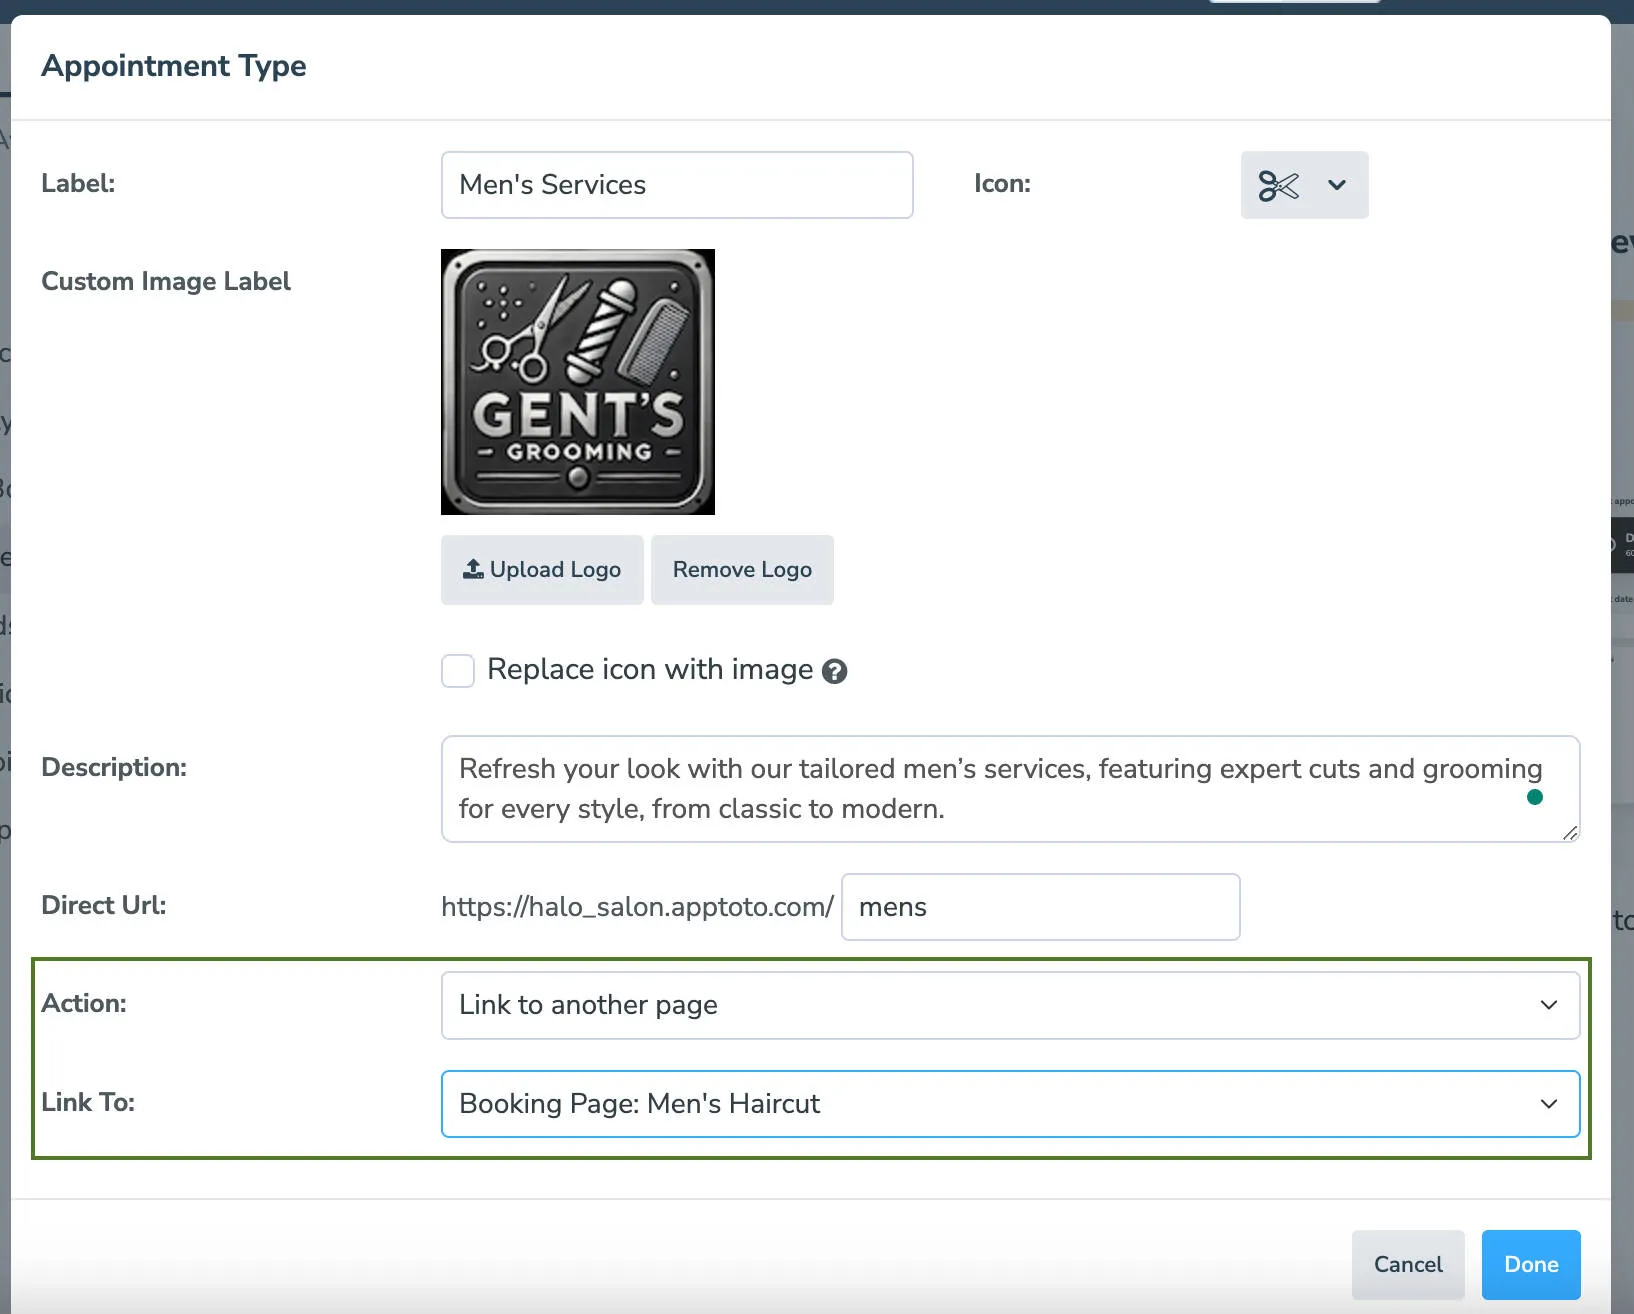
Set the Label (appointment type name), icon, and description.
-
Change the Action field to Link to Another Page.
-
Using the Link To dropdown, select the appropriate booking page for your first appointment type.
-
Click Done to return to the Appointment Types tab.
-
Click +Add Type to repeat the process for all the appointment-type pages you created and want to link.
-
Use the preview button to ensure your primary and secondary pages work as expected.
-
Finally, click Save (or Create if a new page) to launch your new multi-step booking page with unique schedules by appointment type.
Troubleshooting
Section titled “Troubleshooting”Check out the FAQ section our blog post, Set Custom Schedules by Appointment Type on Your Booking Page, for detailed explanations on: