Multiple Calendar Support
A single Availability Page can pull availability from more than one calendar. Go to the Availability tab and add the calendars you want Apptoto to check.
When you use multiple calendars, you control how appointment availability is determined with the When setting.
Here are some examples of how you can utilize this powerful feature:
- You have 2 salespeople and you want prospects to be able to book appointments whenever at least one of the salespeople is available.
- You have one calendar for client appointments and another calendar for personal appointments. Apptoto will only show that you are available when you are available on both calendars.
| When setting | Behavior |
|---|---|
| At least one calendar is free | Shows open slots whenever any linked calendar is free |
| All calendars are free | Only shows slots when every linked calendar is free at the same time |
| Appointment exists on any calendar with specific title | Shows slots when at least one calendar has an event with that exact title |
| Appointment exists on all calendars with specific titles | Shows slots only when every calendar has an event with that exact title |
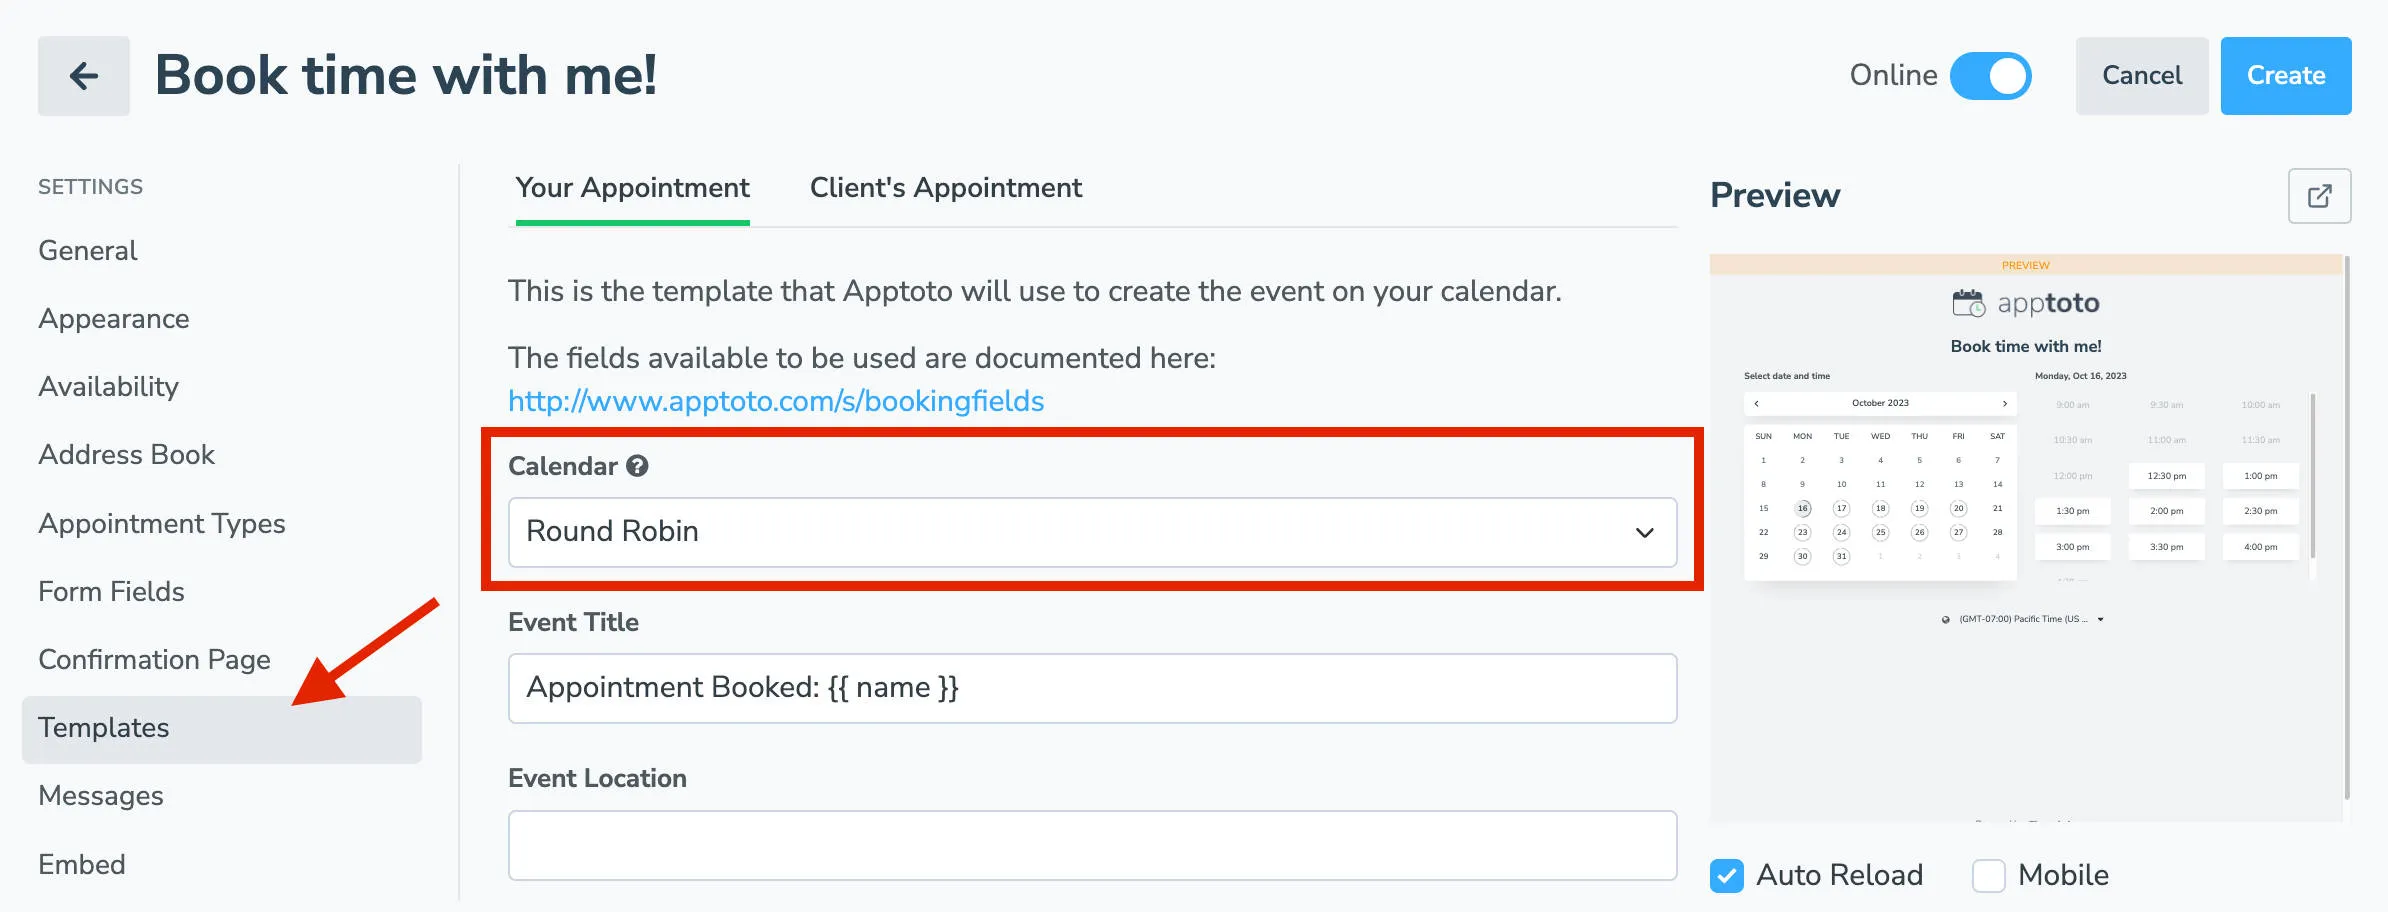
You can also configure how appointments are assigned to calendars in the Templates tab. Choose Round Robin to distribute evenly, or Ordered to assign based on priority.
Syncing multiple calendars to a Booking Page
Section titled “Syncing multiple calendars to a Booking Page”This is the process you will use to sync the availability of two or more calendars to a booking page. Apptoto will review the synced calendars’ availabilities and the booking page settings to determine what calendar to add the appointment to.
-
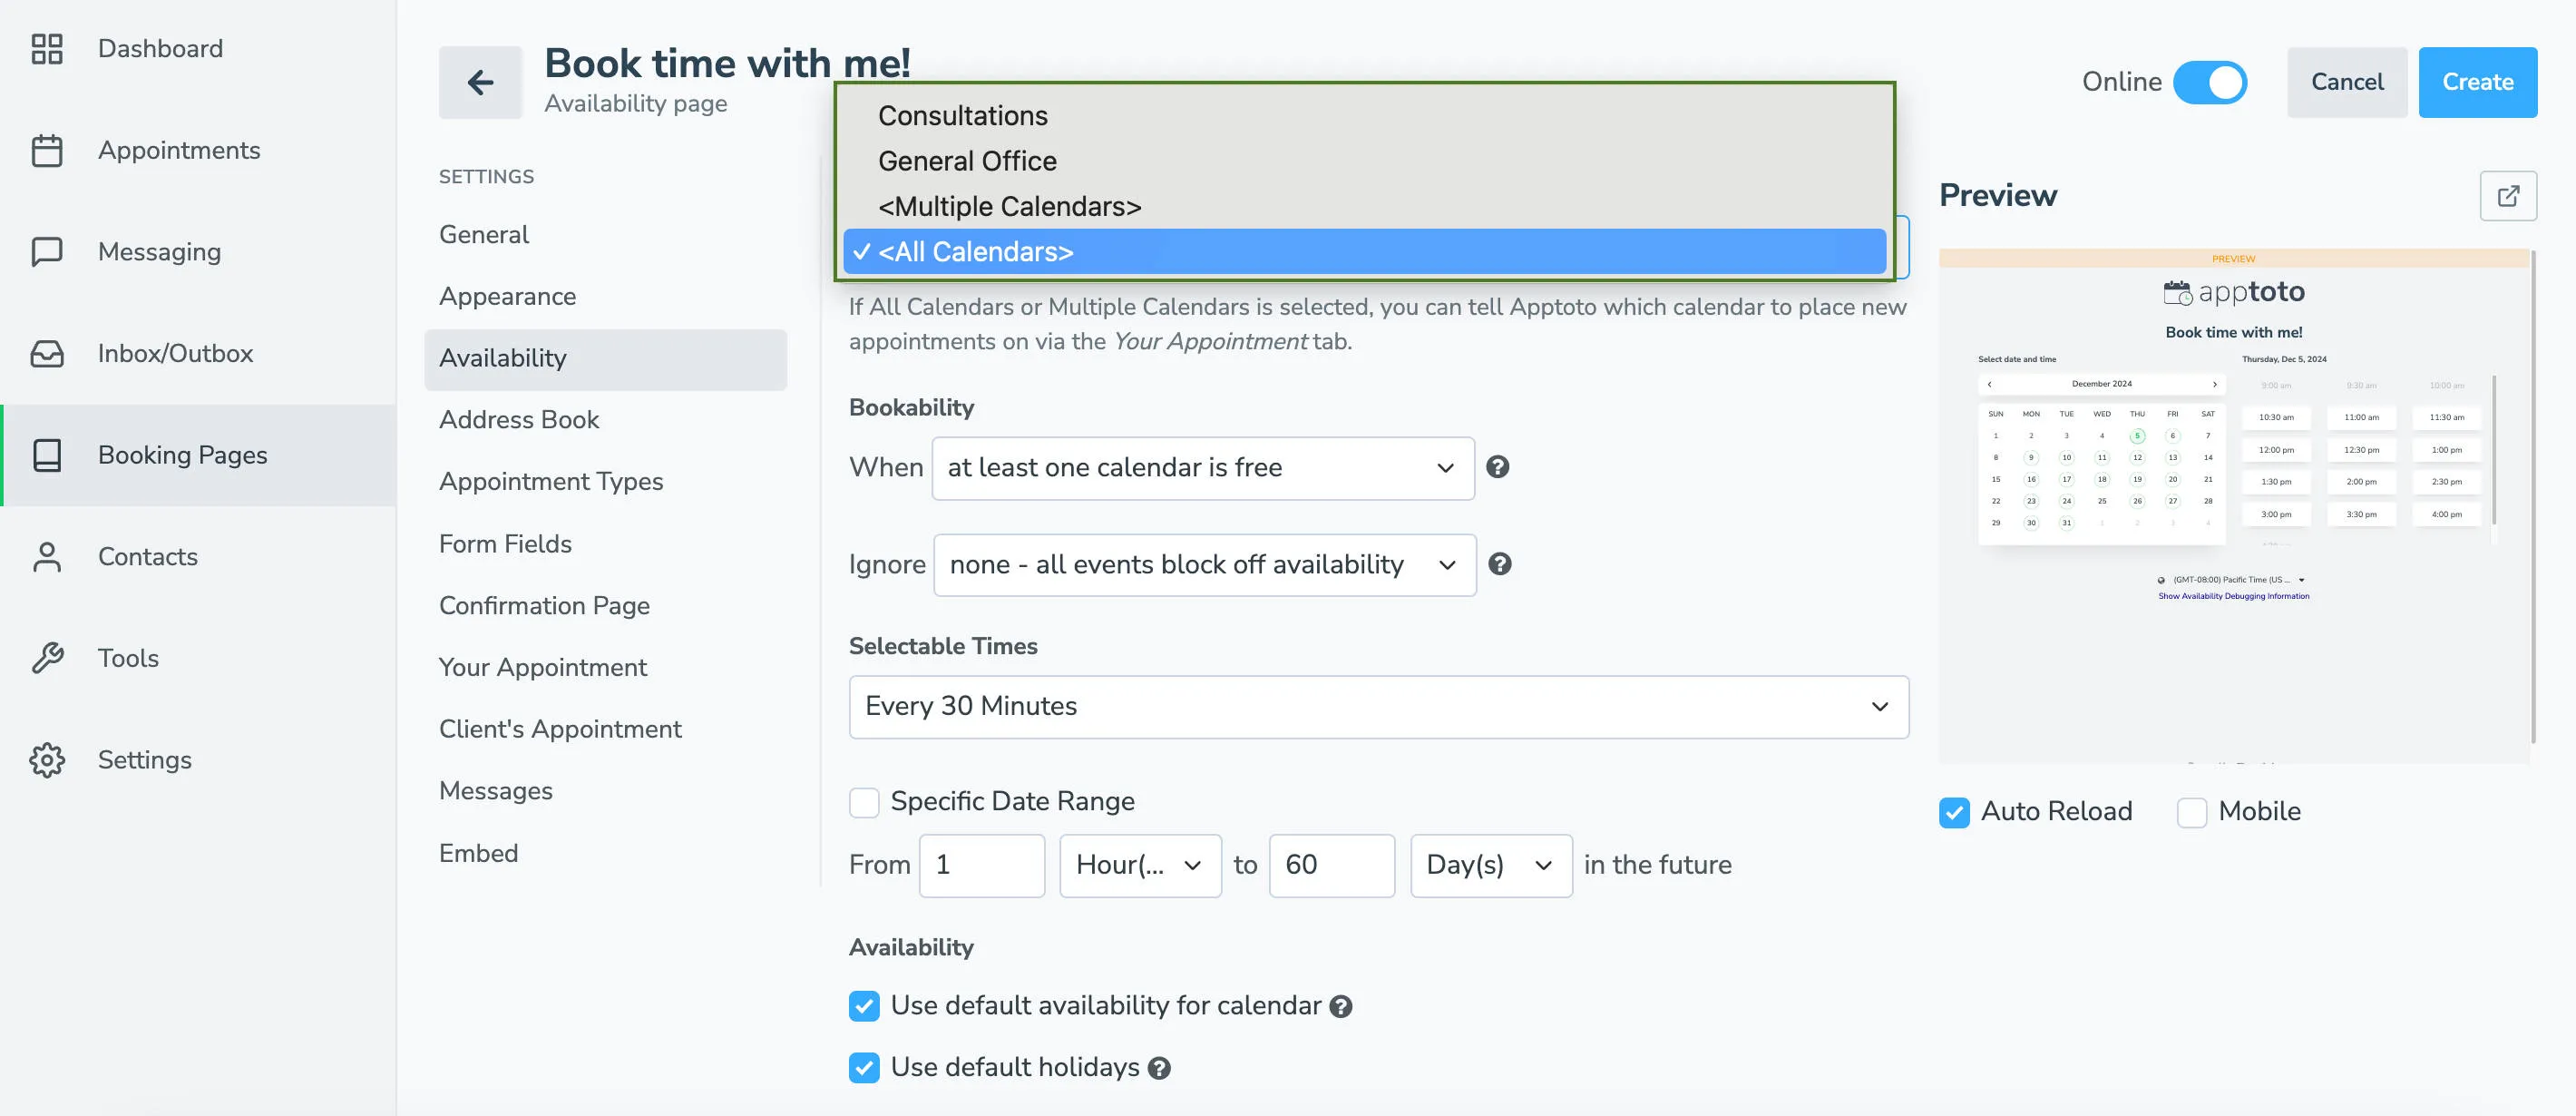
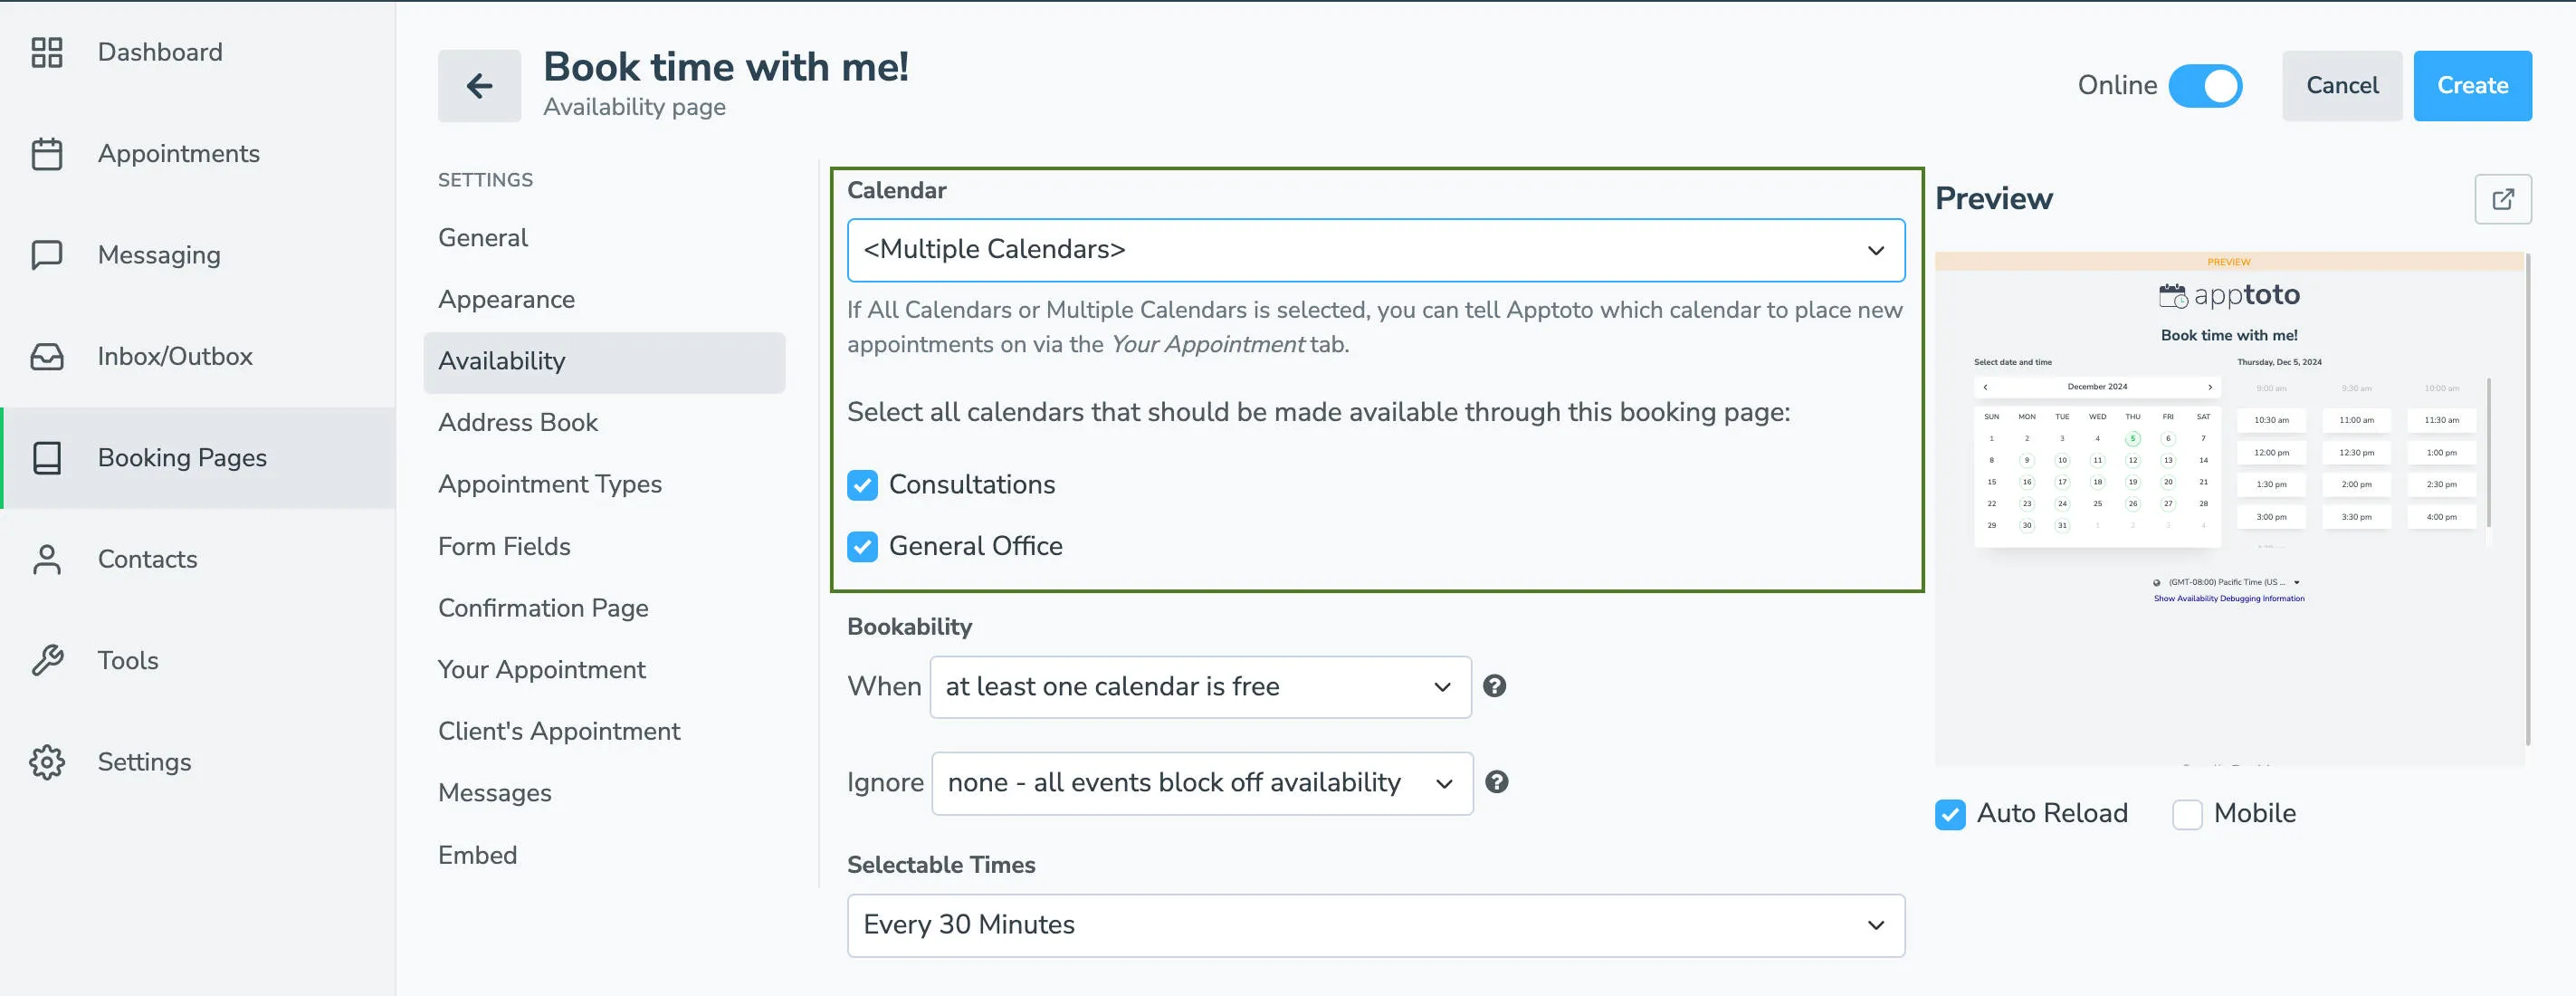
Enable multiple calendars: To allow your page to check multiple calendars for open time slots, select either “All Calendars” or “Multiple Calendars” from the Calendar dropdown on the Booking Page Availability tab.
-
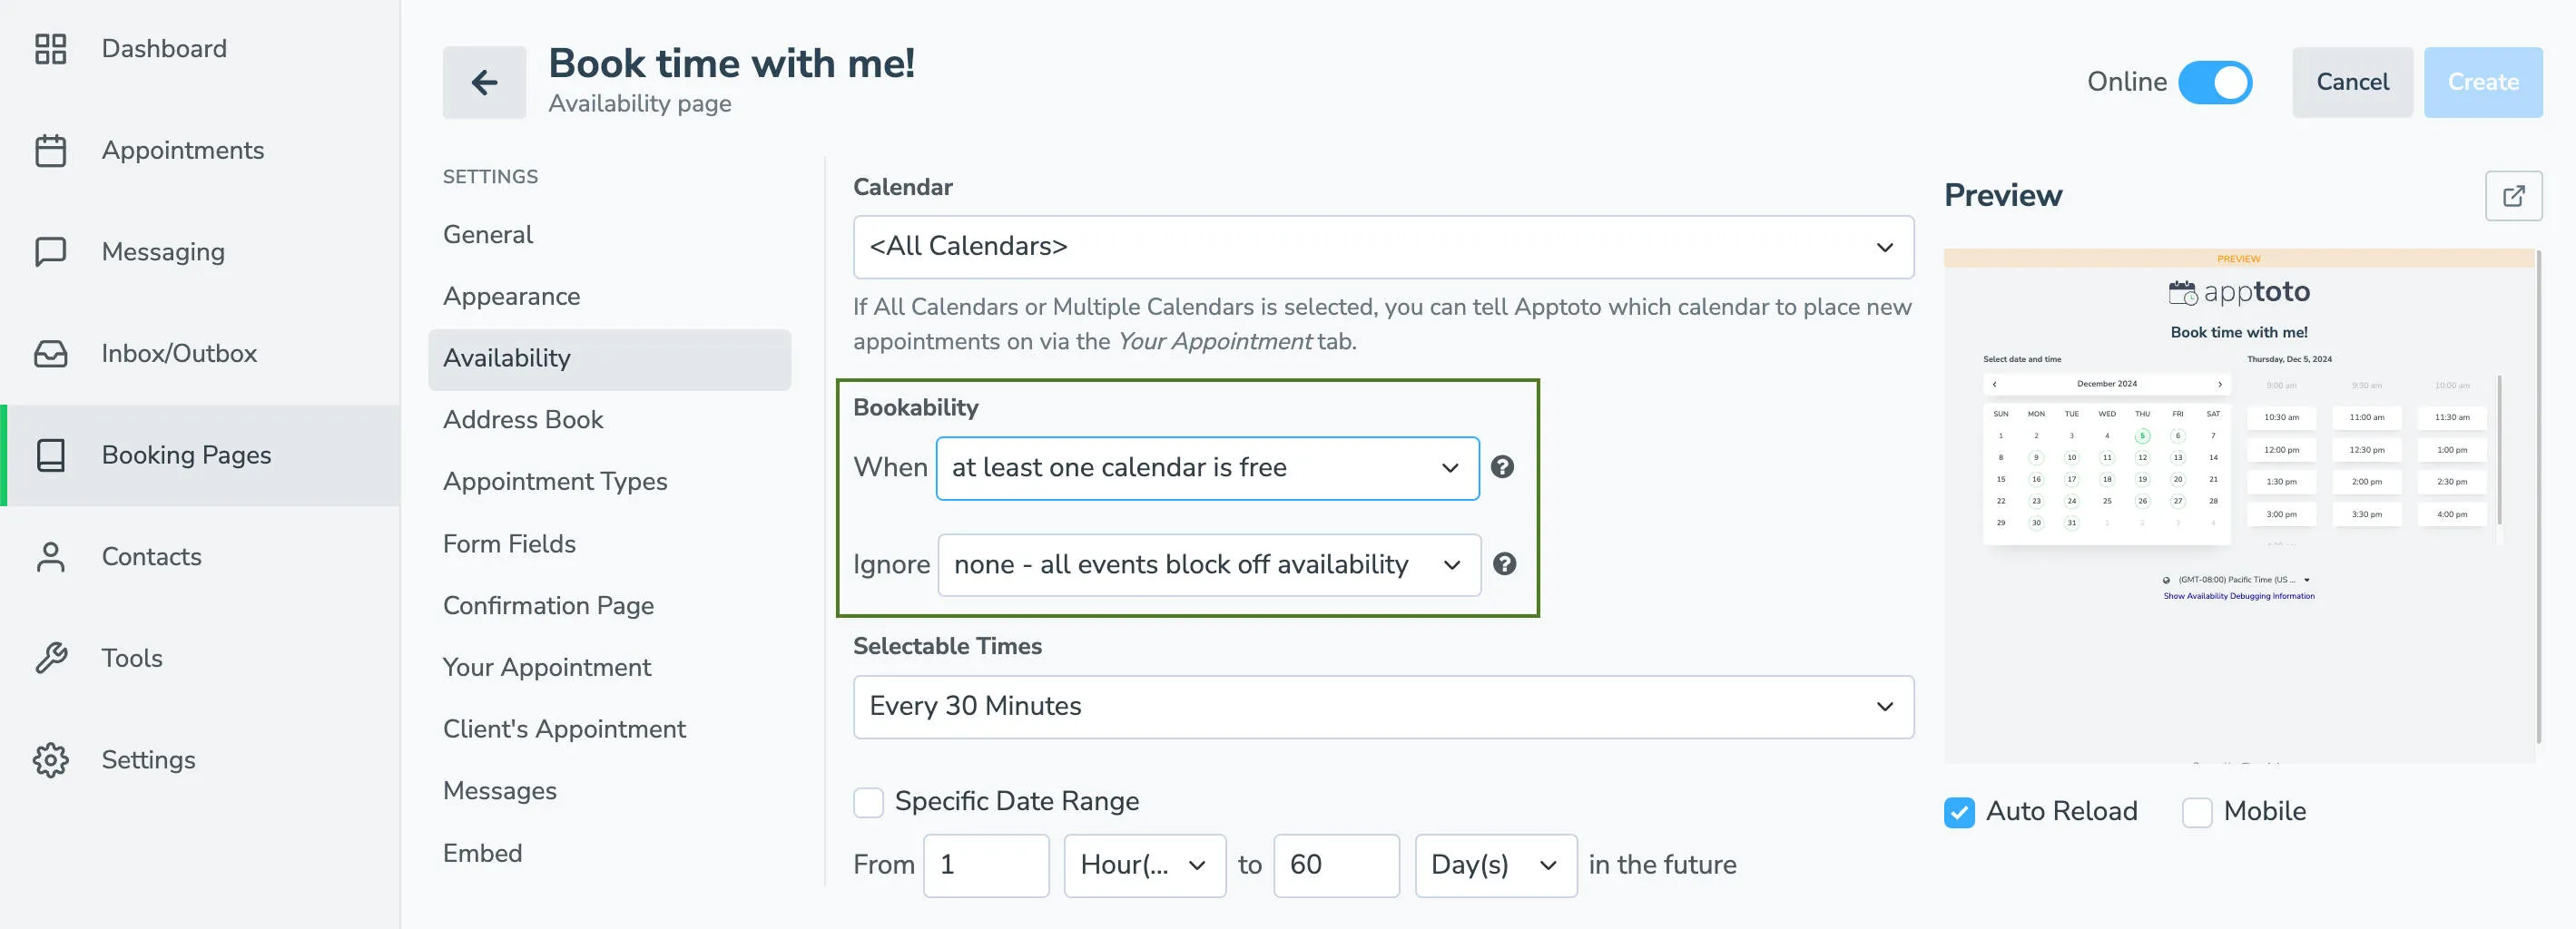
Choose bookability settings: Apptoto will review all calendars attached to the booking page to determine when available appointment times should be shown (i.e., when they are “bookable”). The options are:
- WHEN:
- At least one calendar is free: Apptoto will show availability whenever one or more of the calendars checked are free. This is useful in Example #1 above.
- All calendars are free: Apptoto will only show availability whenever all of the calendars are free at a specific time. This is useful for Example #2 above.
- Appointment exists on any calendar with specific title: Apptoto will show availability whenever one or more calendars have an appointment with an exact title, and are free. This is useful for Example #1 if you wanted to give your sales people the ability to mark when they are available on their calendar.
- Appointment exists on any calendar and title includes: Apptoto will show availability whenever one or more calendars have appointments that include a specific keyword, whether independently or tucked in with other info.
- Appointment exists on any calendars and matches condition: Apptoto will show availability whenever one or more calendars have an appointment that matches specific criteria beyond simple keywords, operating similarly to the Rules feature of the Auto Messages tab.
- Appointment exists on all calendars with specific titles: Apptoto will show availability whenever all calendars have an appointment with an exact title and are free.
- Appointment exists on all calendars with titles that include: Apptoto will show availability whenever all calendars have appointments that include a specific keyword, whether independently or tucked in with other info.
- Appointment exists on all calendars that match condition: Apptoto will show availability whenever all calendars have an appointment that matches specific criteria beyond simple keywords, operating similarly to the Rules feature of the Auto Messages tab.
- IGNORE:
- Ignore None – all events block off availability: By default, Apptoto will block off availability on your calendar if you have any appointments on your calendar at that time.
- Events with a Specific Title: This allows Apptoto to ignore certain events on your calendar with an exact title (e.g. Lunch or “Check Email” task) and will allow appointments to be scheduled during that time.
- Events whose Title Includes: This allows Apptoto to ignore certain events on your calendar with certain keywords in the title and will allow appointments to be scheduled during that time.
- Events that Match a Condition: This allows Apptoto to ignore certain events on your calendar that match specific criteria beyond simple keywords. This will allow appointments to be scheduled during those times.
- WHEN:
-
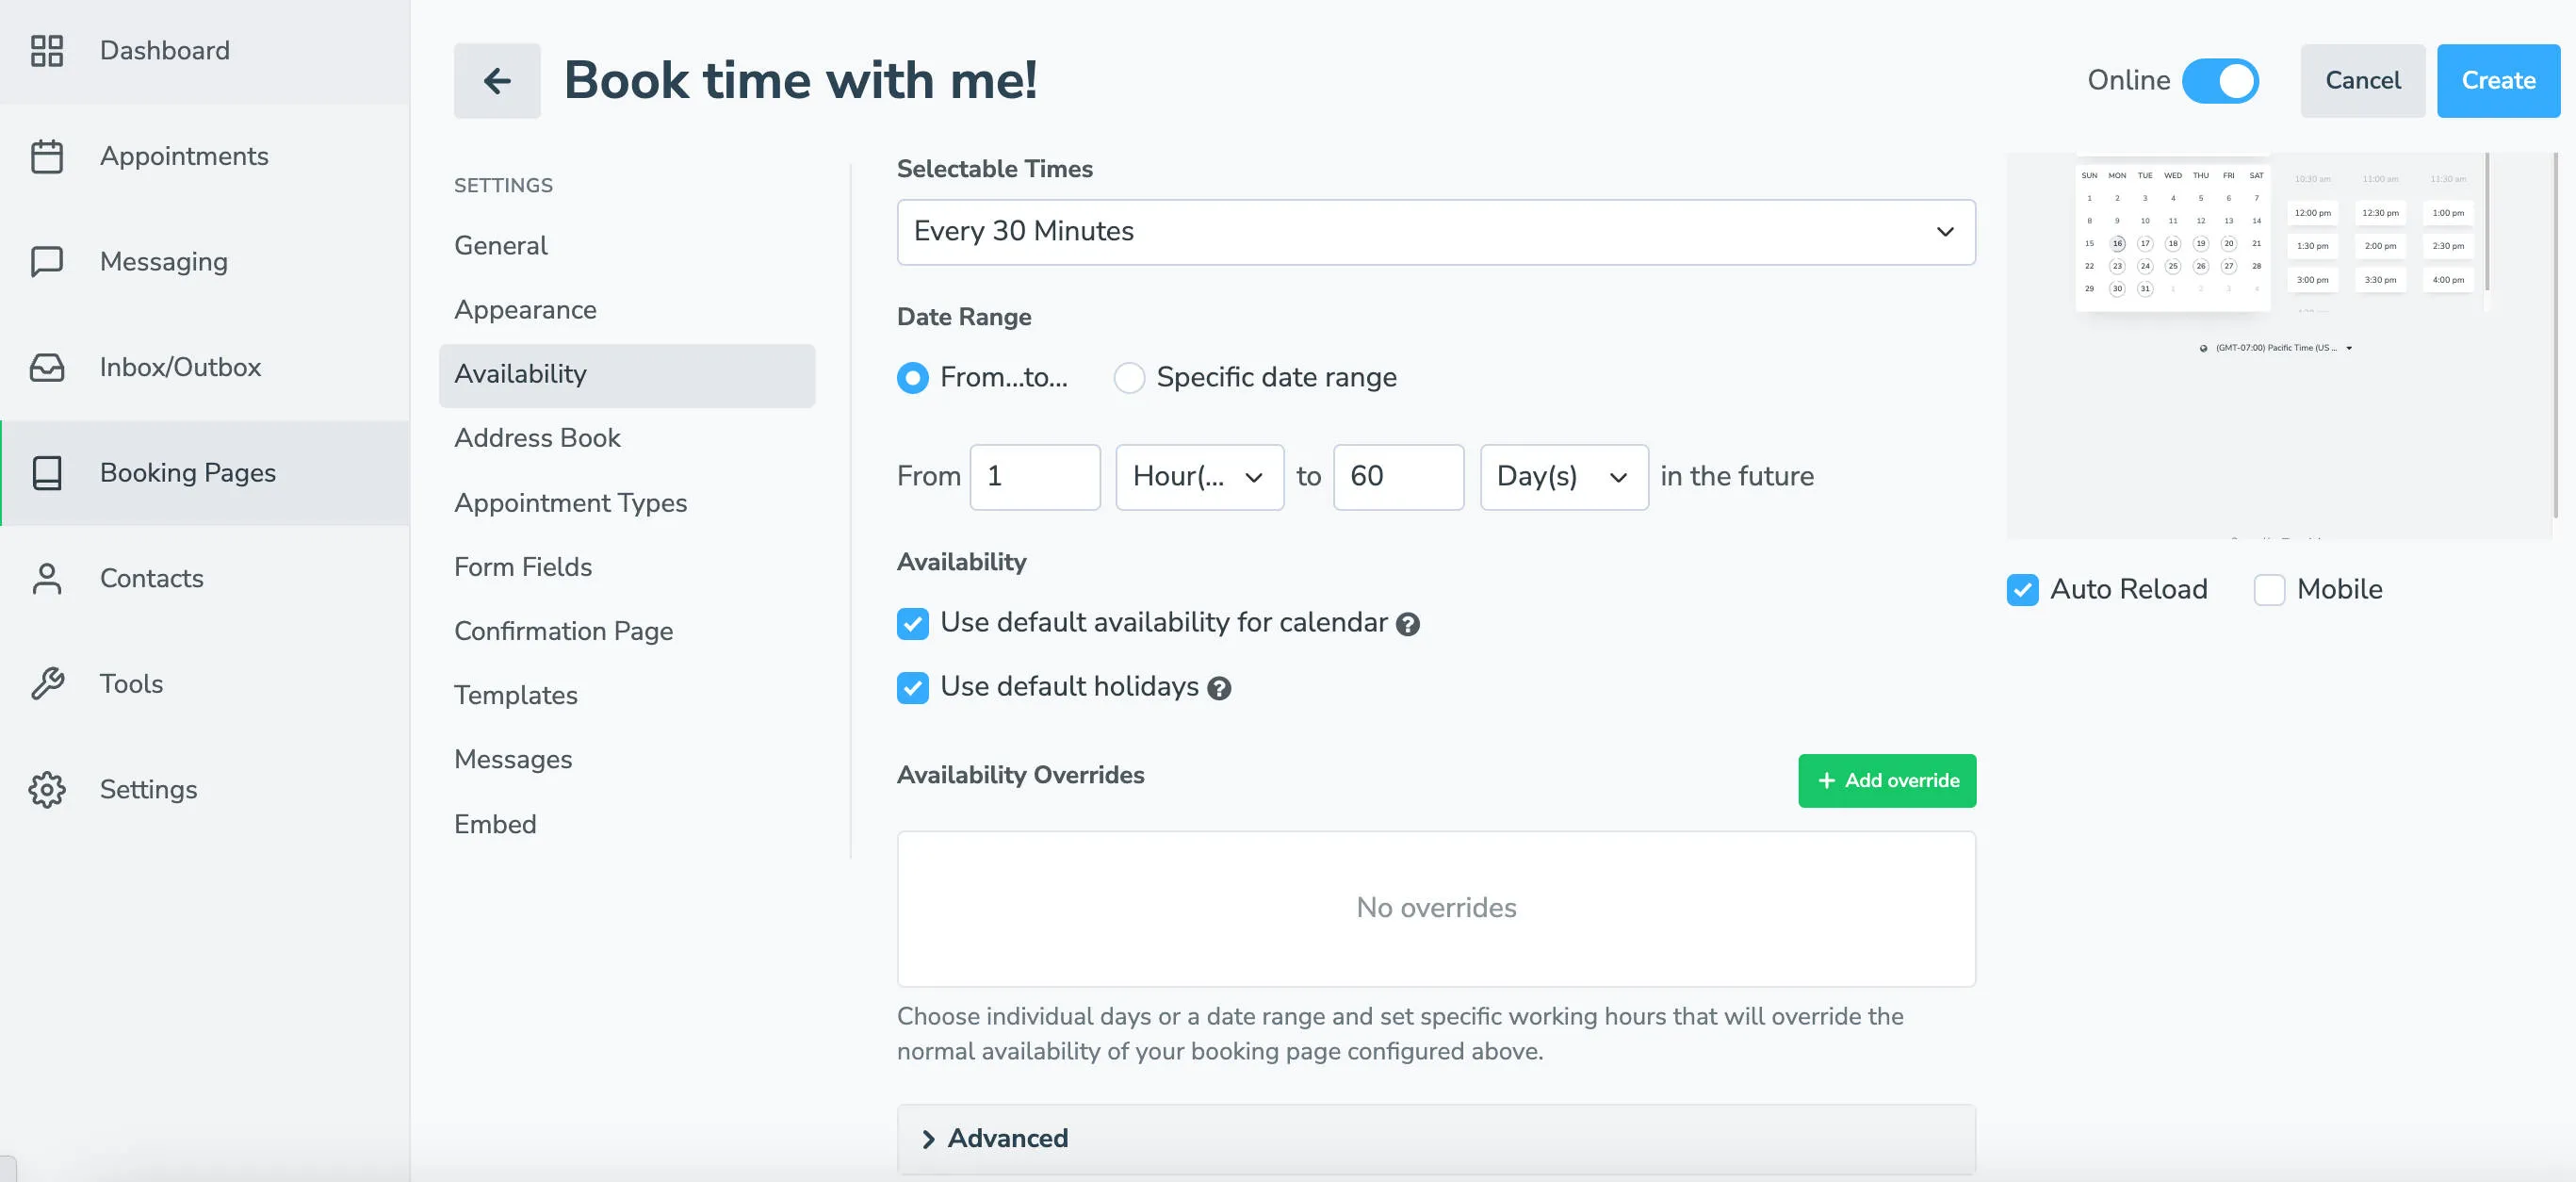
Set availability options: Scroll down the Availability tab to find the Selectable Times section. This controls how and when appointments may be scheduled on your booking page.
- Selectable times: Set how frequently you’d like people to be able to schedule appointments with you (for example, every 30 minutes, 60 minutes, 120 minutes, specific times, custom timing).
- Date Range: Set the date range for which you’d like to show available bookings. It’s possible to set:
- A range of times using the “From…To” (e.g., from 1 hour to 60 days in the future)
- A “Specific Date Range” (e.g., 9/15/2023 to 12/24/2023)
- Availability: Set when appointments can be scheduled on the booking page:
- Check the checkbox to use default availability for each calendar (set under Settings > Calendars tab > click gear icon next to your calendar name > Availability section)
- Uncheck the checkbox to set a unique availability schedule for your current booking page
- Holidays: By default, all your booking pages will inherit the account-level holidays you set for your business. On holidays, Apptoto will not show any availability on your booking pages. Default account-level holidays can be set on the Settings > Holidays tab. If you still wish to set holidays page-by-page, uncheck Use Default Holidays.
- If you uncheck Use default holidays, then you will need to set:
- Holiday Region: Selecting this will dynamically update the list in the next section per the country you live in.
- Select Holidays: Click the checkboxes next to the holidays you wish to block off on your calendar. Uncheck any you will be “open” / available for appointments.
- Custom Holidays: Enter any additional custom holidays you wish to block off availability on your calendar.
- If you uncheck Use default holidays, then you will need to set:
- Availability Overrides: Set the days you are unavailable for any appointments. You can set a specific date or a date range. This will block your availability on those days on your booking page and prevent any appointments from being booked.
-
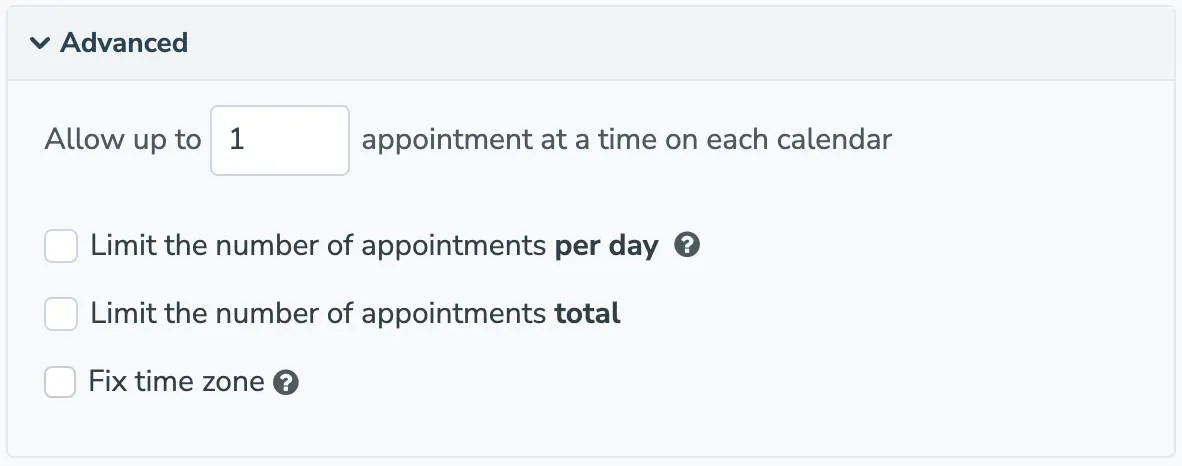
Set Advanced options: Click to expand the advanced options near the bottom of the page.
- Allow up to # appointments per day on each calendar: Select how many appointments you wish to allow to be booked per day per synced calendar.
- Limit the number of appointments per day: Limit how many appointments can be booked per calendar on a given day (whether booked through a booking page or just set as “busy” on your calendar).
- Limit the number of appointments total: Set this to limit how many bookings can be scheduled via this booking page on a given day.
- Fix Time Zone: By default, Apptoto will show your booking page availability to your users in whatever time zone they are in (or their browser is set to). Click Fix Time Zone if you only want to show availability in a singular time zone.
-
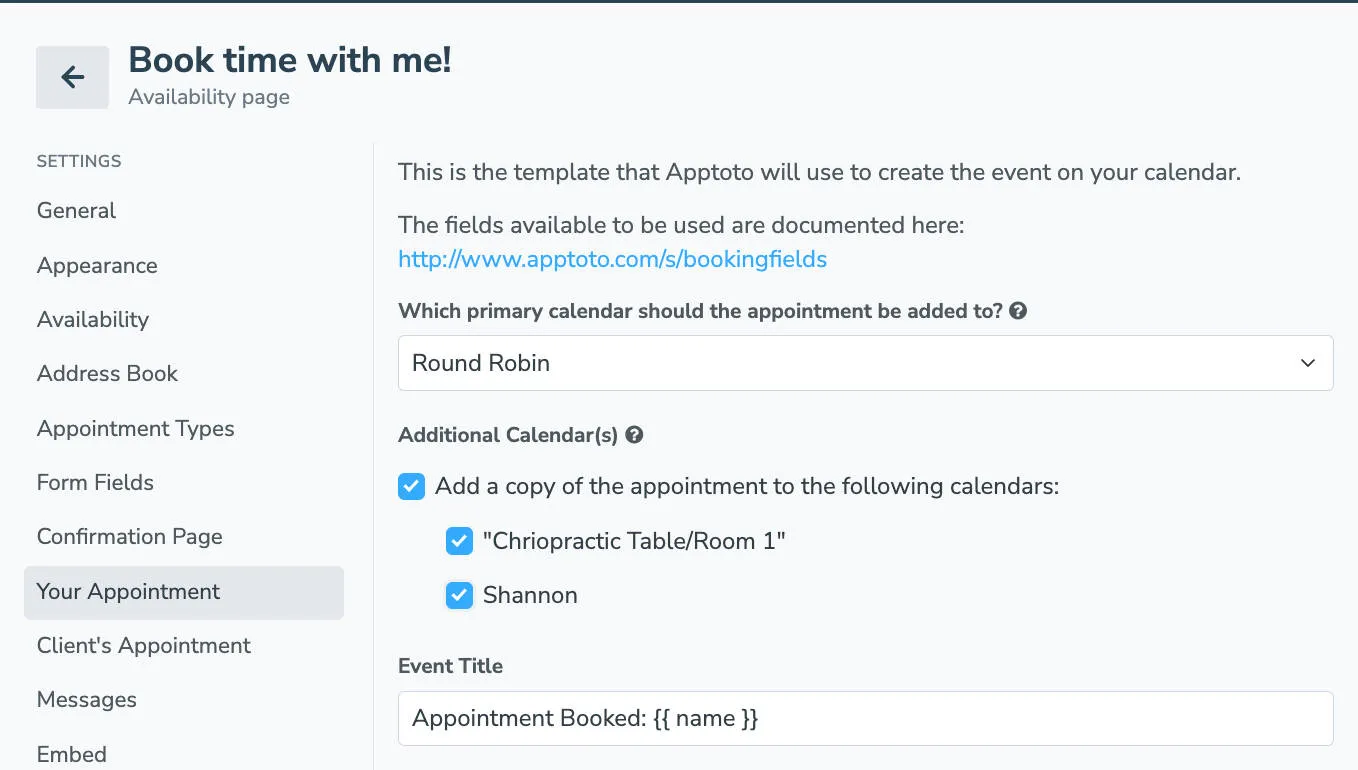
Set which calendar new appointments should be added to: Select the Templates tab and choose which calendar new bookings should be added to. Your options are:
- Round Robin: The appointments will be placed on each of the calendars in a round-robin order.
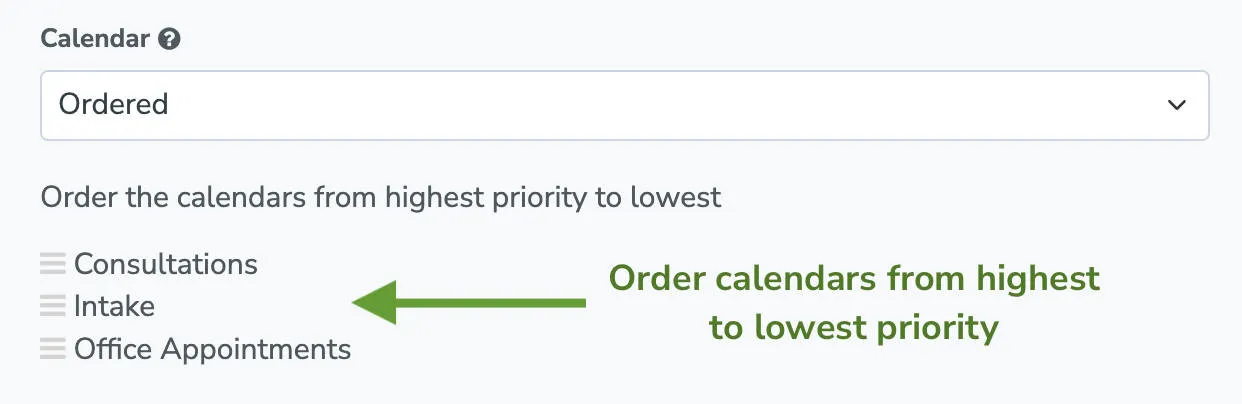
- Ordered: The appointments will be placed on the calendars depending on the order you provide (drag and drop to change the order).
- Specific Calendar: Appointments will be placed on one specific calendar. This option is only available if “all calendars are free” is specified in step 2 above.
-
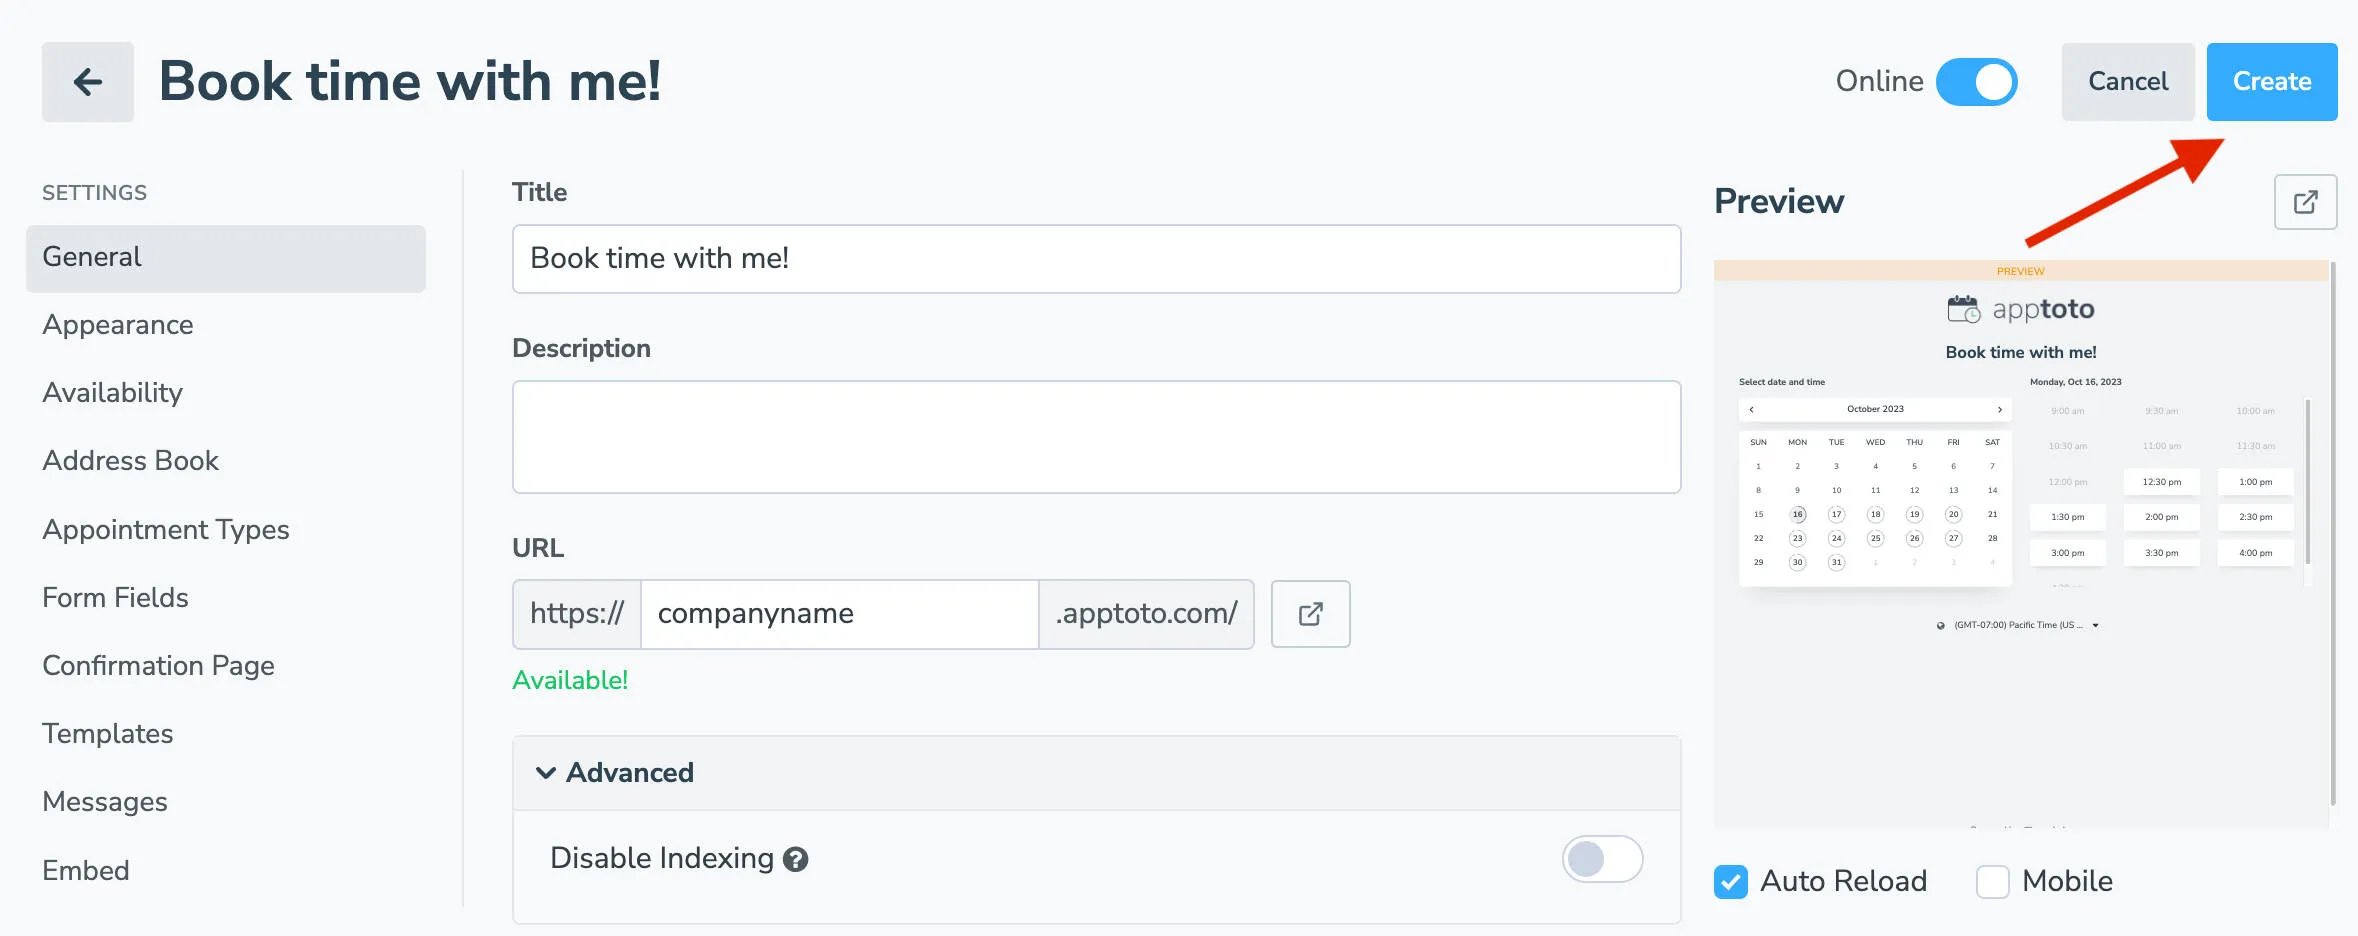
Click Create / Save to save your changes.
Book an Appointment on Multiple Calendars
Section titled “Book an Appointment on Multiple Calendars”The process above tells Apptoto how/when to add an appointment to an individual calendar. However, Apptoto can also add an event to multiple calendars at the same time.
A great example of when you might use this are if you have a provider calendar and a “room” calendar synced to the same booking page. Apptoto will check both calendars to ensure there is open availability for both the provider and the room. Then, once a client books, the event will be added to both the provider’s schedule and the room schedule. If another provider also has the room calendar synced to their booking page, the room calendar will not display availability for the times the other providers have booked.
-
Navigate to the Booking Pages and click the booking page you want to edit.
-
Navigate to the Your Appointment tab.
-
Under the Additional Calendar(s) section, click the checkbox next to Add a copy of the appointment to the following calendars.
-
The calendars synced to the booking page will appear. Select all the calendars where you want Apptoto to add a copy of the event.
-
Click Save.