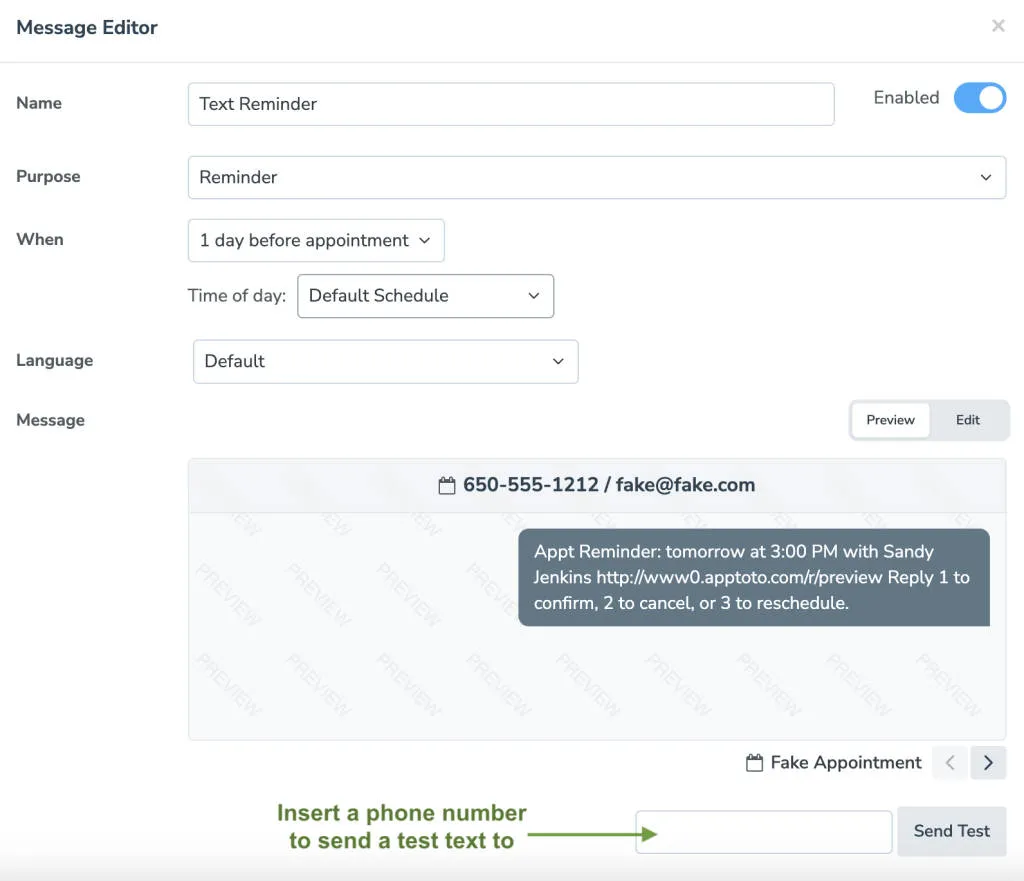
Message Editor
To edit your messages, click on the Messaging > Appointment Auto Messages tab.
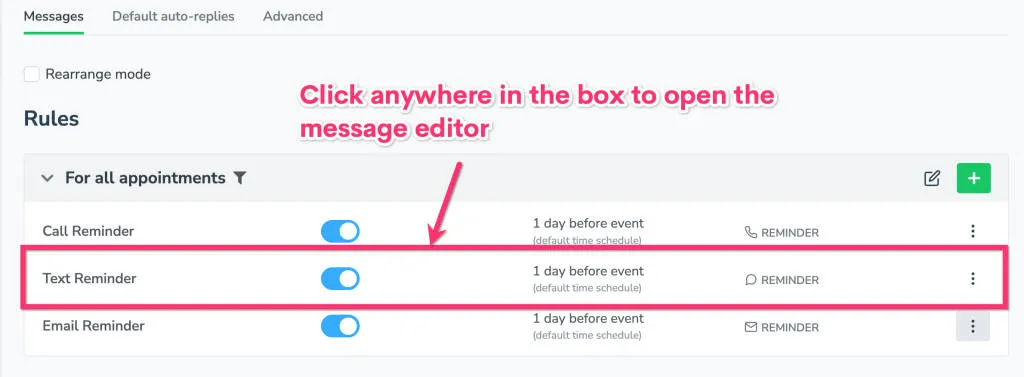
To edit any portion of a message (timing, content, etc.), just click on the message, in this case “SMS Reminder,” which will open the editor for that message.
By default, it will look like this:
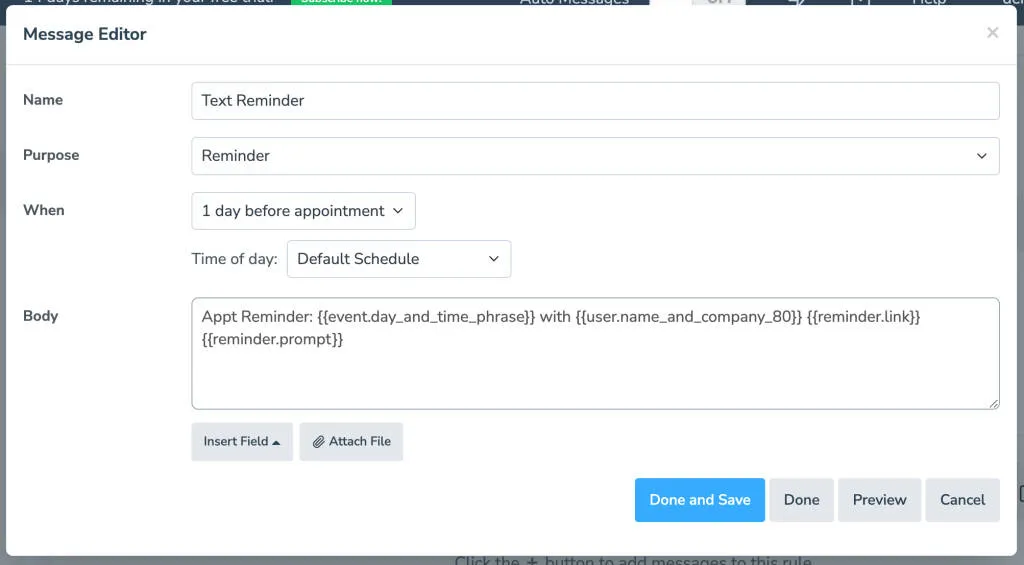
You can change the name of each message to reflect its content (e.g., “New Client SMS”) for easier reference.
Purpose
Section titled “Purpose”Each message in the Appointment Auto Messages tab can be one of three types: Reminder, Follow-up, or Booking.
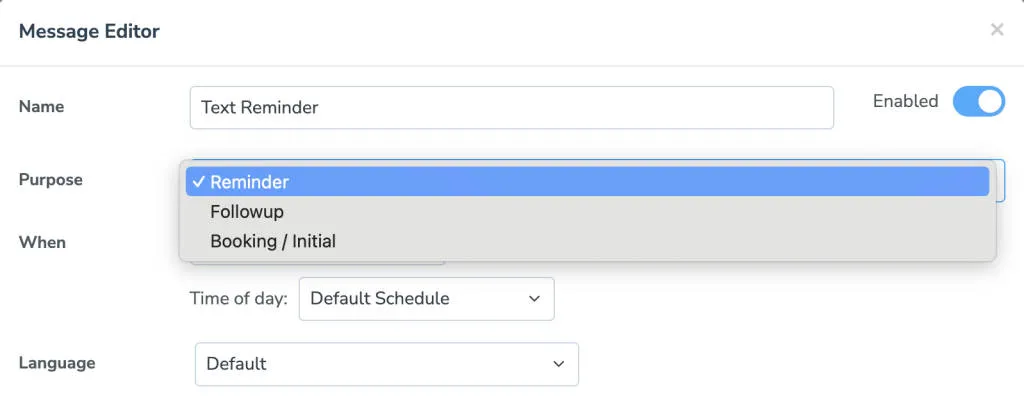
Reminder: The default setting. Will be the messages you send before an appointment
Follow-up: Messages set to go out after an appointment with additional information
Booking: Messages sent when an appointment is created
This specifies when a message will be sent. For more information, see Message Timing Options.
This is where you include the content of the actual message sent to clients or patients. You can use either plain text, Fields to insert appointment-specific information into individual outgoing messages, or a combination of both.
Email format and theme
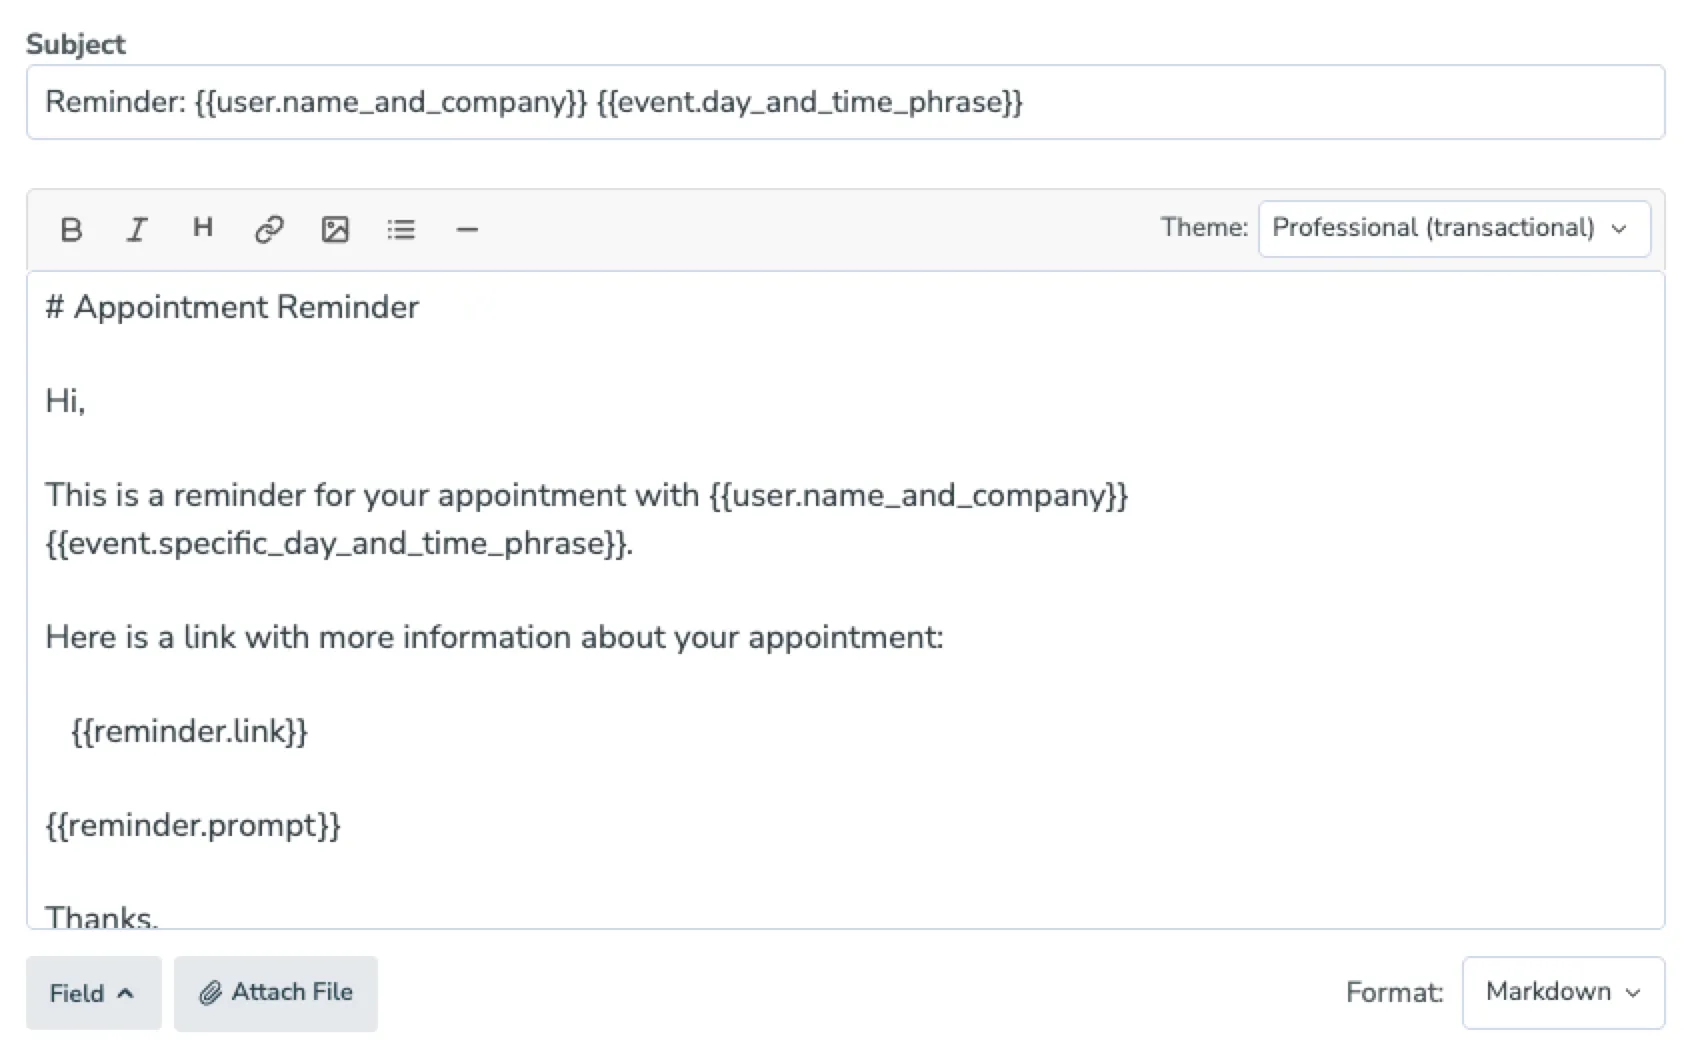
Section titled “Email format and theme”Email messages have a Format dropdown that controls how you write the body:
- Markdown (default for new messages) — write the message using simple Markdown syntax and Apptoto formats the email automatically when it’s sent. A toolbar above the editor offers shortcuts for bold, italic, headings, links, images, lists, and horizontal rules. See the Markdown Primer for the syntax.
- HTML — opens the rich-text (WYSIWYG) editor when you want full design control.
- Plain Text — a plain textarea with no formatting.
Switching between formats converts the existing content where possible, so you can experiment without losing your work. Fields like {{ event.day_and_time_phrase }} are preserved across the conversion.
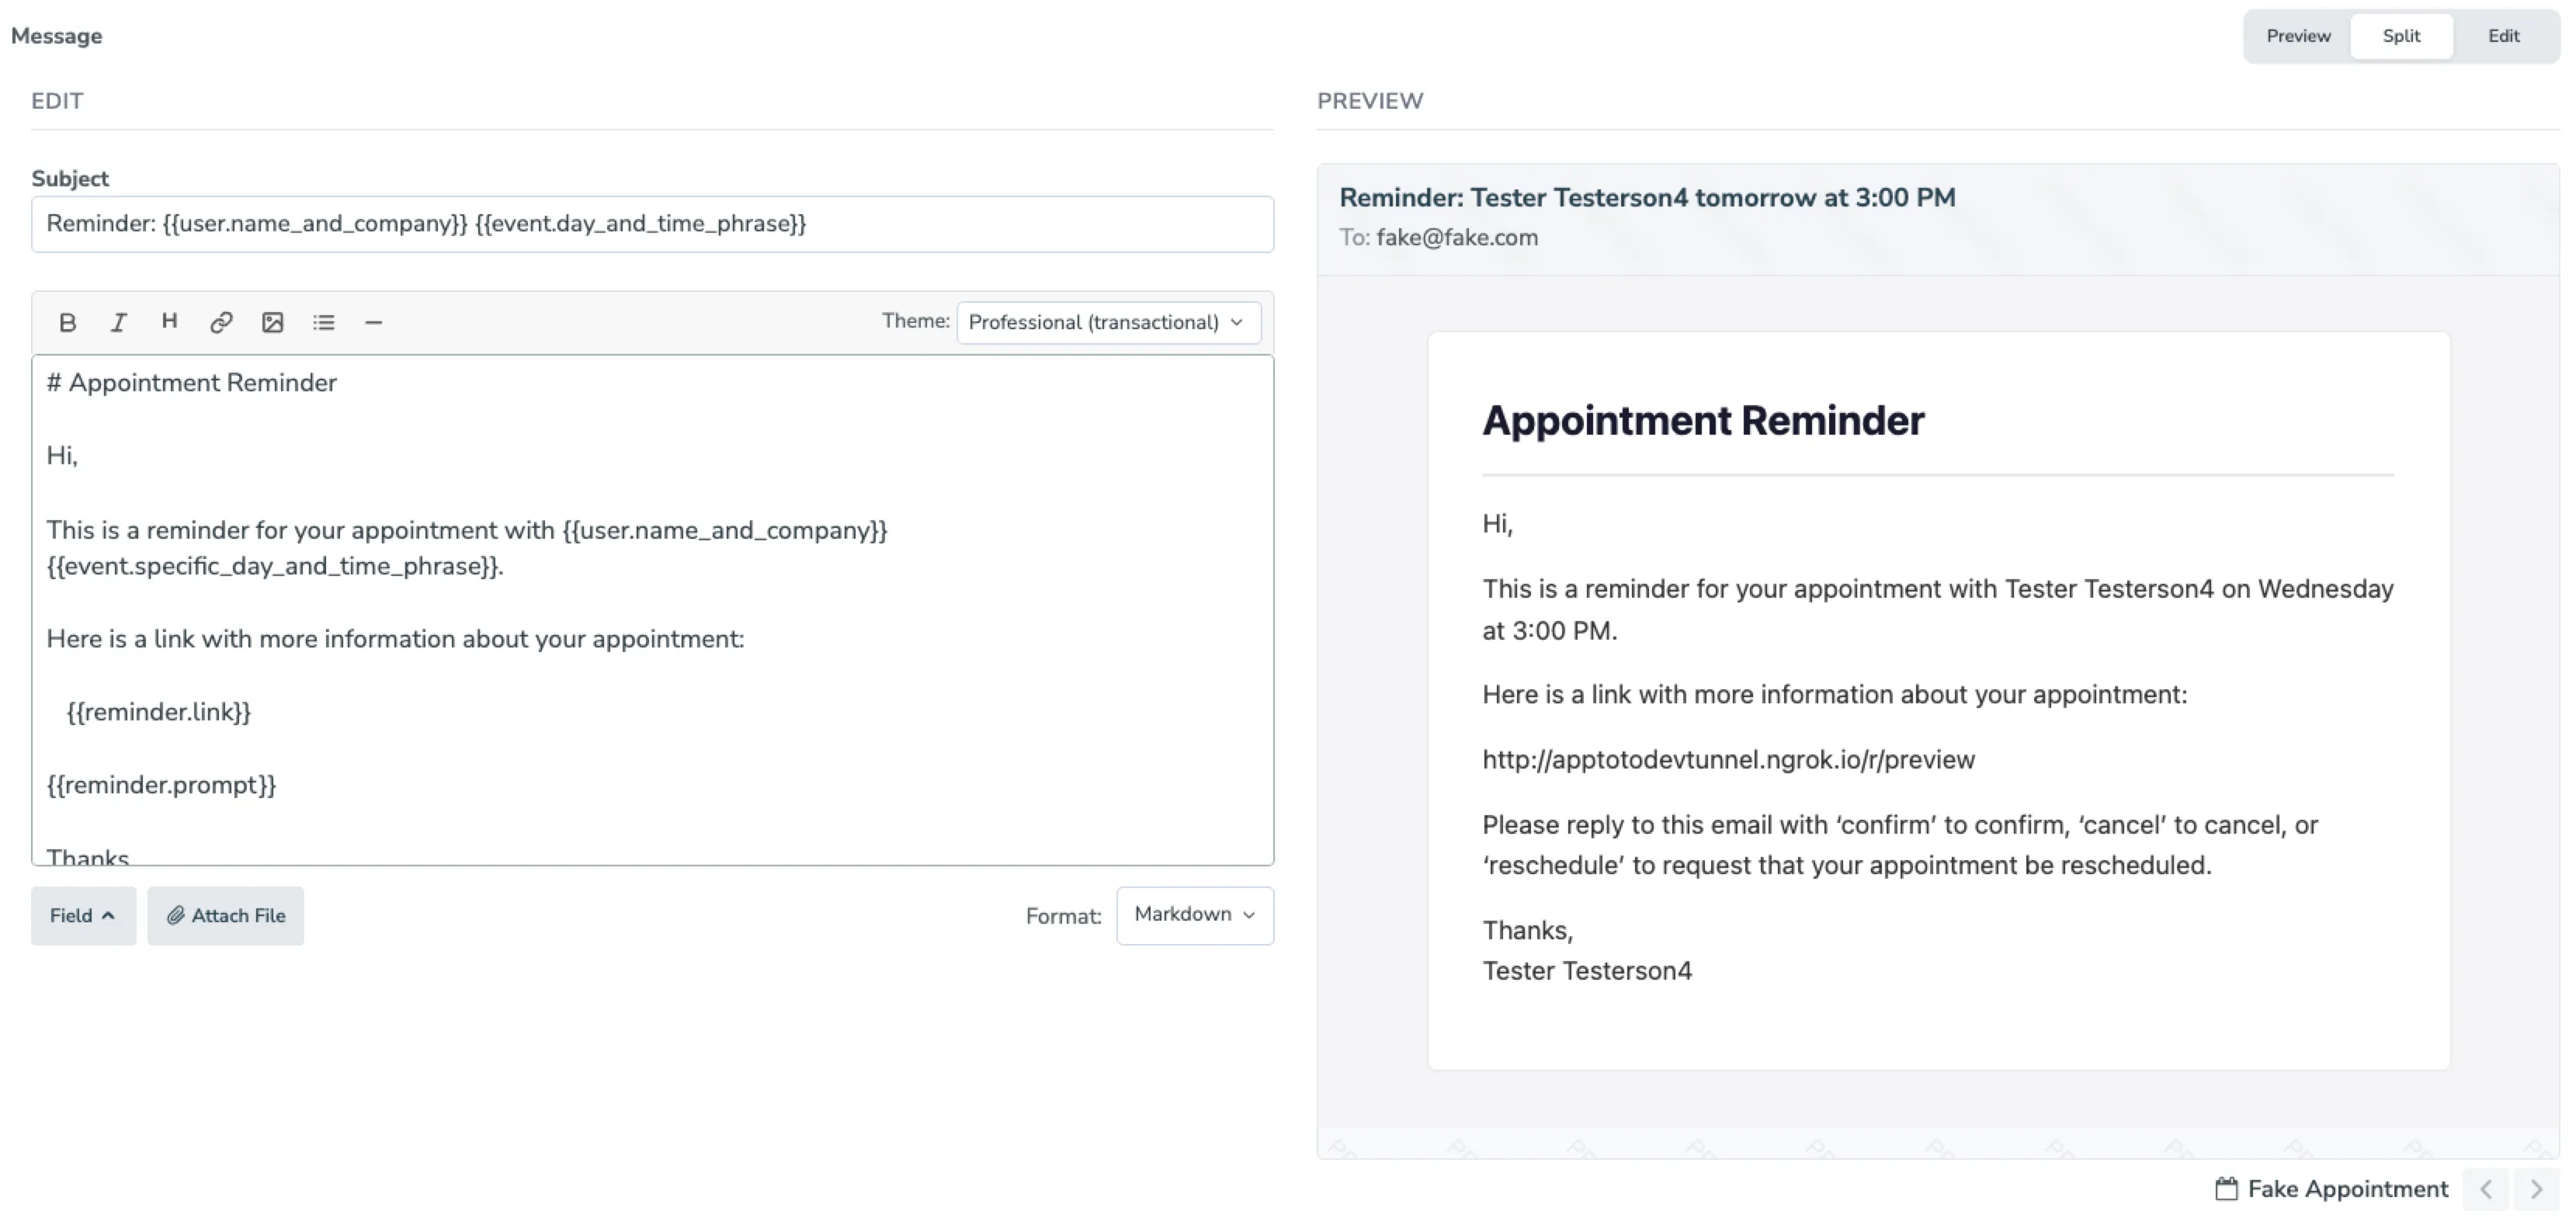
When the format is Markdown, a Theme dropdown next to the toolbar wraps the email in a styled layout:
- None (as-is) — no wrapper styling; the email displays the way the recipient’s email program would normally show it. This is the default for new email auto messages.
- Clean (modern) — a sans-serif body with subtle headings.
- Professional (transactional) — a card-style layout on a light gray background, suited to receipts and confirmations.
- Minimal (editorial) — a serif body with restrained typography.
Inserting images in Markdown emails
Section titled “Inserting images in Markdown emails”Click the image icon in the Markdown toolbar to upload an image. Apptoto inserts a reference at your cursor and automatically resizes the image for each recipient when the email is sent. You can also adjust width and height after the fact - see Images (Emails Only) for the details.
Preview, Edit, and Split views
Section titled “Preview, Edit, and Split views”Above the message body, a segmented control toggles between Preview, Split, and Edit:
- Edit — the editor only.
- Preview — a sample of what the message will look like for a real appointment, with controls to send a test message to a phone number or email address.
- Split — the editor on one side and the live preview on the other, updating as you type. Useful when you’re fine-tuning Markdown or trying out different themes. Cc, Bcc, and the auto-reply panel are tucked away in Split view to leave room for the preview.
In Preview, you can also enter a phone number or email address and click Send Test to send the message to yourself before saving:
When the message content looks the way you want it to, click the “Back” button to return to the main Message Editor page.
Once you’ve set the content of your message, you’ll need to set the Message Timing to determine when your message is sent.
Apptoto now supports attachments to both incoming and outgoing SMS and emails. On the messages where this feature is available, there will be a clickable Attach File button.