Webhook Triggers
A webhook trigger defines the event you want Apptoto to watch for. When that event occurs, any actions you’ve attached to the trigger will execute automatically.
Available triggers
Section titled “Available triggers”- Appointment created
- Appointment modified
- Appointment deleted
- Participant reminder state changed (any state)
- Participant invite sent
- Participant confirmed
- Participant not coming
- Participant needs to reschedule
- Participant booking state changed (any state)
- Participant accepted booking
- Participant declined booking
- Participant canceled booking
- Participant check-in state changed (any state)
- Participant replied to message
- Participant added to stop list
- Booking request completed
- Booking page viewed
- Message sent
- Message received
- Message failed*
Setting Up A Webhook Trigger
Section titled “Setting Up A Webhook Trigger”-
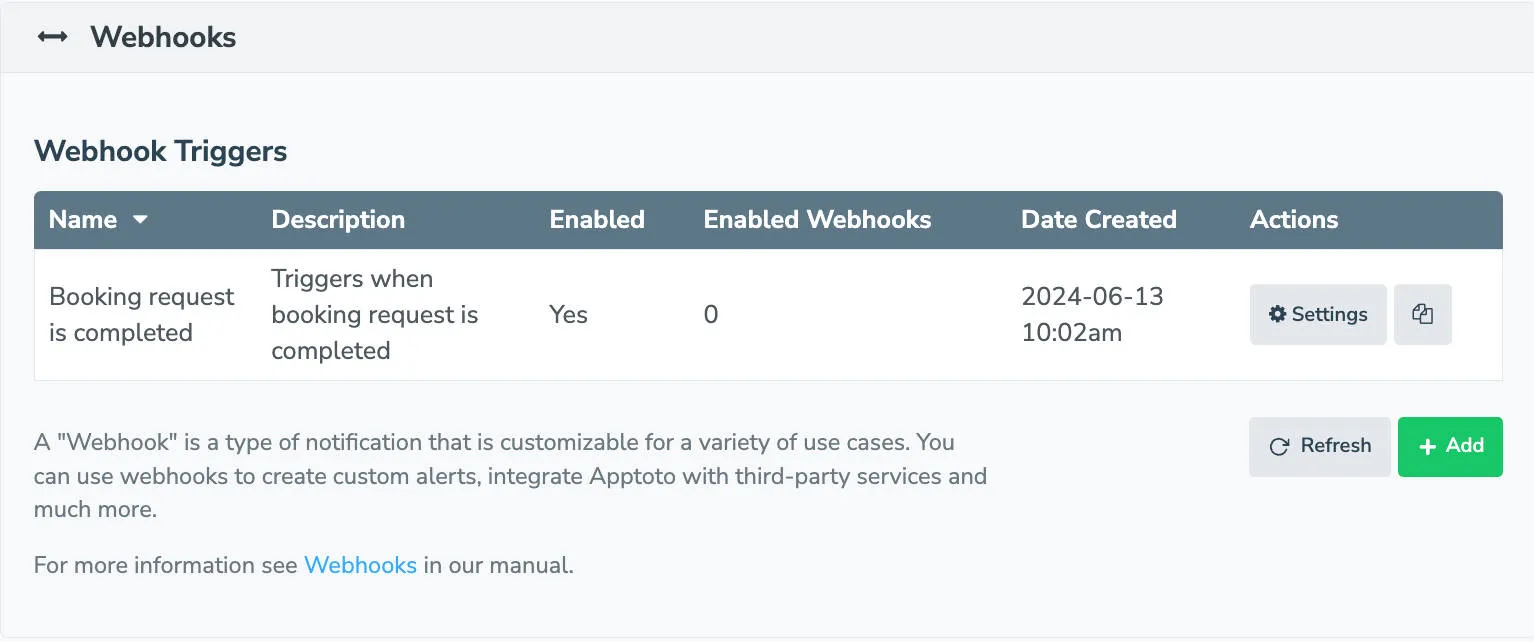
Open the “Settings”>“Integrations” tab and click on the “Webhooks” header. This will display the table of any triggers you currently have set up, with options to edit and delete existing triggers, or create a new trigger:
-
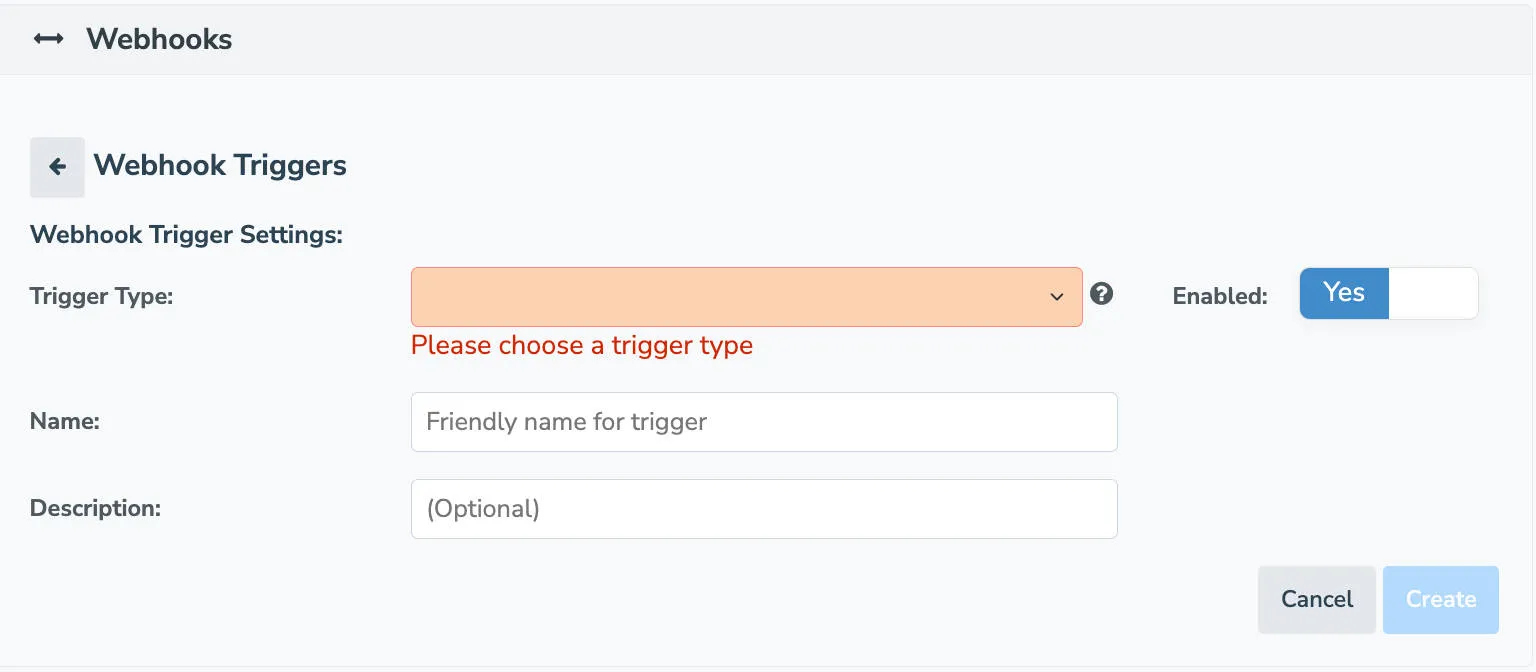
Add a new trigger. Click the blue “Add” button. You should be greeted with the following form:
-
Set the “Trigger Type” field. It is the type of event that you want Apptoto to monitor, for example, “Participant confirmed” will fire when a participant confirms an appointment.
-
Name and enable the trigger. Give the trigger a descriptive name and optional description. Make sure the Enabled toggle is on.
-
Save the trigger. Click Create. Apptoto redirects you to the trigger’s detail page, where you can add one or more webhook actions that execute when the trigger fires.
Next steps
Section titled “Next steps”Once you have a trigger, set up webhook actions to define what happens when it fires.