Payments for all Appointments
Apptoto allows you to collect payments for all of your appointments, not just ones booked through Apptoto.
Learn more about Apptoto’s Payments feature:
This guide covers the following topics.
- How to tell Apptoto the price for each appointment
- Collecting Payments
- Manually requesting payments
- Through the “Appointment Page” (sent in reminders)
- Automatically using “Auto Messages” (e.g. reply ‘p’ to pay)
- Configuring the “Payment Page” TBD
Payment Settings for Appointments
Section titled “Payment Settings for Appointments”In order to collect payments for your Appointments, Apptoto needs to know how much each contact should pay for their appointment.
Telling Apptoto the price for an appointment type
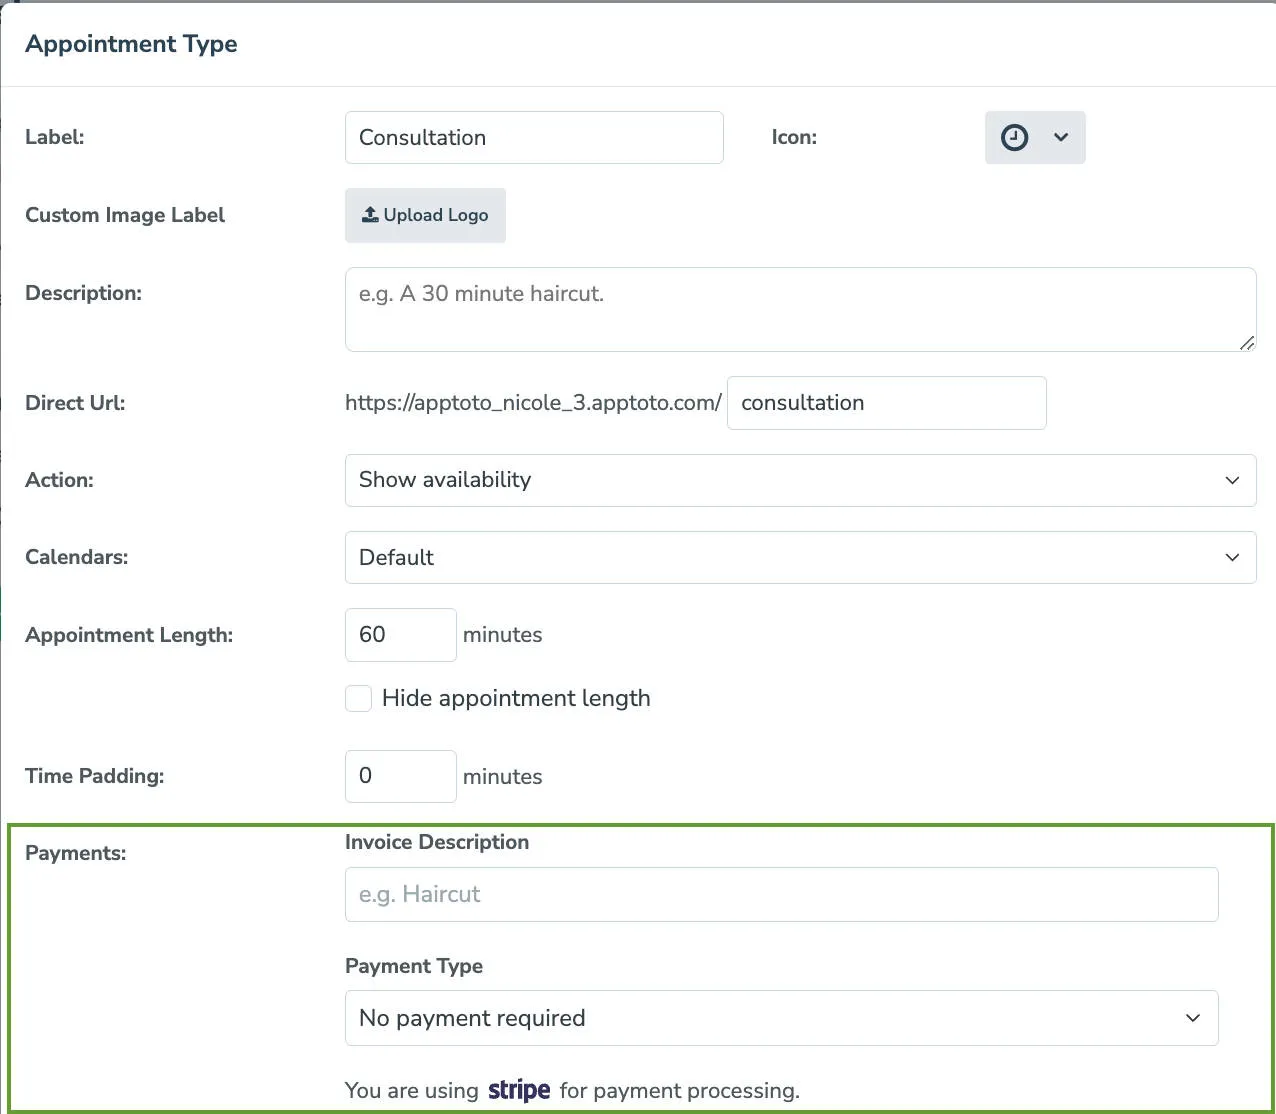
Section titled “Telling Apptoto the price for an appointment type”If you offer a specific appointment type on a booking page and always charge the same amount for it, you only need to set the price and payment settings once. Navigate to Booking Pages > Select a Booking page > Appointment Types. Once there, add or edit your appointment types and scroll down to the Payments section to fill in the amount and other details.
Including the price in an event
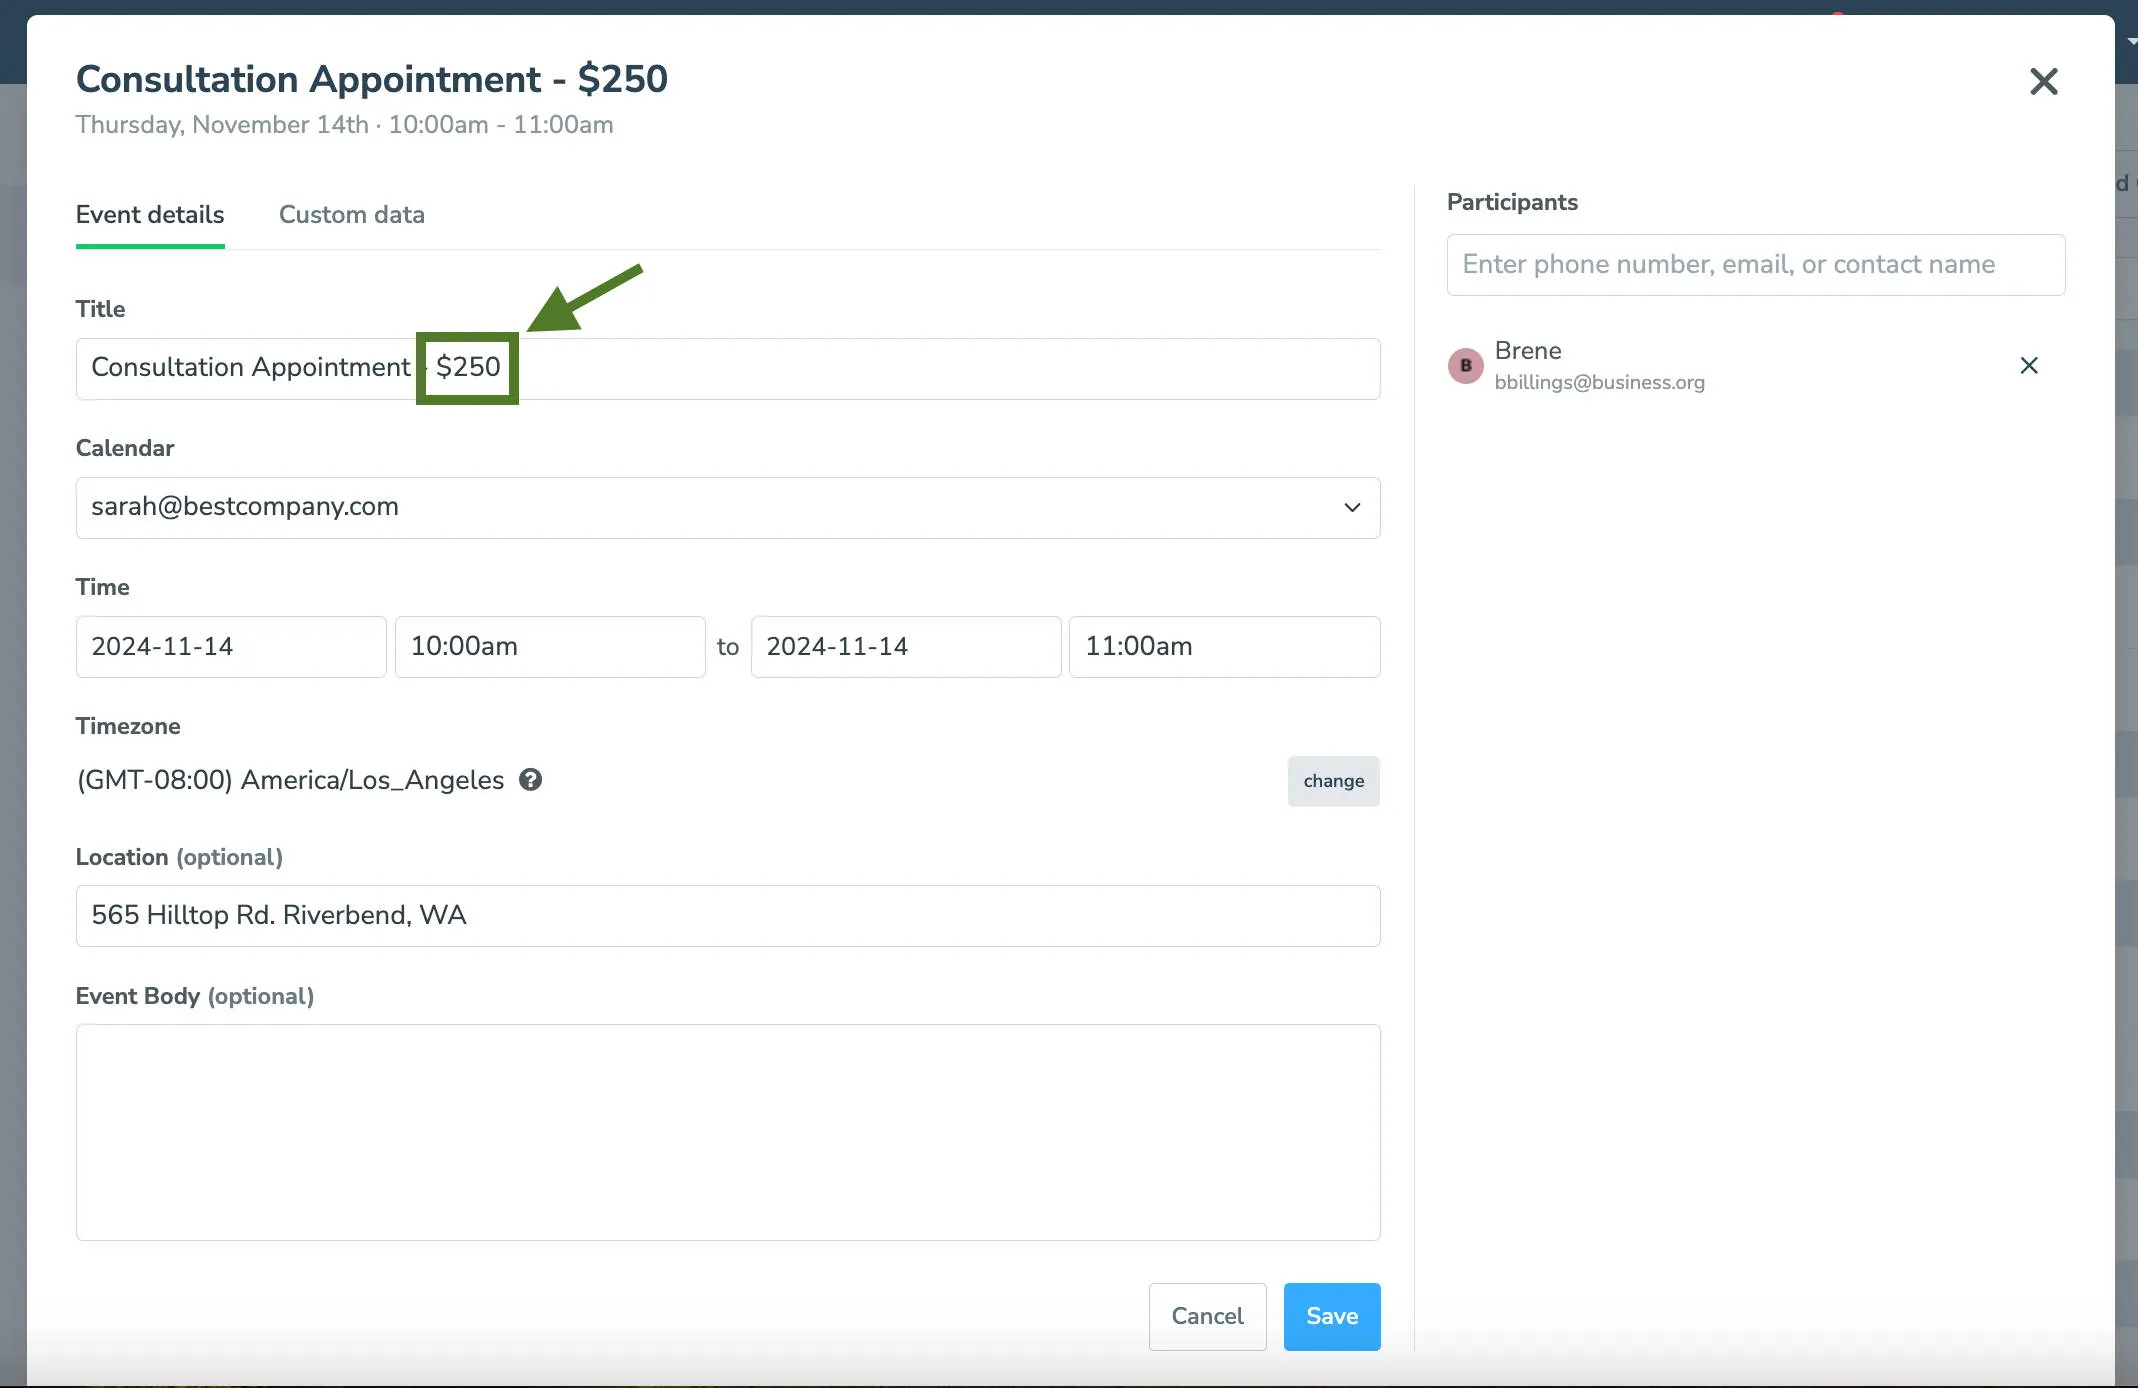
Section titled “Including the price in an event”If your appointments all have variable prices, you can put the price in the body of your appointment event instead and have Apptoto use that to charge your client or patient.
Turn the “Use price in event if one exists” option on. Apptoto will then look for the price using these methods (in order):
- A custom field called “price” (e.g. if the body of the event has ‘price: 25’ in it)
- Any $ amount found in the event title/location/body (e.g. $25.00 or $25)
Requesting Payments
Section titled “Requesting Payments”Requesting Payments Manually
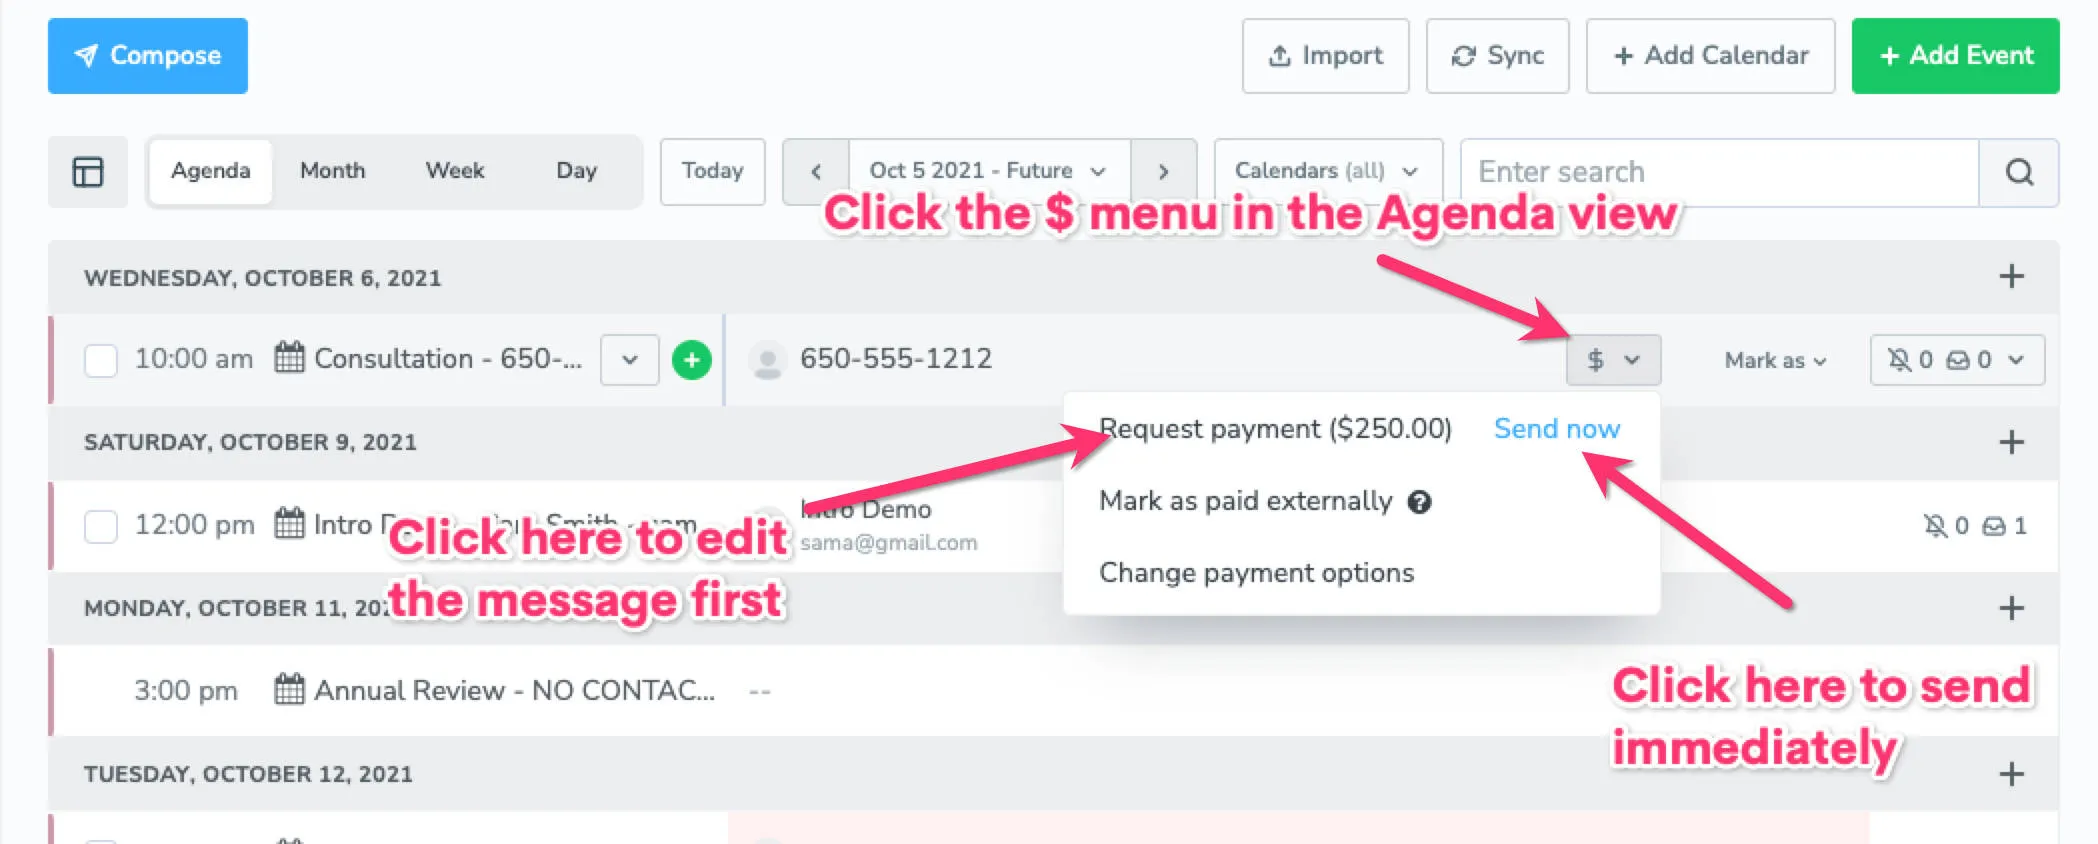
Section titled “Requesting Payments Manually”- Find the appointment on the Agenda view: Navigate to Appointments and locate the appointment. Look for the grey $ icon next to the participant’s name.
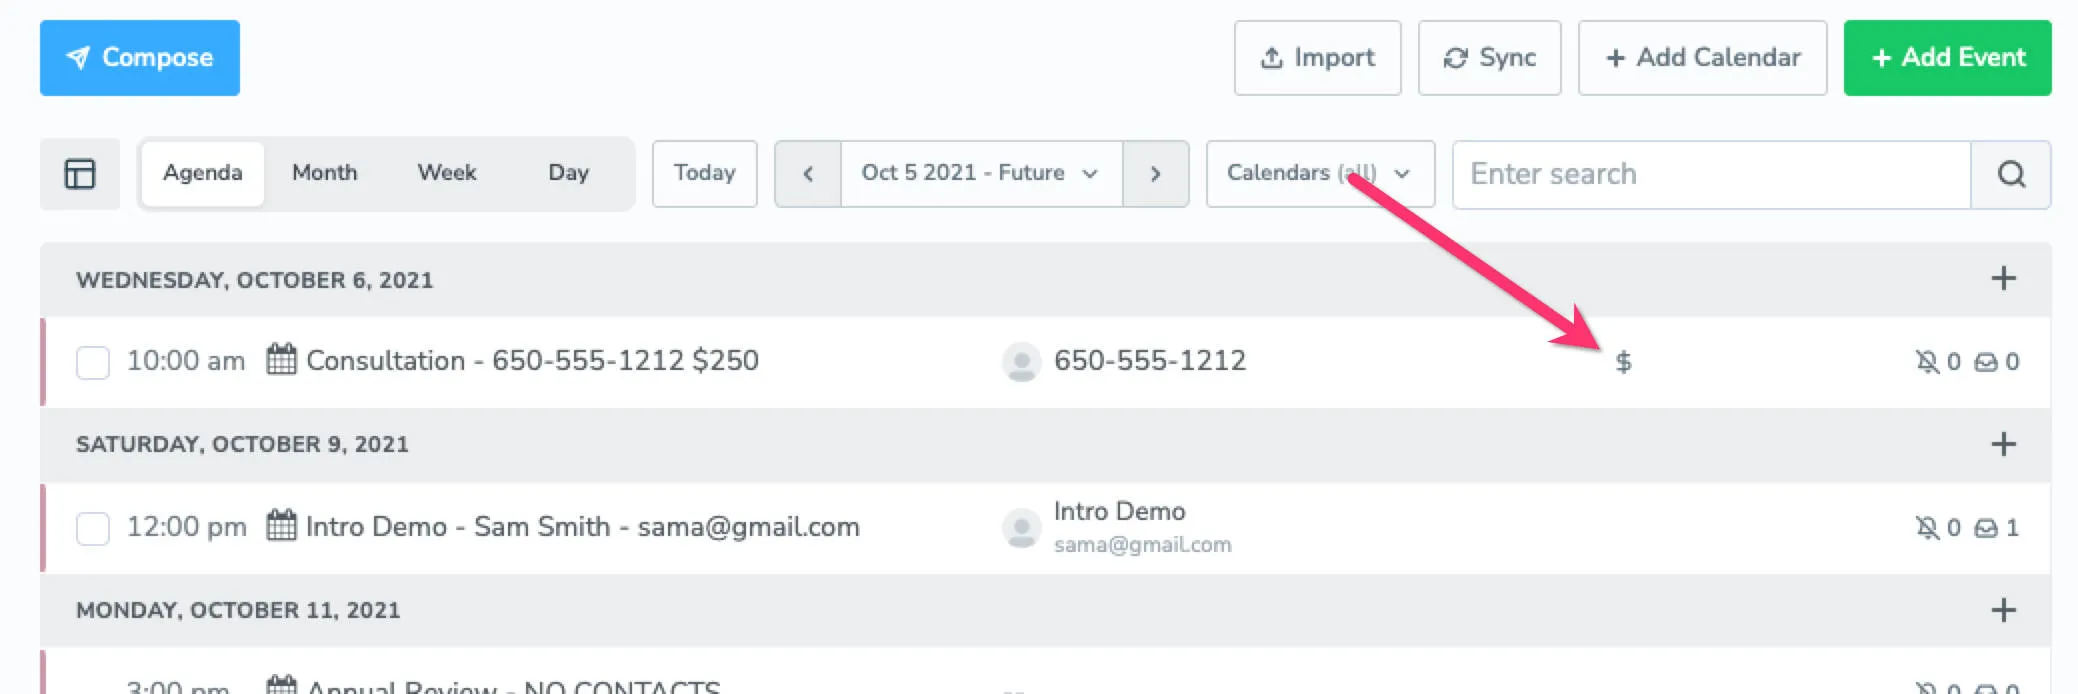
- Open the payment menu: Click the $ icon to open the payment actions menu.
- Send or edit the request:
- Click Send now to immediately send the default payment request message.
- Click Request Payment ($…) to preview and edit the message before sending.
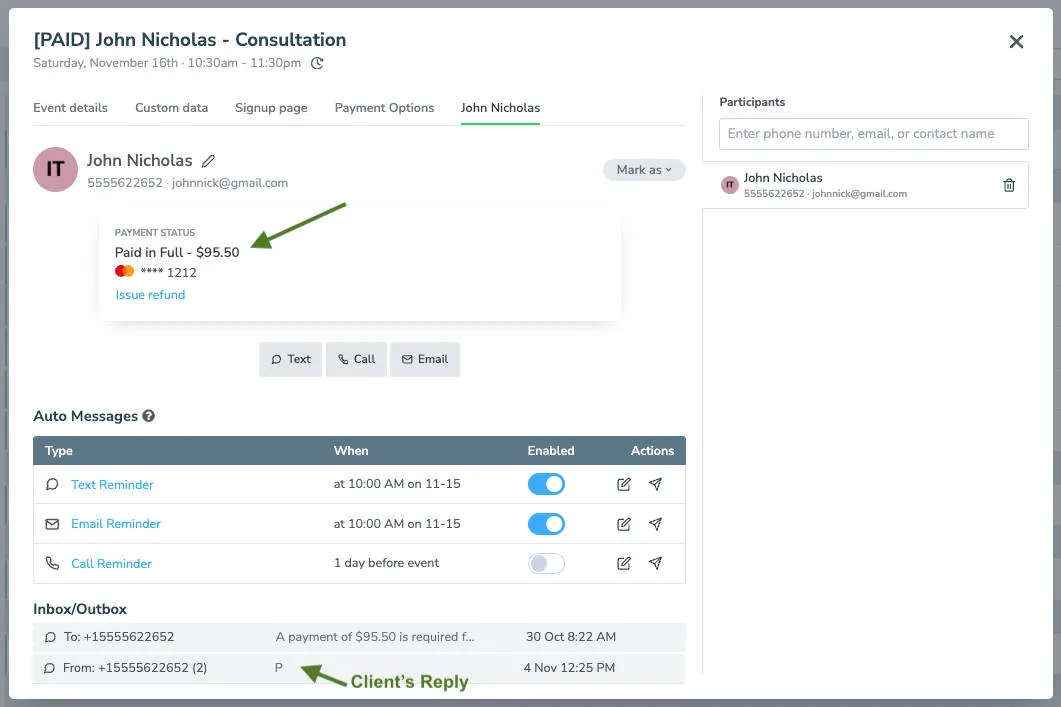
Once an appointment pays or completes the payment requirement (e.g., “Card Required”), the $ icon will turn green.
Collecting payments via the Appointment Page
Section titled “Collecting payments via the Appointment Page”By default, any appointment with an outstanding payment automatically shows a Pay Now button on the client-facing Appointment Page (the page included in reminder messages). Clients can pay directly from that link.
To remove the Pay Now button from Appointment Pages, enable Hide Payment Prompts under Settings > Appointment Page.

Requesting payments automatically using Auto Messages
Section titled “Requesting payments automatically using Auto Messages”You can use Auto Messages to send payment requests without manual intervention:
- Create an auto message rule: Navigate to Appointments > Appointment Auto Messages and create a new rule that targets appointments with a payment that is due. You can use the
payment.is_duefield for this purpose.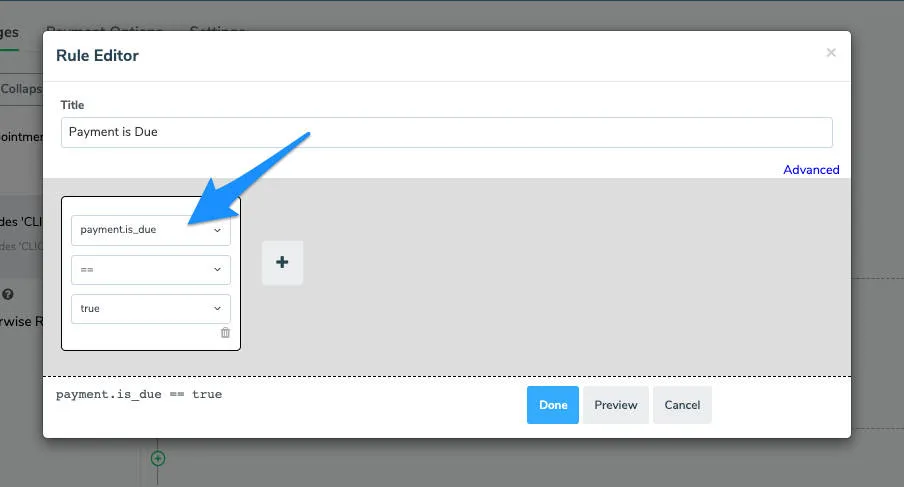
- Create a message and add payment prompt field: Once the rule is created, create a message in that rule to be sent that uses the
payment.promptfield (available under Insert Field > Payments > Prompt). You can add custom text around it.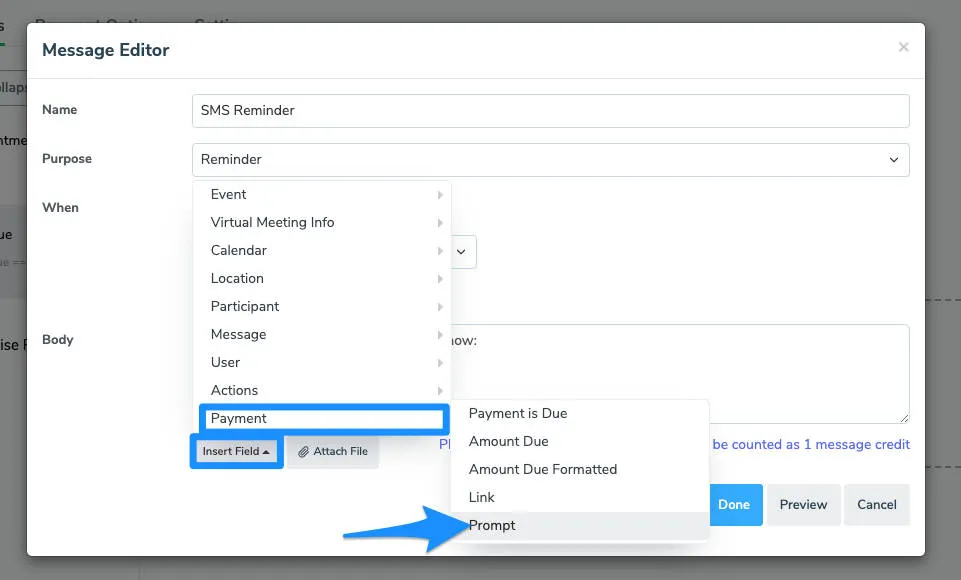
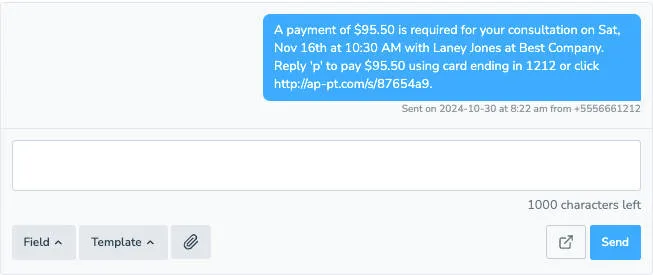
When sent, the payment.prompt will be replaced with the client’s or patient’s custom payment information and will look something like: “Reply ‘p’ to pay $95.50 using card ending in 1212 or click [link].”
When a client replies P, Apptoto processes the payment, marks the appointment as paid, and the $ icon turns green on the Appointments tab.