Participant Info
Overview
Section titled “Overview”The Participant Info column in the Agenda View shows the contact details for each participant in each appointment.
Adding Participants
Section titled “Adding Participants”To add a participant to an appointment, click the small ‘+’ button, which will be located on the last listed participant when hovering over their info.
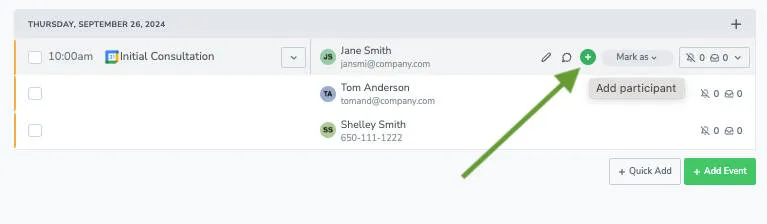
Whenever a participant is added to an appointment, there will be an accompanying icon to the left of the contact info to indicate the status of that contact.
![]()
| Icon | Meaning |
|---|---|
| Gray Silhouette | Indicates that the participant’s info has not been matched to an existing contact in your address book. |
| Initials/Picture | Indicates that the participant’s info has been matched to an existing contact in your address book. |
| White Silhouette | Indicates that the participant’s info was matched to an unnamed entry in your address book. |
| Yellow Warning Triangle | Indicates that a participant’s info is ambiguous and can be matched to multiple different existing contacts. |
Click this icon to display and choose possible matches

Outgoing messages & response color-coding
Section titled “Outgoing messages & response color-coding”Whenever Apptoto is scheduled to send a message to a participant, their info will be shown in bold text, and there will be a number next to the bell icon in the Messages column, indicating the number of messages set to go out.

Once a participant has responded to a reminder for their appointment, their contact information will change color to indicate their response:
- Green highlight: Indicates appointment state has changed, and the participant has confirmed.
- Red highlight: Indicates appointment state has changed, and participant has cancelled or requested rescheduling.
Hover actions
Section titled “Hover actions”Hovering over the participant info will bring up three action buttons for that participant; an edit button, a delete button, and the add button mentioned above.

- Pencil (edit) - Display event details and edit the contact’s information for editing, separated into Name, Phone Number, and Email fields
- Chat bubble - Display event details and a list of all the Auto Messages that the contact is set to receive. Send a one-off text, call, or email to the participant
- Green plus - Display the event details and allow you to add additional participants to the event
Clicking a participant
Section titled “Clicking a participant”Clicking the participant info opens the Participants section of the Appointment Editor, focused on that person’s information.