Creating and syncing Resources to your booking pages takes a few simple steps.
You have the option to specify which resources for each of your booking pages individually or set up resources at the account level (this is helpful if many booking pages share the same resources)
Creating Resources
Predefined Resources (Account-Level):
The new Settings > Resources page allows users to create resources at the account level. These are called “Predefined Resources.”
“Predefined Resources” are helpful if multiple booking pages need the same resources. By creating them at the account level, you won’t need to recreate and manage them on each booking page. This is also useful if you want to “share” the resource with others in your Apptoto Group Account.
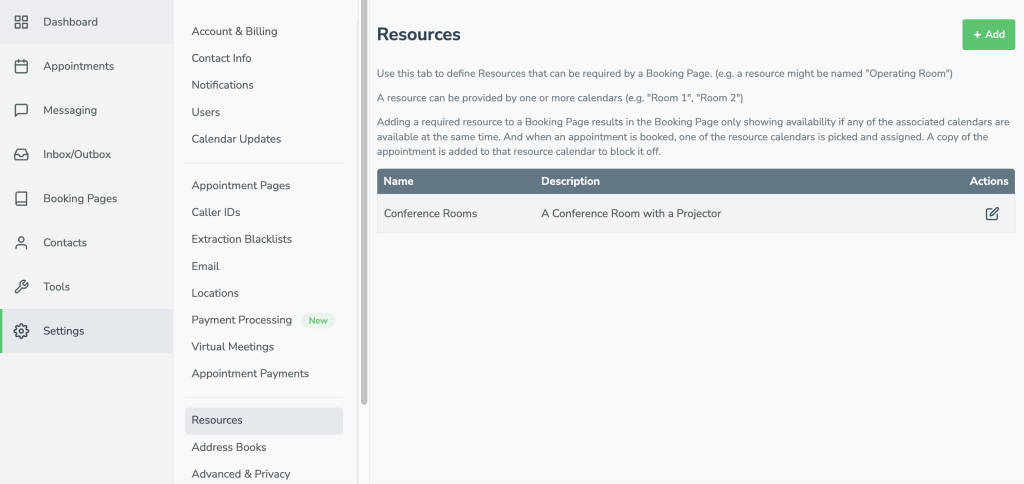
- After you’ve navigated to Settings > Resources tab, click “+Add” in the upper right-hand corner.
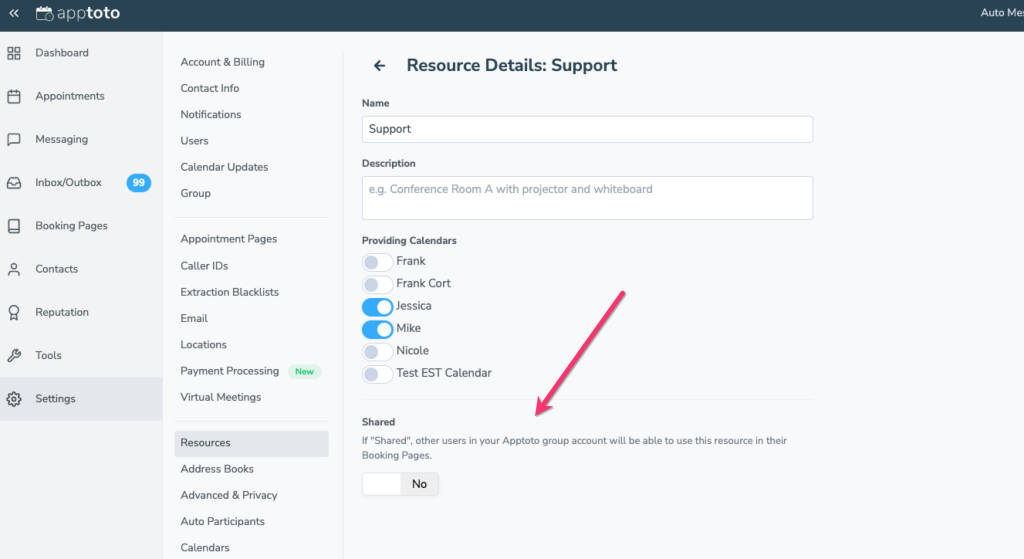
- Give the resource a name and a description (optional) that helps describe what the resource is
- “Providing Calendars” are the calendars you want Apptoto to check for availability before displaying time slots on a booking page. Turn the toggle on for the calendars you want synced to this resource. Click “Save.”
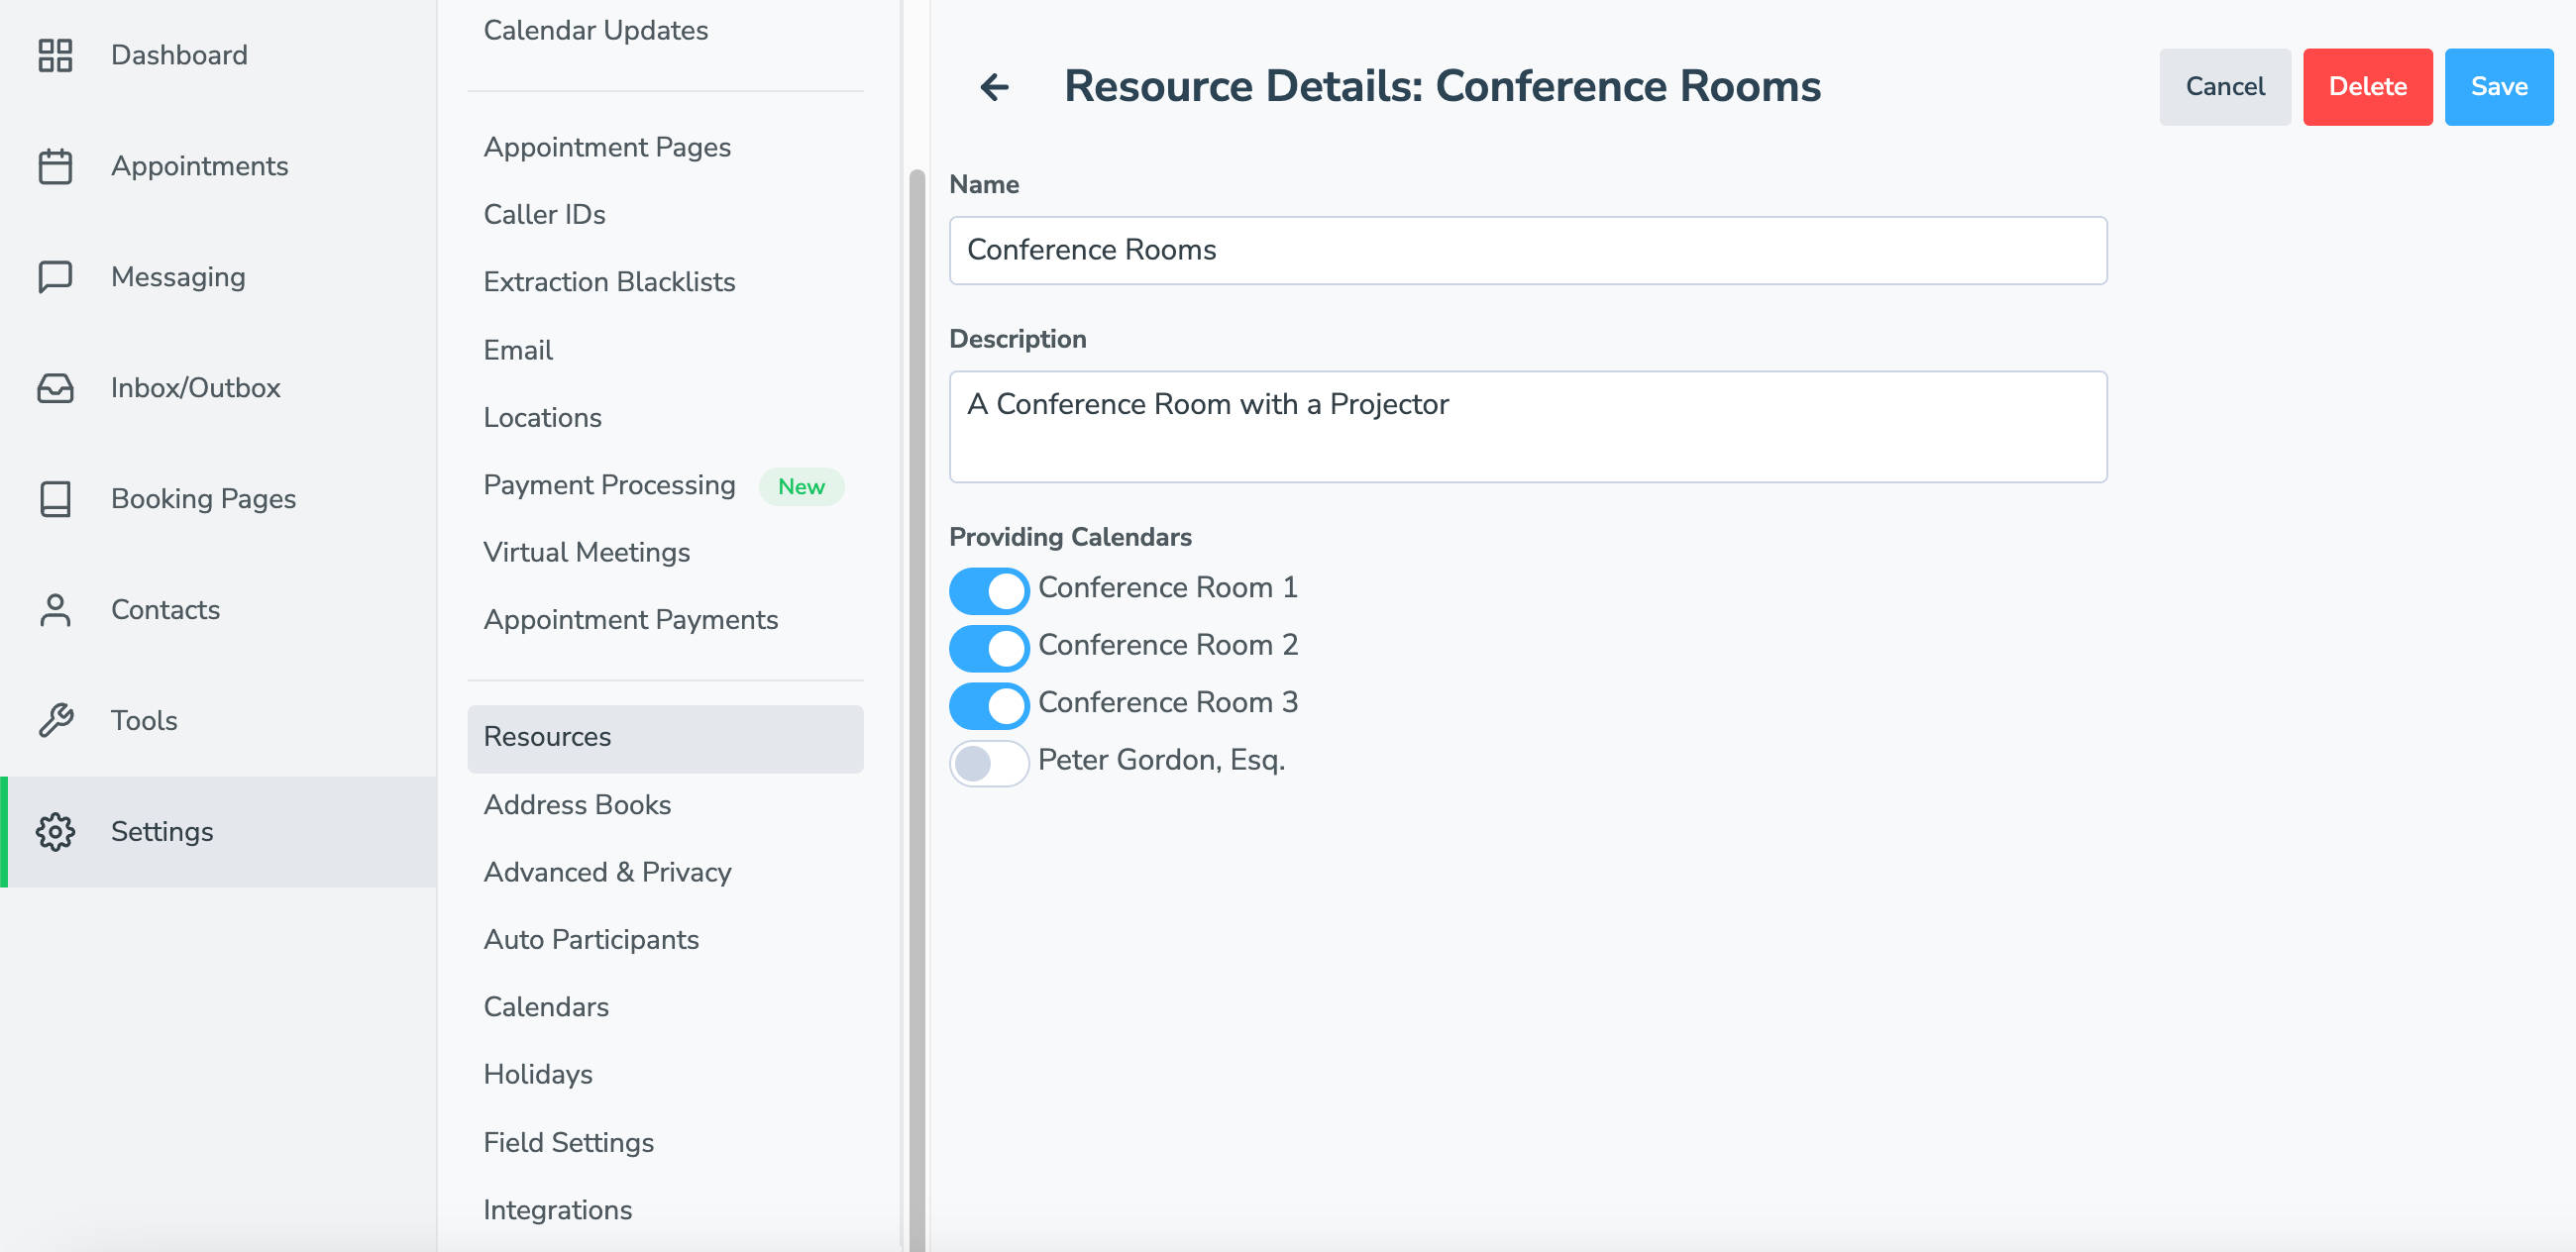
- Repeat the process as needed to create additional resources
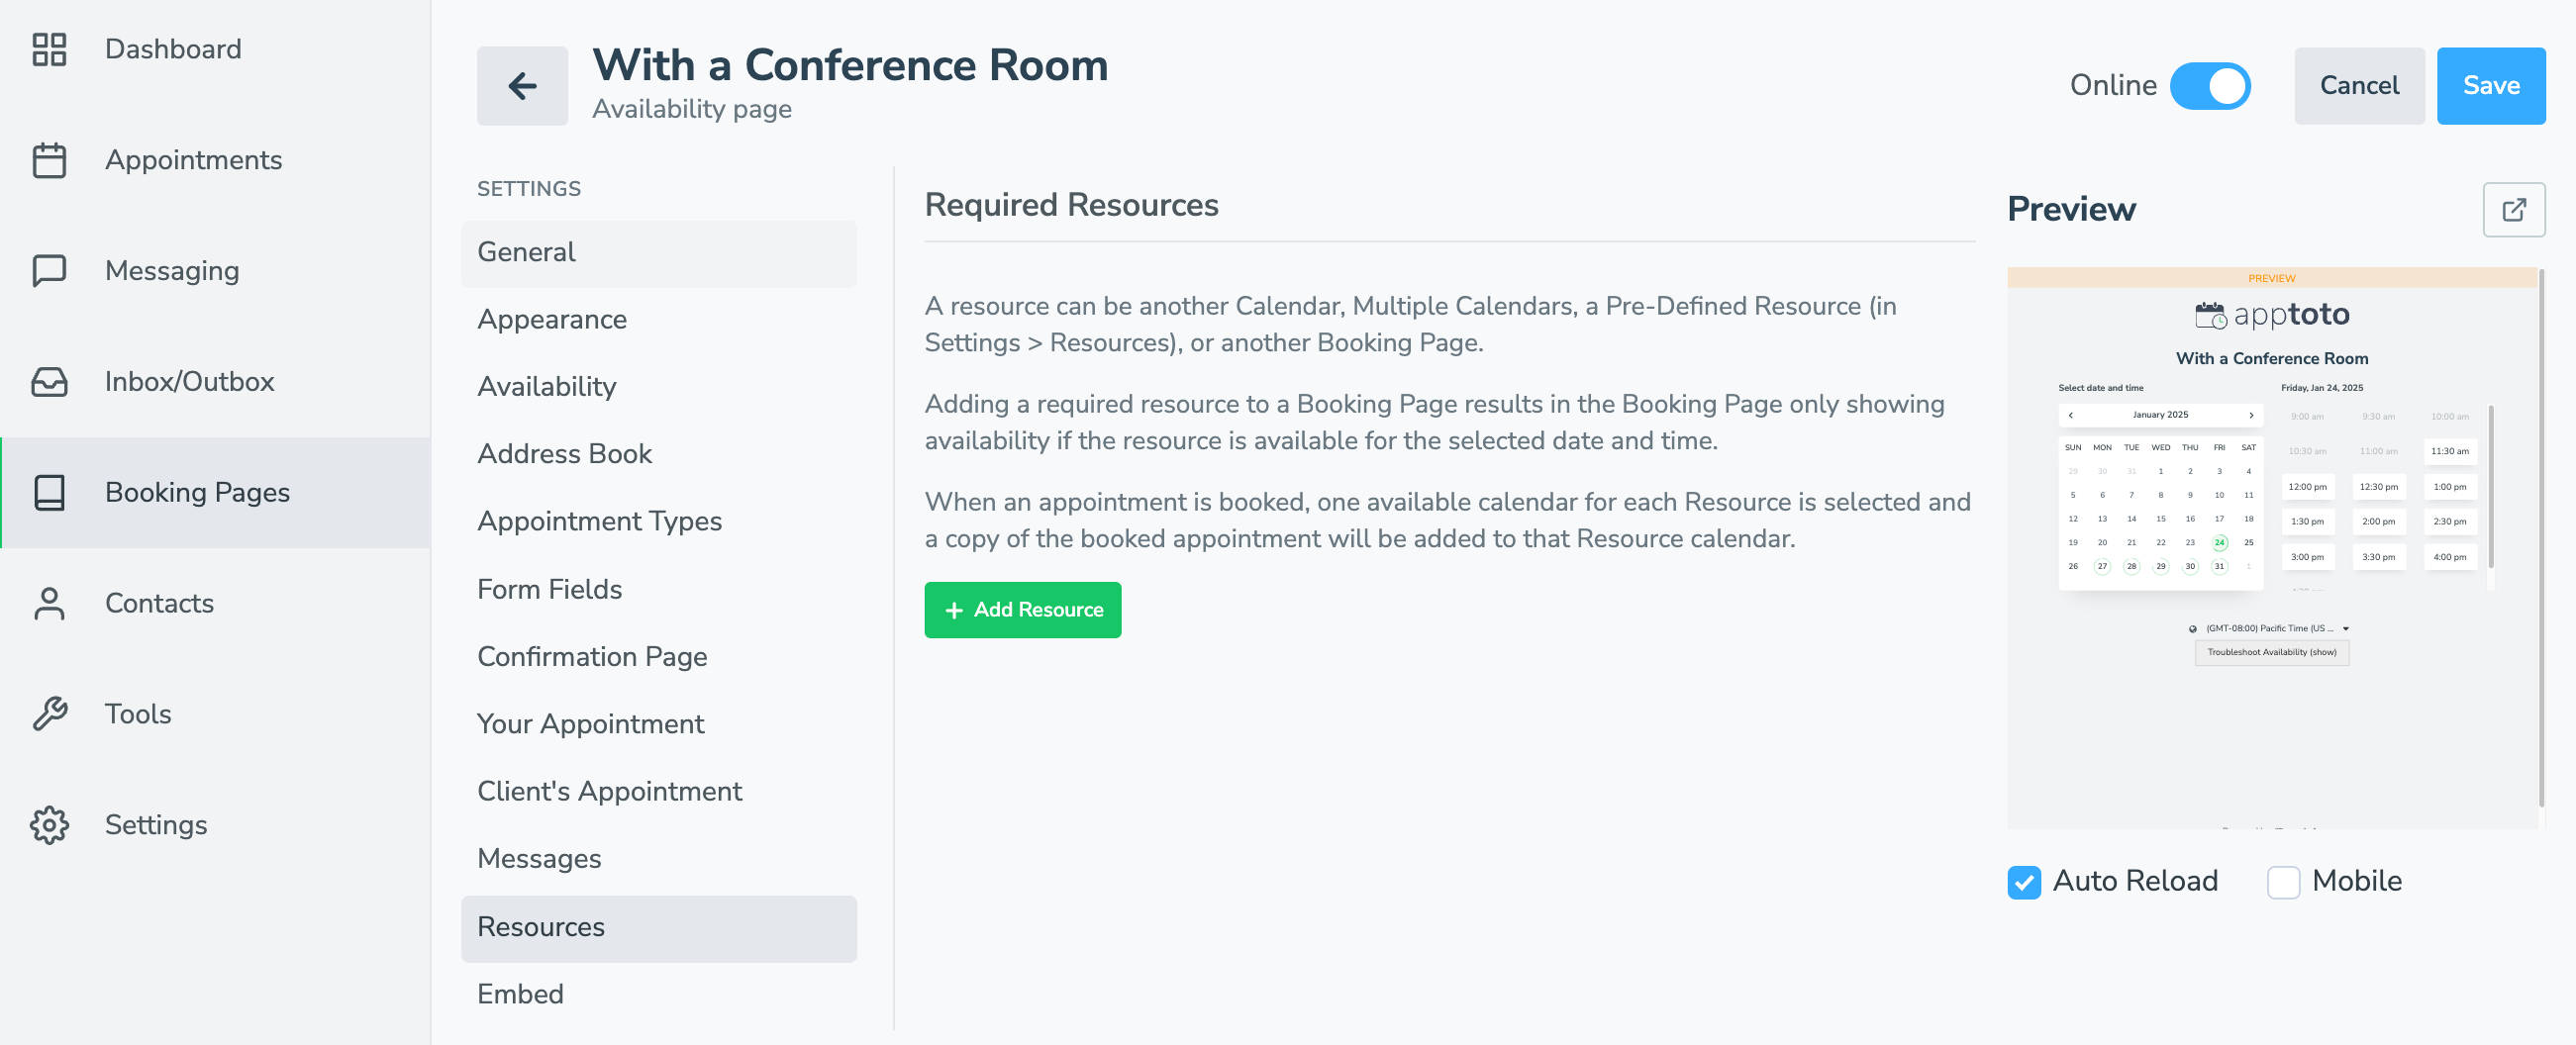
- Navigate to the “Booking Pages” tab, and click the booking page you want to update.
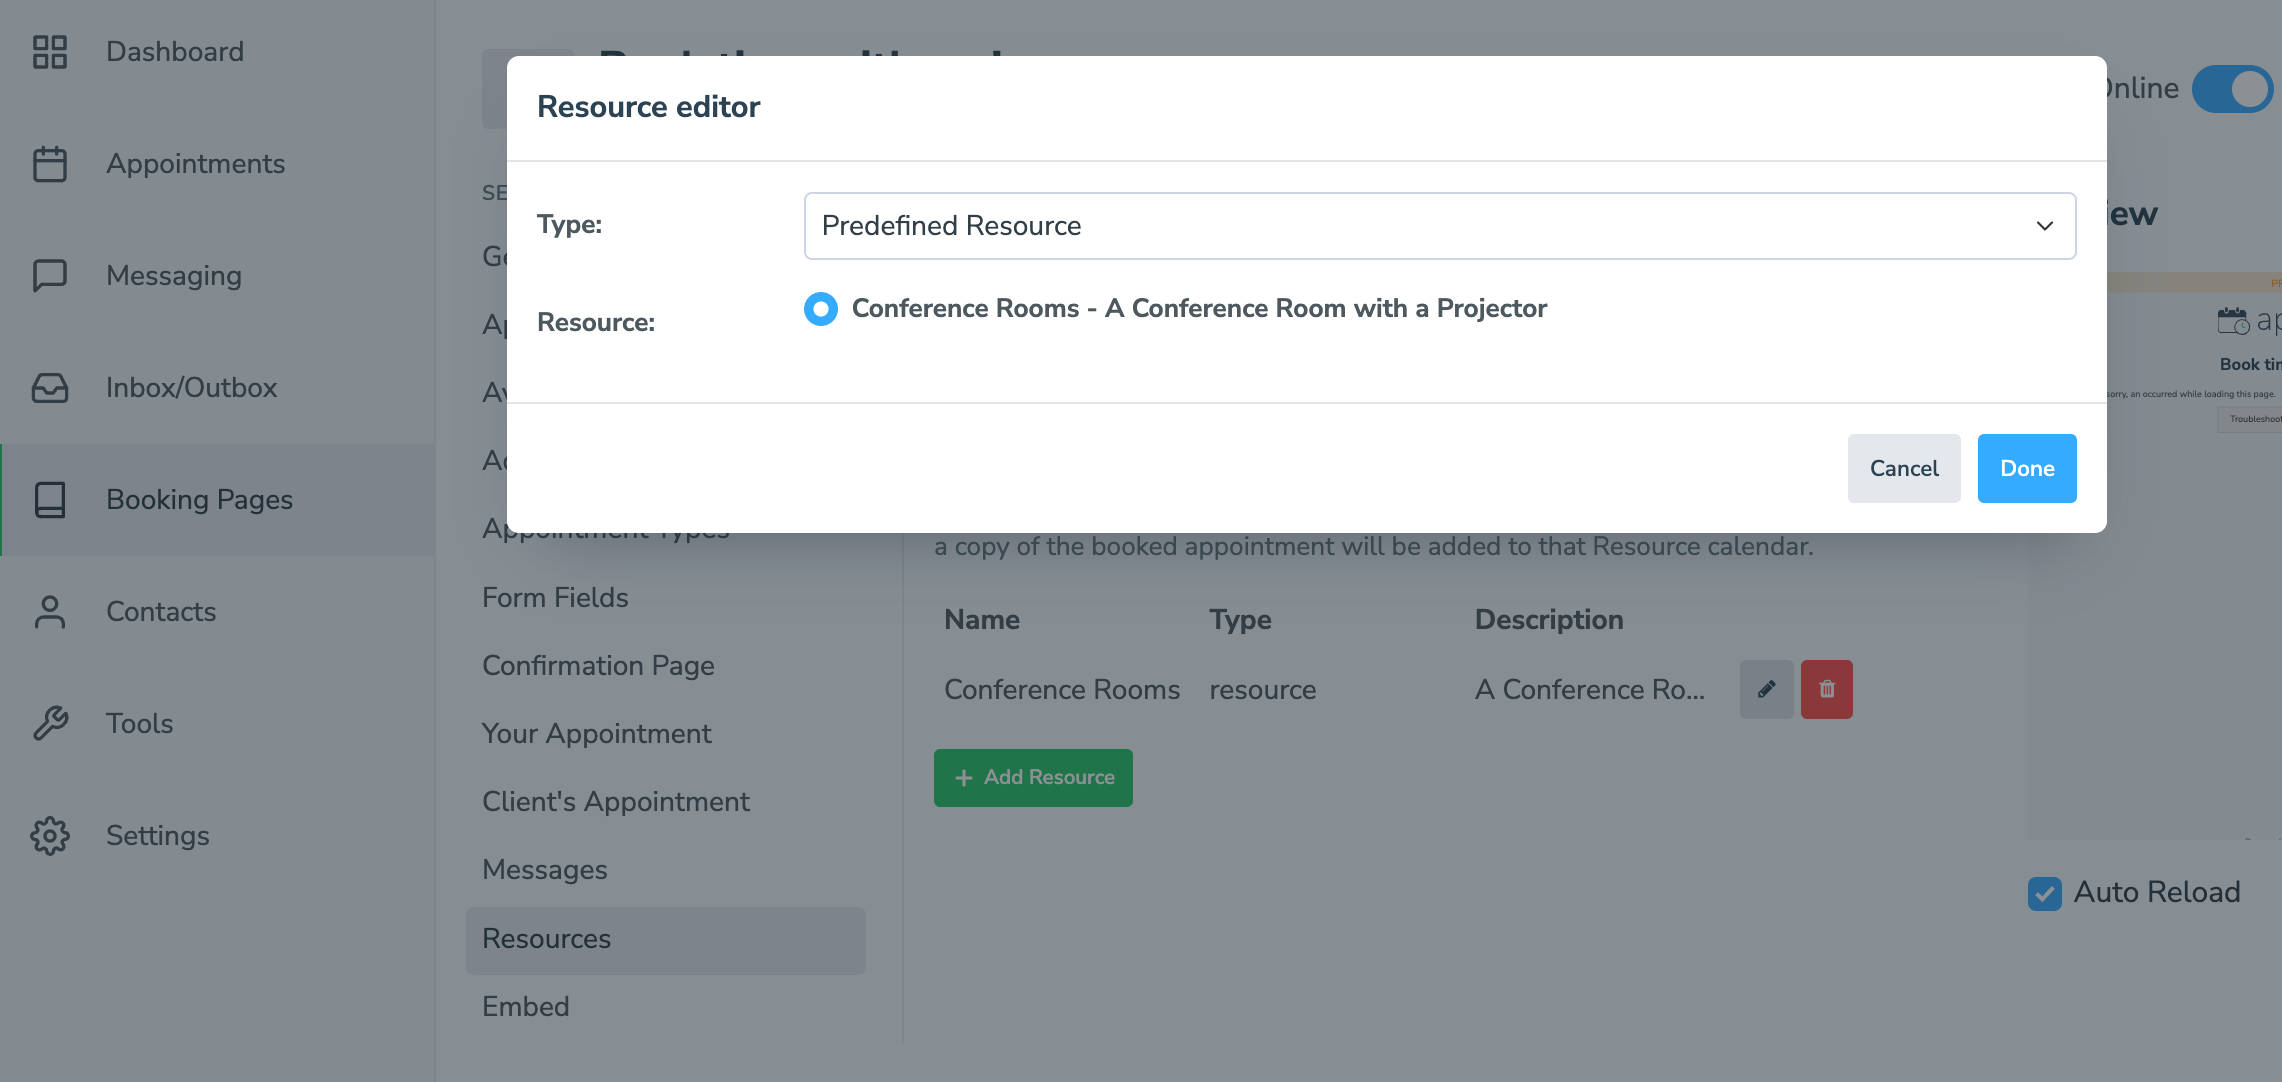
- Click the “Resources” tab, then “+Add Resource.”
- On the “Resource Editor” screen, leave Type set to “Predefined Resources.”
- Select the radio button for the resource you want to add to the booking page, then click “Done.”
- Repeat steps 6-8 if you want to add more resources.
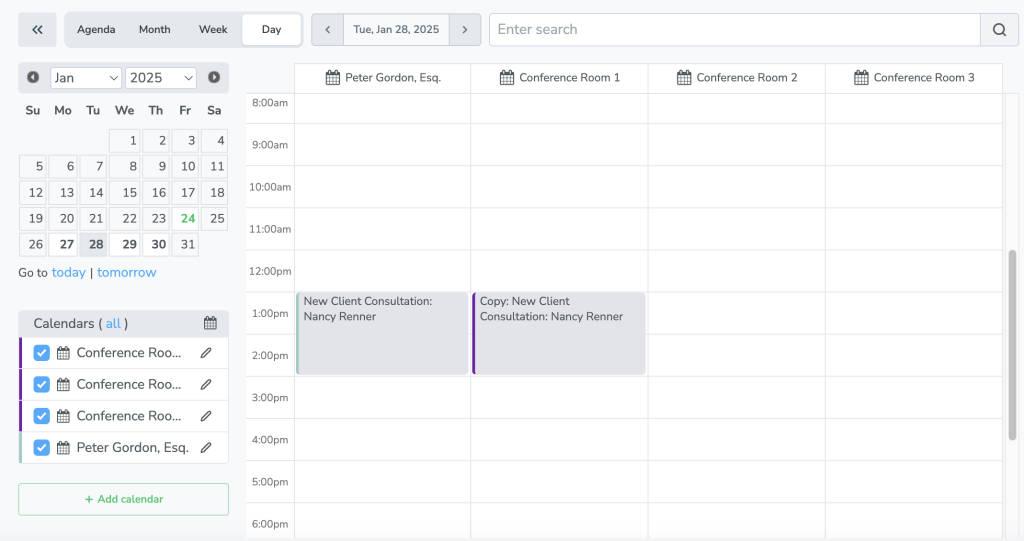
When a client books a time on the booking page, Apptoto will schedule an appointment, assign a resource, and add a copy of the appointment to the assigned resource calendar to prevent double bookings.
Booking Page Resource
If you don’t want to create/use account-level resources, do not use the process above. Instead, set which resources each booking page requires on the “Resources” tab under the booking page settings. Skip steps 1 through 4 above.
- Navigate to the “Booking Pages” tab, and click the booking page you want to update.
- Click the “Resources” tab, then “+Add Resource.”
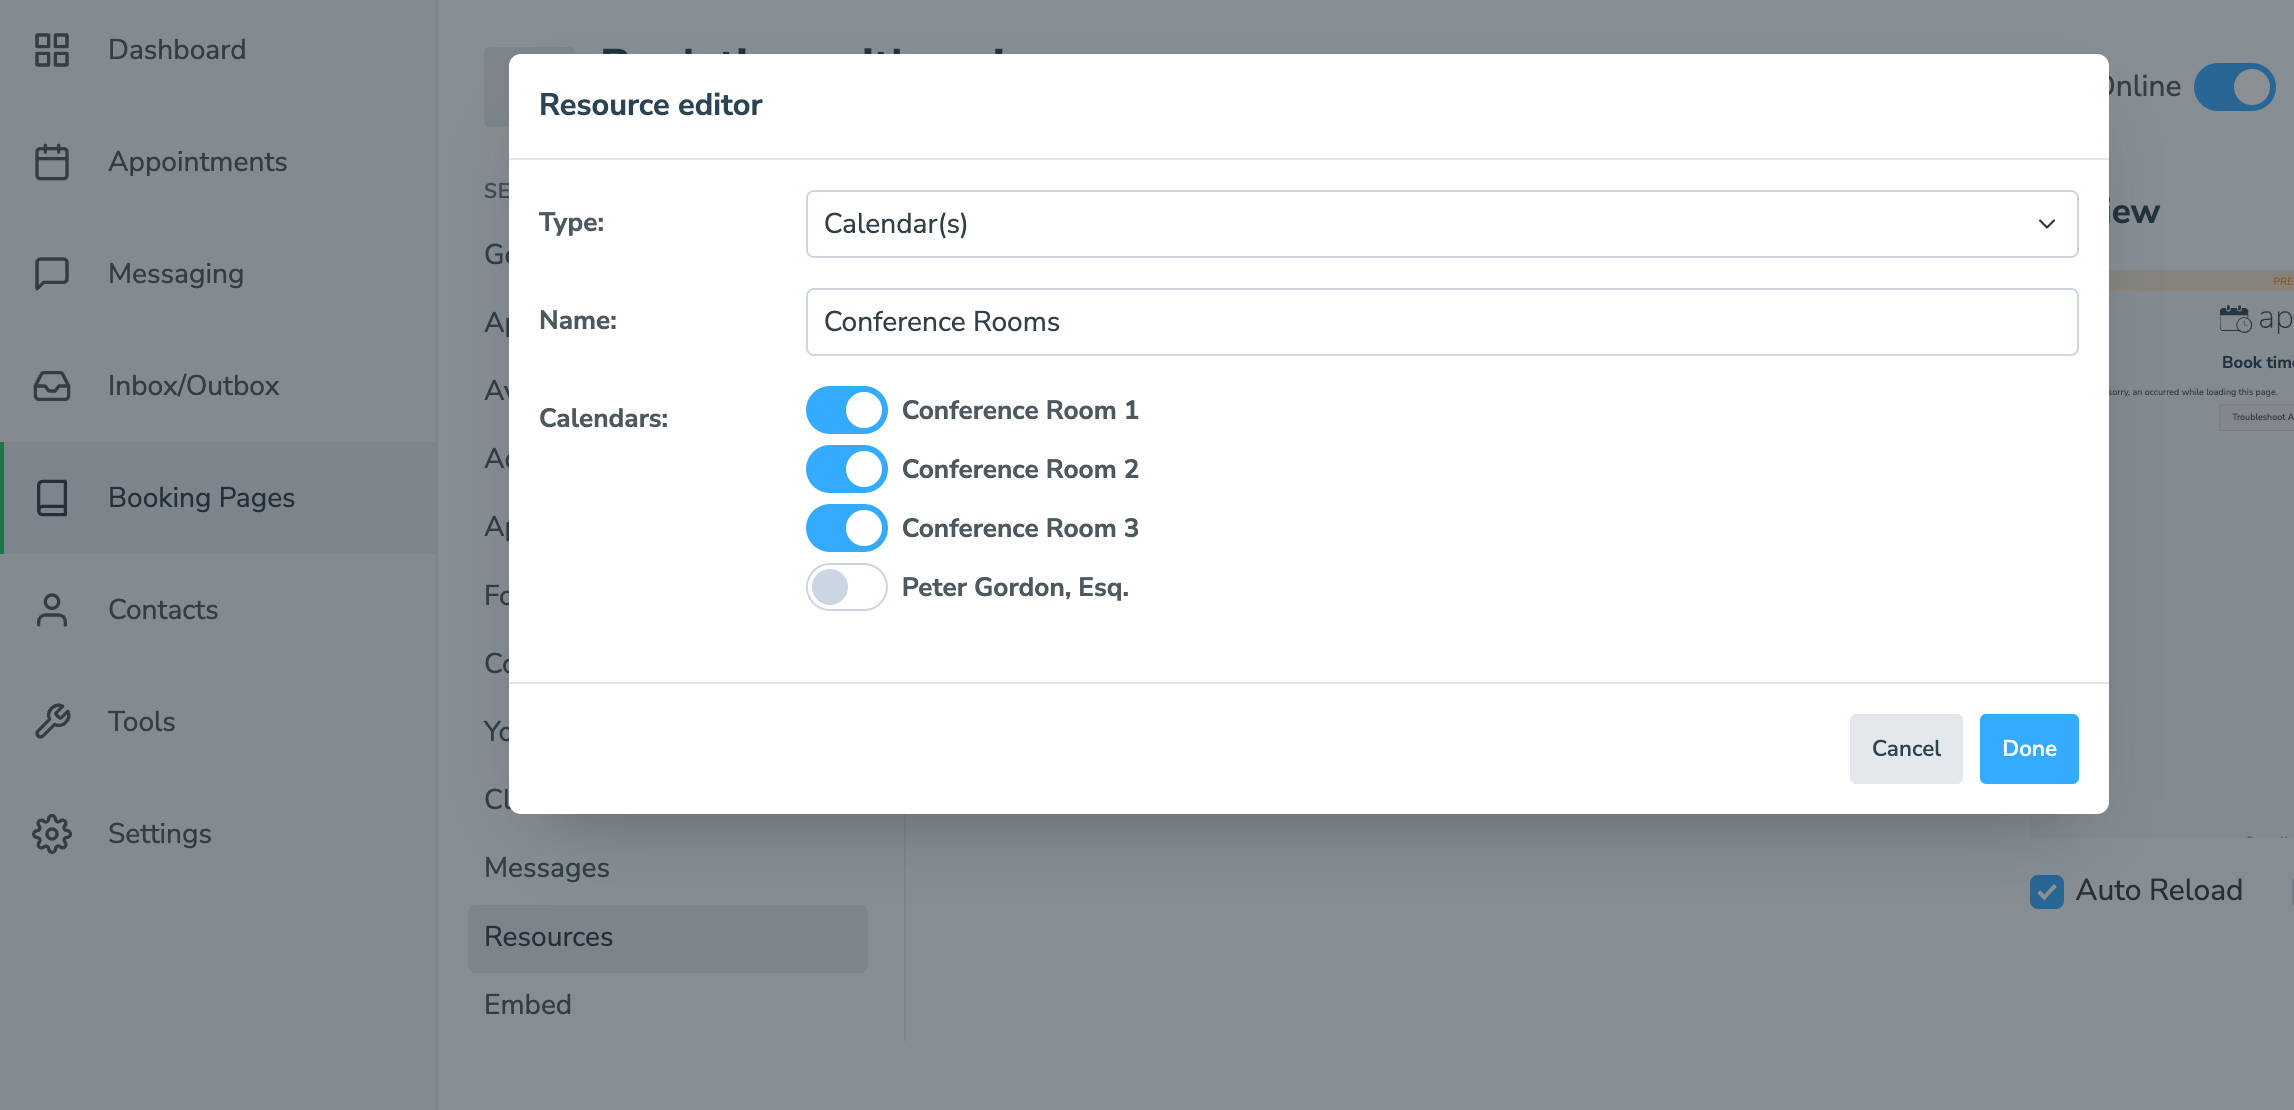
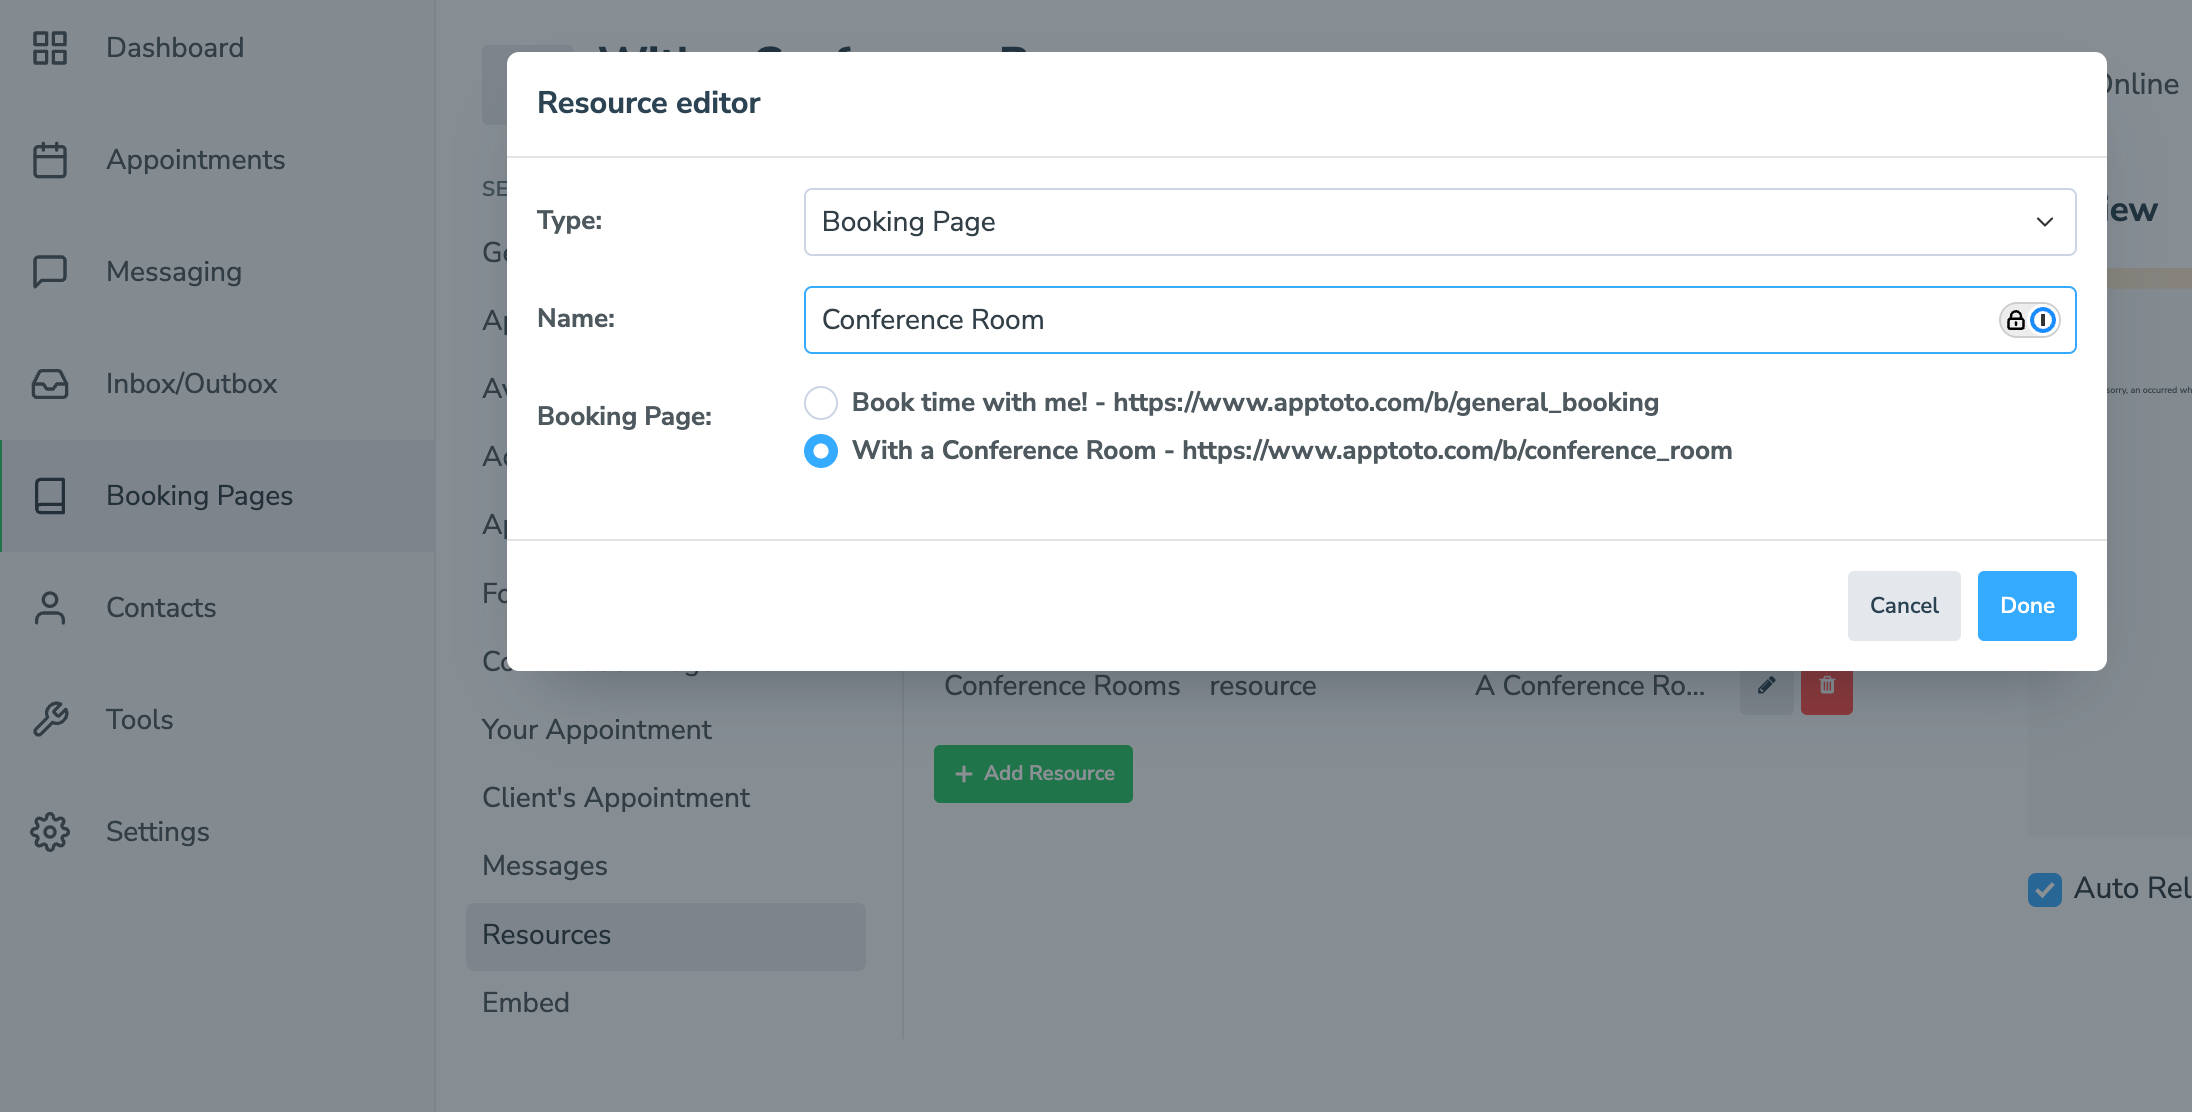
- On the “Resource Editor” screen, set Type to either “Calendar” or “Booking Page.”
- If you select “Calendar,” give the resource a name and then toggle on the calendars you want to sync to it.
- If you select “Booking Page,” give the resource a name and then select the Booking Pages you want to sync to this resource. Click “Done.”
- If you select “Calendar,” give the resource a name and then toggle on the calendars you want to sync to it.
- Repeat as needed to add additional resources.
Sharing Resources – Group Accounts
Setting up “predefined” (or account-level) resources allows you to share resources with all the users in your Apptoto account. But what if you want to share resources across multiple group accounts? It’s absolutely possible!
Businesses with group accounts have a primary Apptoto account. But, instead of having all staff use the primary account, each team member uses their own personal Apptoto account linked to the company.
When setting up predefined resources (Settings > Resources), you’ll now see a Shared” section underneath the “Providing Calendars.” Simply toggle the “Shared” section to share your resource with other group members.
Troubleshooting Resource Availability
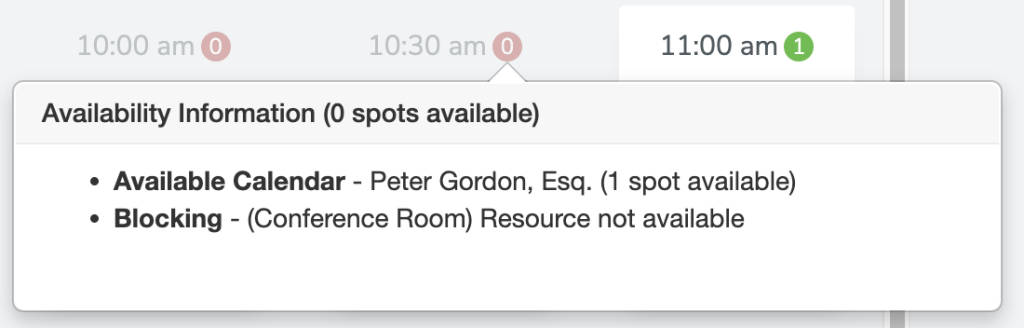
Before a client or patient can book, Apptoto will consult the calendar owner’s availability and resource availability to determine if appointment slots are open. If a time is blocked off because of a resource issue, you will see some new notes when using the troubleshooting availability tool.
“Resource Not Available” means the appointment is blocked off during that time. You will be unable to see the specific reason the appointment is blocked. But there are numerous reasons why this might occur (another appointment is booked at the same time, the resource is closed/down for maintenance, the resource is completely blocked for that day, etc.).
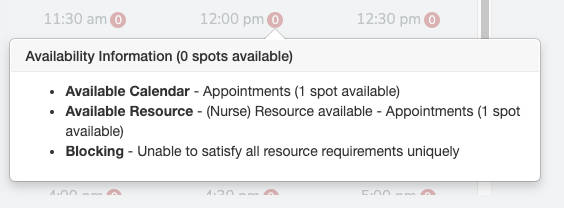
The “Unable to satisfy all resource requirements uniquely” issue happens when Apptoto can’t figure out a way to assign all the required resources to different providing calendars.
For example, booking an appointment might require two resources (Room 1 and Room 2). However, if only Room 2 is available, the appointment cannot be booked.
Similarly, let’s say you have a calendar called “Appointments” on which all appointments are booked. You created a Nurse resource that uses the “Appointments” calendar as well. The appointment cannot be booked because the primary and resource calendars are identical.
Refer to our Common Appointment Availability Issues article for more insight into availability issues.
What Happens After a Client/Patient Books
How the Booking Appears on Apptoto’s Appointments Tab
A new appointment booking will be made once a client or patient finds a time when the calendar owner and the required resources are available.
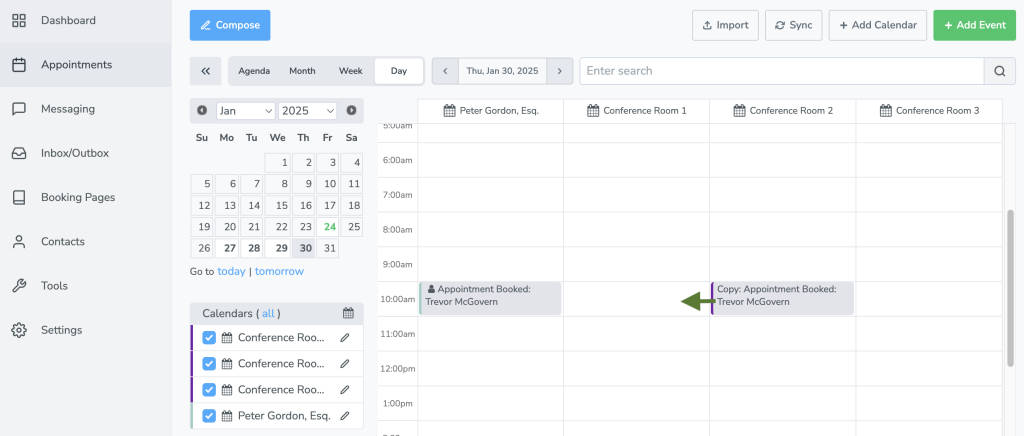
A booking will be placed on the calendar owner’s calendar. A copy of the appointment will also be placed on one calendar for each required resource.
The copy is created for two reasons:
- To show the owner of that calendar that the appointment was created
- To block off the availability of each required resource.
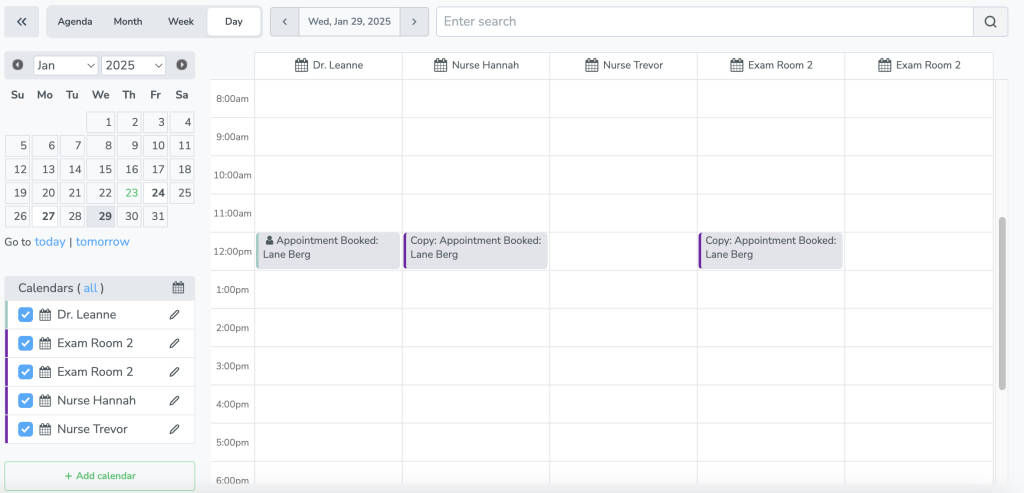
In the example below, an appointment is booked on Dr. Leanne’s calendar with a patient, Lane Berg. A room and a nurse resource are also assigned at the time of booking. A copy of the booking is placed on Nurse Hannah’s schedule and on Exam Room 2.
Using Fields in Booking Confirmations and Appointment Messages
You can add “Resources” fields to booking confirmations and messages your team members and clients receive if you choose to. This gives team members and/or clients/patients insight into the resources assigned to their appointments.
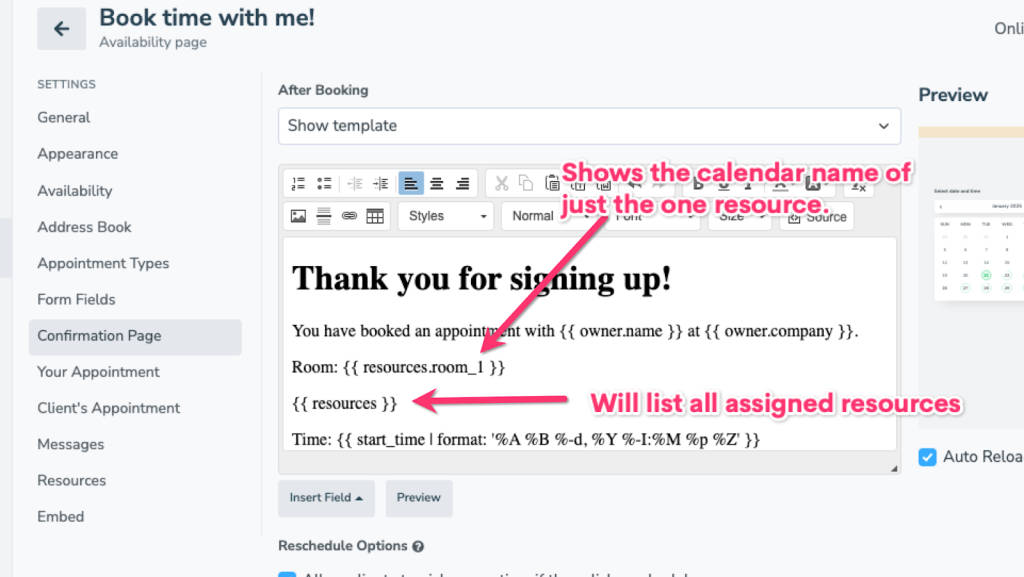
Using {{resources}} will list all the assigned resources on your confirmation page or in your email or SMS message. For example, the confirmation page would look like:

If you use {{resources.resource_name}} instead, you can control which resources you want to show in the message.
For example, if you have an “Exam Room” resource and a “Nurse Schedule” resource, but you only want your patient to see the nurse they will be working with, you would include something like “Nurse: {{ resources.nurse_schedule }}” but leave out the exam_room resource.
The confirmation page would look like:

Changing Resources after they are Assigned
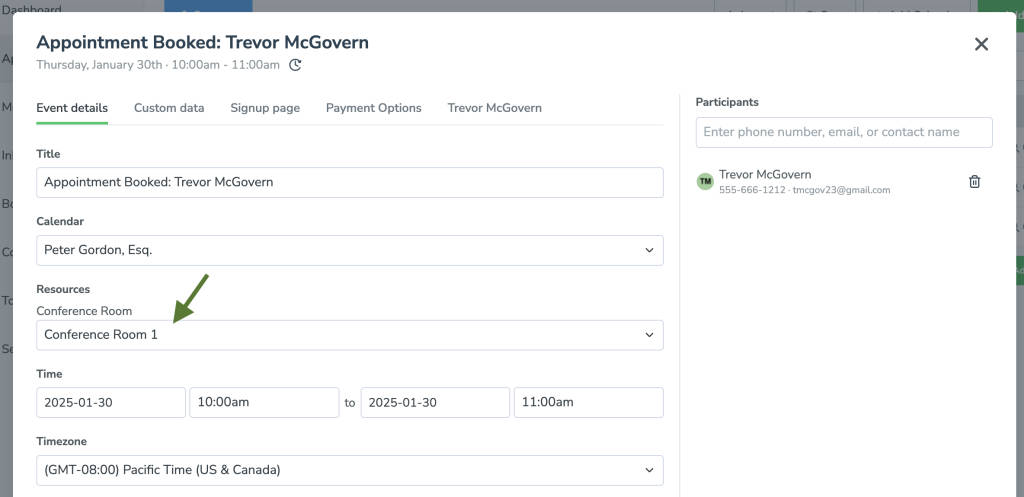
It is possible to change an assigned resource for an appointment in the Event Editor. For example, let’s say an appointment is booked in Room 2, but you need to move it to Room 1.
To do so, click on the appointment you wish to update and find the “Resources” drop-down. Select the new resource (“Room 1”) to assign the appointment.
You can also move the appointment in Apptoto via your Appointments tab or on a source calendar that supports “moving” (e.g., Google or Salesforce))
Apptoto will do its best to update the resource in the event body to reflect the change.

IMPORTANT: Changing a resource manually in the event body WILL NOT change the resource assigned. You must use the Resources drop-down. (i.e., if you edit the event body and change “Conference Room: Room 2” to “Conference Room: Room 1”, Apptoto will not pick up on that and move the copy of the appointment to Room 1).
Rescheduling an Appointment
When an appointment with resources is rescheduled, Apptoto deletes the original appointment and creates a new one (as opposed to simply moving it). This ensures that resources are properly reallocated for the rescheduled appointment.