Estimated reading time: 10 minutes
You’ve just set up your Apptoto booking page, and appointments are rolling in.
While this is a great problem to have, you realize you need to keep your team updated about all these new bookings. So, how do you keep your team in the loop and ensure they know what to do next without creating bottlenecks or confusion?
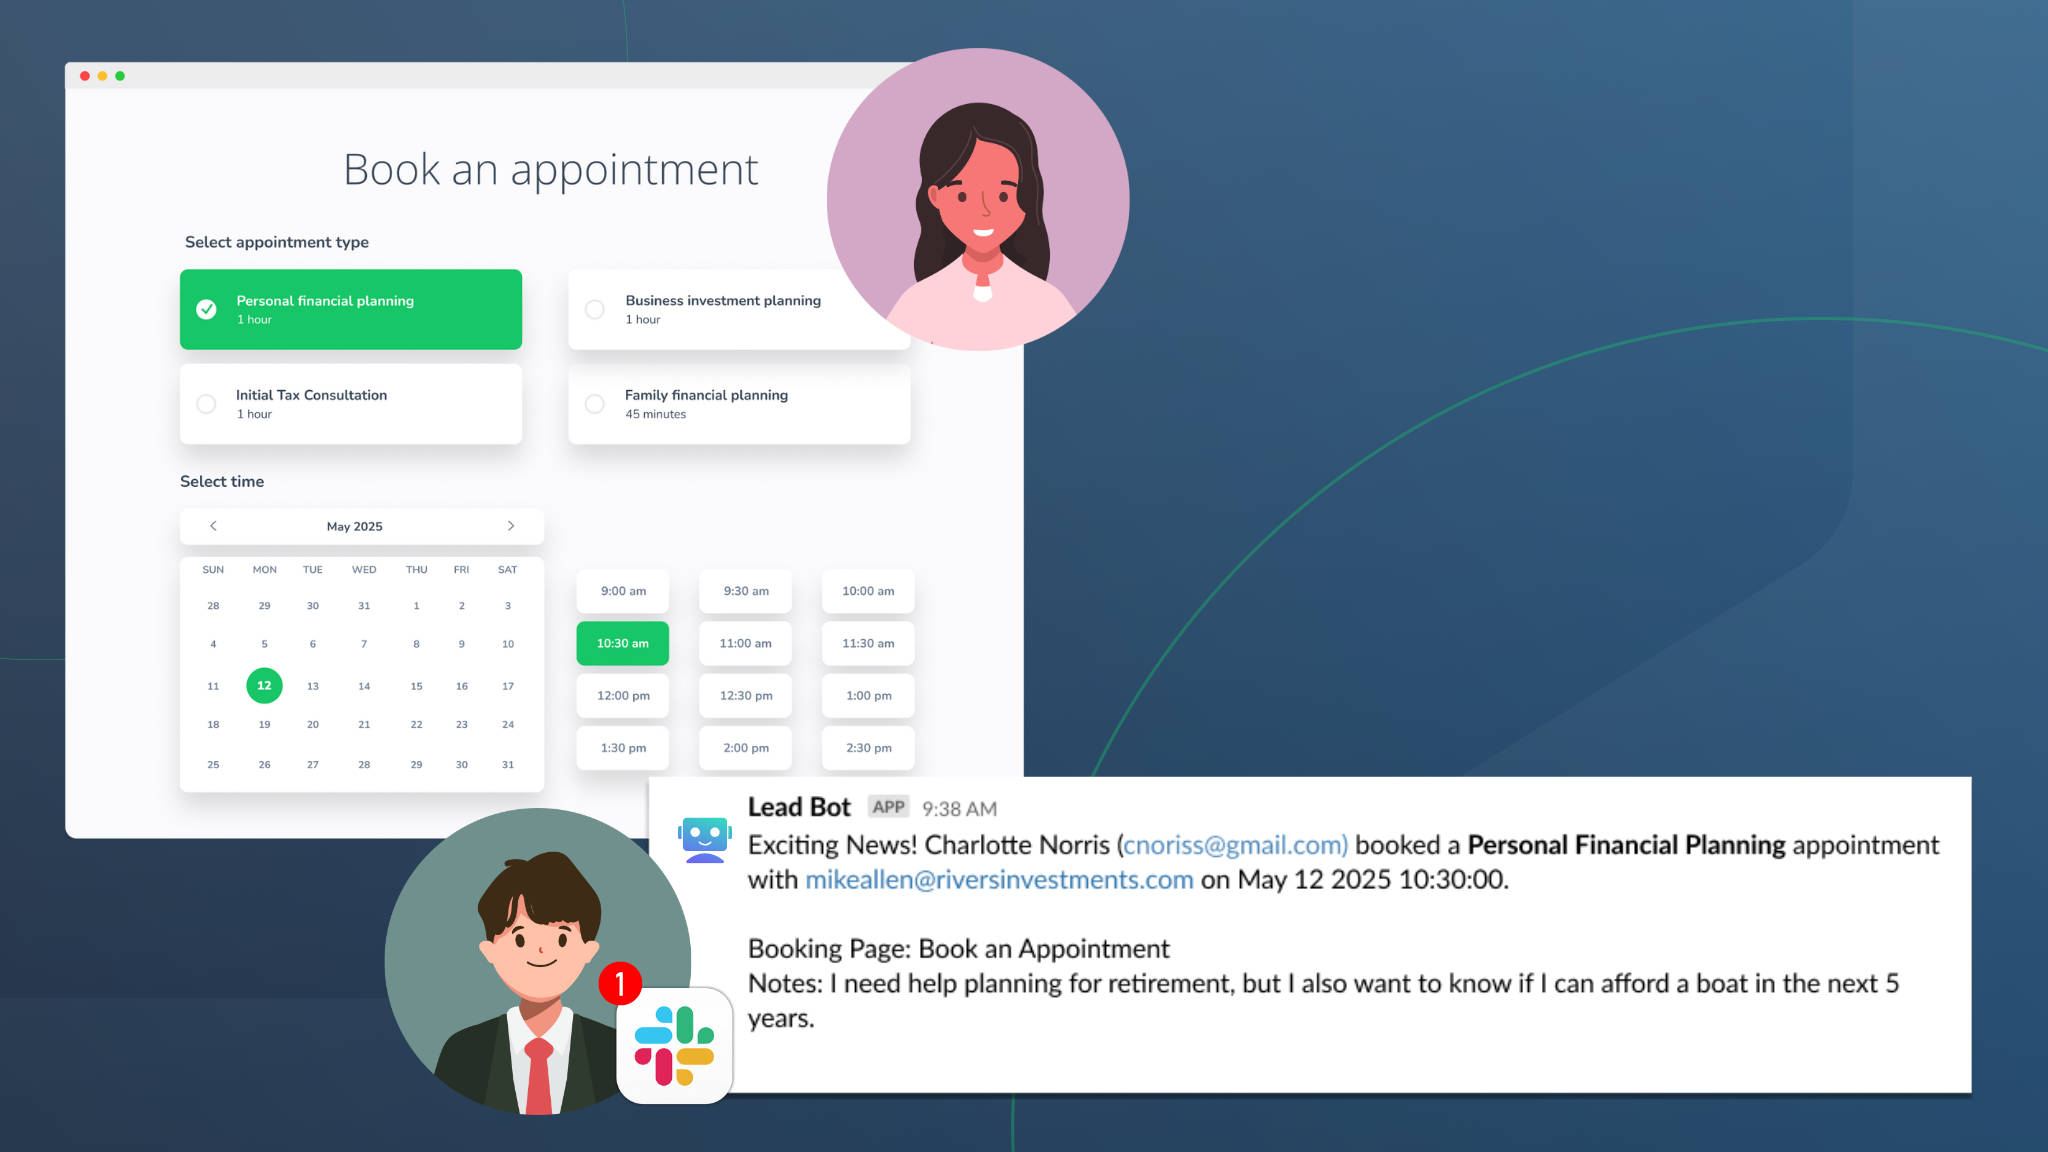
What if you could instantly notify your team of new bookings by sending real-time notifications directly to a Slack channel? This way, everyone knows when a new appointment is booked and can check out key details they may need to prepare. Whether you’re booking appointments with long-time clients, scheduling demos with new leads, or attracting new webinar registrants, there’s no more guessing or missed opportunities.
In our latest Automation Recipe, you’ll learn how to send new appointment booking alerts straight to Slack. You keep your team aligned and ready to act, and every potential or current client gets the attention they deserve.
What This Automation Does
This automation recipe shows you how to:
- Integrate Apptoto with Zapier and Slack
- Automatically send new bookings to a designated Slack channel
- Customize Slack messages with booking details, such as client name, time, and appointment type
Industries
Real-time appointment notifications in Slack are ideal for fast-paced, communication-driven teams across various industries.
Best for: Legal practices, healthcare providers, consulting businesses, sales and marketing teams, and customer support/success teams (really, any company that thrives on instant collaboration).
What You’ll Need
- Apptoto account
- Active Apptoto booking page
- Zapier
- Slack
Instructions
- Log in to Apptoto and navigate to “Settings” > “Integrations” > “API Keys”
- Copy your existing API key, or click “+Add API Key” to create a new API key to use for Zapier.

Trigger a Zap for Every New Appointment Booking
- Log in to Zapier. Click “+Create” then “Zaps.”
- Click your Zap Trigger, and select “Apptoto” from the apps list.

- Set up your first Zap step using the form that appears.
- The App field should now show “Apptoto.”
- Set the “Trigger Event” to “Appointment Scheduled.”
- Click “Sign In” in the Account field.

- Enter your Apptoto email and the API key you copied in step two. Then click “Yes Continue to Apptoto.”
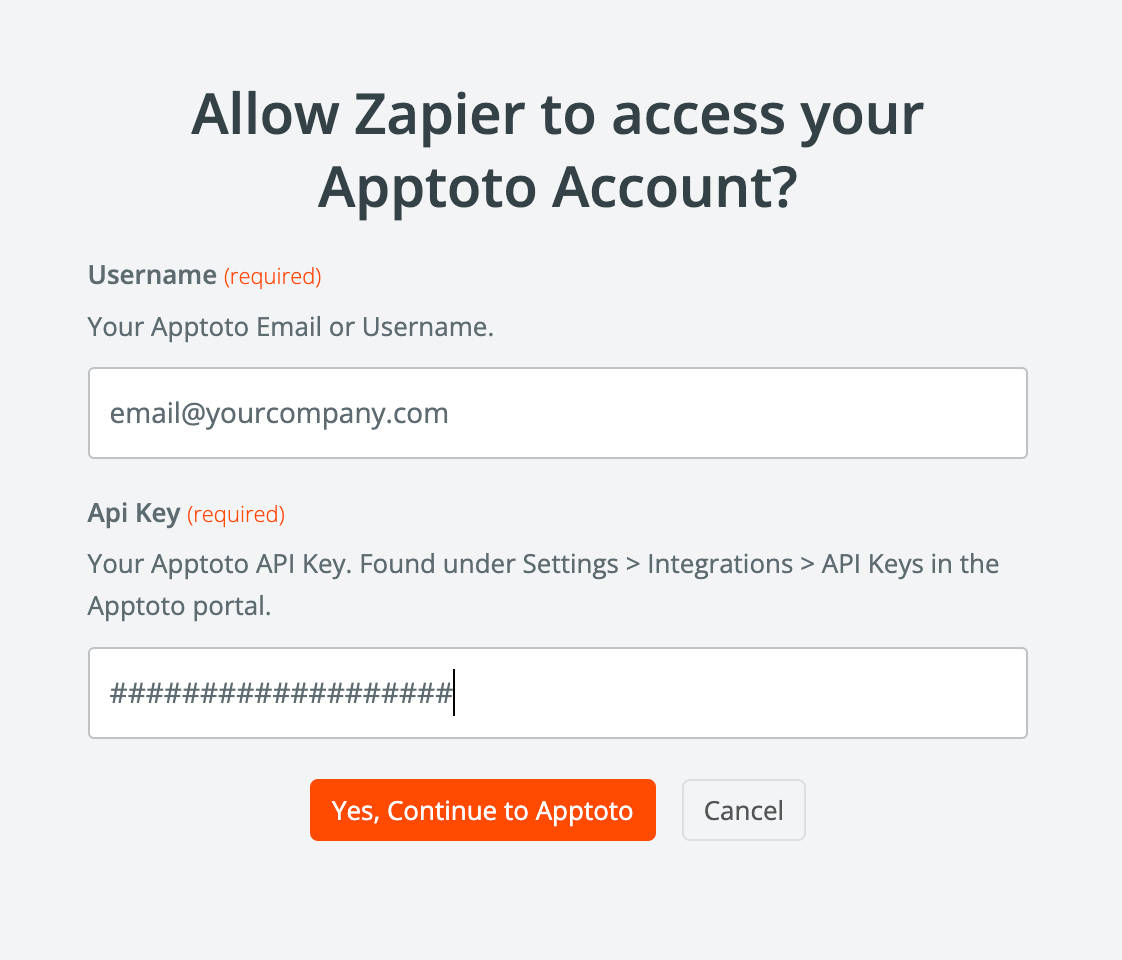
- Navigate back to Zapier. Click “Continue.”

- Click “Test Trigger.”
- If the details are correct, click “Continue with selected record.”
- Zapier will display recent appointment bookings made via your Apptoto account. Select an appointment to review its details.

Update the Appointment Event
- Click the Action step directly below your Trigger event. Once again, select “Apptoto” from the Apps list.
- Set the “Action event” to “Create or Update Event.” (The name of the step will default to “2. Create or Update Event”). Click “Continue.”

- On the Configuration tab, click the + button for the “Event ID” field. Find and click on “Event ID” to add it to the field.
- Do not set any additional fields.

- Do not set any additional fields.
- Click “Continue” and then “Test step.” A “Data out” tab will appear on the “Create or Update Event” configuration screen. Make sure the event details match the appointment in Apptoto.

Reformat the Appointment Start Time
- Add another step to your Zap by clicking the + sign below Step “2. Create or Update Event.”

- Search and select “Formatter” from the Apps list.
- Set your “Action event” to “Date / Time.” Then click “Continue.”

- On the Configuration tab, click “Transform” and select “Format” from the list of available options.
- Click the + button for the “Input” field. Click “2. Create or Update Event” and then “Event Start Time.”

- Click the “To Format” field and select “MMMM DD YYYY HH:mm:ss.”
- Click the “To Timzone” field and select your timezone. Then click “Continue.”

- Click “Test Step” to make sure Zapier reformats your appointment time from this: 2024-11-22T14:00:00-08:00 to this: November 22 2024 14:00:00.

Send Your Appointment Booking Notification to Slack
- Add the final step to your Zap by clicking the + sign below Step “3. Date/Time.”
- Choose “Slack” from the list of Apps.
- Set “Action event” to “Send Channel Message.” Click “Continue.”
- Click “Sign In” to log in to your Slack account. Enter any needed credentials and grant Zapier permissions to access your Slack workplace.

- On the Configuration screen, click “Pick a Channel” to choose which Slack channel will receive notifications about new appointment bookings.
- Enter the “Message Text” you wish to appear in Slack for new appointments. Use the + button to add dynamic fields that insert information about each unique appointment. We recommend including:
- Booking Page Name = title of your booking page
- Booking Request Appointment Type Token = appointment type (if more than one appointment type is bookable on your page)
- Contact Email = email of the person who booked an appointment
- Output = date of appointment
- Calendar Name = name of calendar appointment was booked on
- Field Data Notes = Add anything entered into the “Notes” field on your booking page to the Zap

- Adjust any additional settings you’d like Zapier to utilize when sending your Slack appointment notification (e.g., bot name, include link to zap, etc.)
- Clicking “Continue” will take you to the last Test step. Click “Test Step” to push your appointment booking notification to Slack.
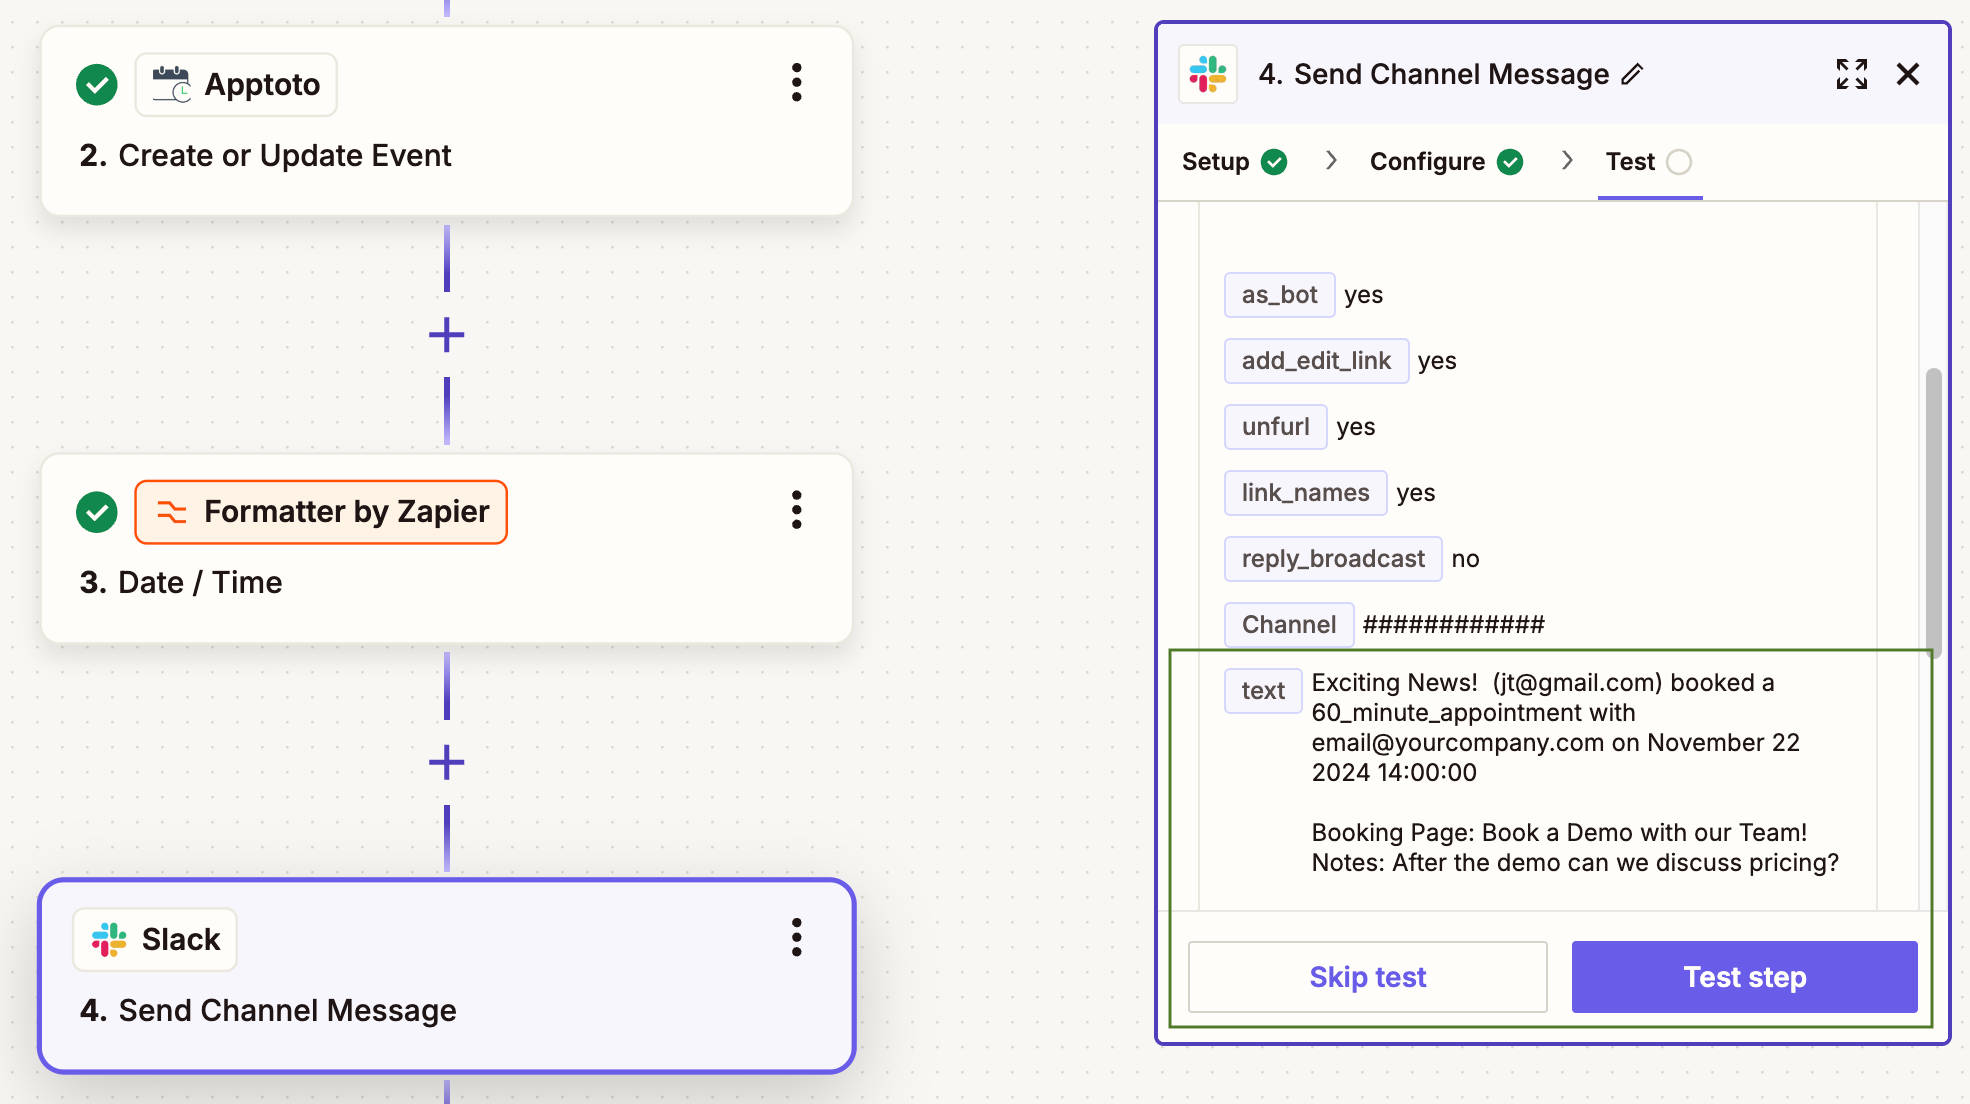
- Confirm the message in Slack contains all the information you want and behaves as expected.

- If everything looks good, go back to Zapier to name your Zap and click “Publish.”
Your Zap is now live and will notify Slack whenever someone books an appointment through your Apptoto booking page! You can edit your Zap anytime, but we recommend testing when you do to ensure your notifications work as expected.
Best Practices for Slack Notifications
- Designate a Booking Channel: Smaller businesses may want to pick a dedicated Slack channel to centralize all booking notifications. However, if you have multiple booking pages with different purposes, consider creating multiple copies of your Zaps to send bookings to separate channels (e.g., sales demos to a Sales channel, support requests to the Customer Support/Success channel)
- Keep Messages Concise: Use Apptoto’s customizable fields to include essential details in the notification. Avoid cluttering Slack messages with unnecessary information.
- Set Clear Team Expectations: Inform your team about the Slack notifications and how to use the information. For example, when a prospective client books a first-time legal consultation, a legal assistant may want to immediately follow up to gather preliminary information and outline the next steps.
- Monitor and Adjust: Review Slack notifications regularly to ensure the information shared aligns with your team’s workflow and adjust settings as needed.
Stay on Top of New Bookings With Slack Appointment Notifications
Sending instant Slack alerts to your team about new appointments keeps them informed and responsive, no matter when or where they work. With real-time updates, you can minimize missed opportunities, improve team coordination, and deliver a better client experience.
Sign up for a free 14-day trial of Apptoto today and see how effortless it can be to keep your team in the loop and your appointments on track. Already using Apptoto? Try this automation recipe today, and then let us know what you want us to cover next.
