When it comes to collecting client reviews for your business in Apptoto, you have several options!
Enabling automated review requests using Reputation Management is the simplest way to launch reviews. With Reputation Management, you link your preferred third-party Review sites, set the timing for when and how often you’d like clients to be sent a review request after an appointment, and launch. Apptoto will direct your clients to an Apptoto review site and then guide them to take action based on the rating they provide (private feedback for a negative or mediocre review, or leave a third-party review if they rated you highly).
However, as outlined below, you can also utilize alternative, slightly more “manual” ways to send automated review requests. They utilize Auto Messages (specifically Follow Ups).

Review Requests: 1-Step Follow-Up
If you already have Appointment Auto Messages set up to send booking confirmations and appointment reminders, you can also add a follow-up review request.
Apptoto will send a follow-up review request after every appointment that meets your Messaging Rules (regardless of how the appointment went). As a result, your business may receive an influx of good and bad reviews.
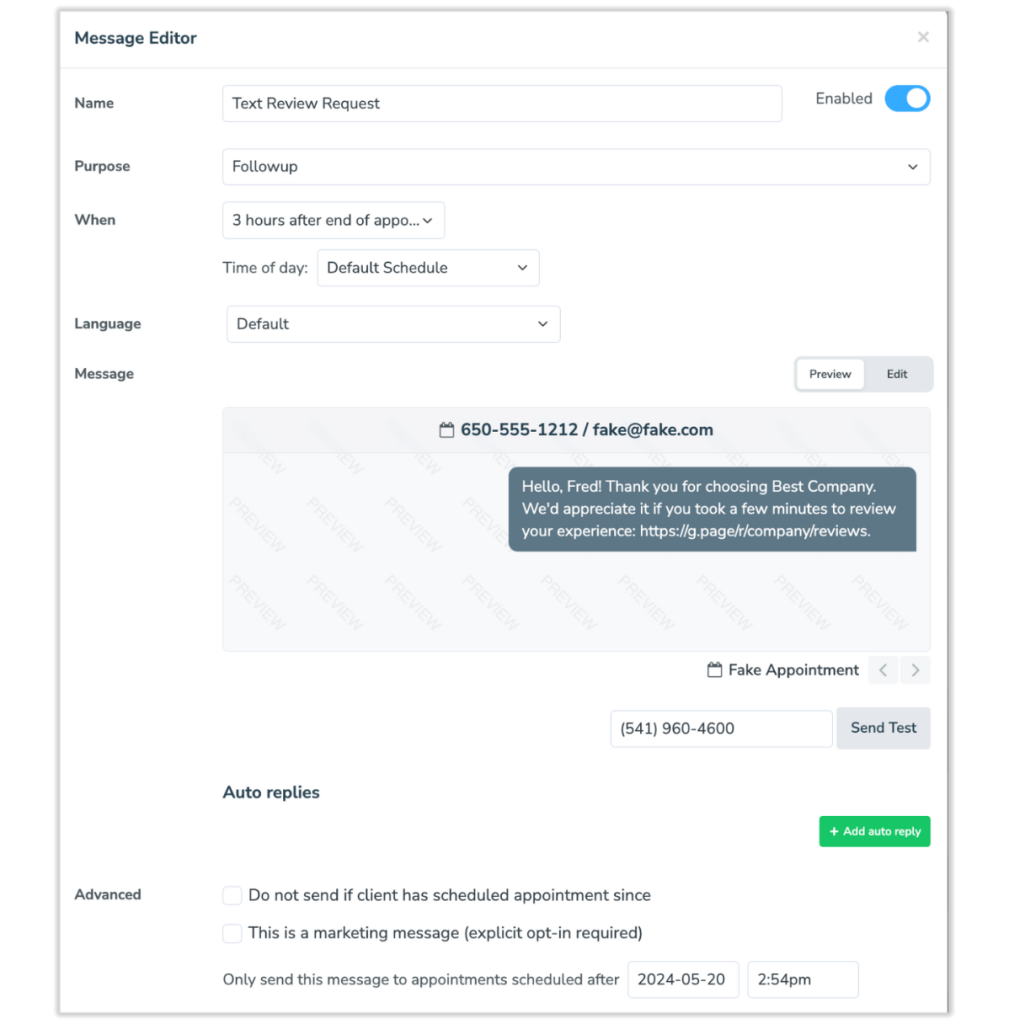
To add a follow-up review request:
- Log into Apptoto and navigate to Messaging > Appointment Auto Messages.
- Click “+Add Message” and select text or email based on your preference.*
- Name your Review Request message.
- Select “Followup” as the message Purpose.
- Choose how long after an appointment you want to send the review request.
- Click “Edit” to adjust the review request message.
- If you’re using liquid variables to personalize your message (e.g., Client Name = {{participant.name}}), use the Fields button to ensure they are added appropriately.
- Add the link where you’d like clients to submit reviews anywhere {{Review Link}} is listed.
- Adjust any remaining settings as preferred, then click “Done and Save.”
- On the Rules page, click “Save” again near the top right-hand corner.
* These directions assume you have one Appointment Auto Message rule set up. If you have multiple, you can create a Follow-Up review request for every rule or one generic review request for all appointments.
Review Requests: Followup + Auto Replies
Sending a follow-up message with auto-replies is a great way to proactively collect reviews from happy customers while redirecting unhappy customers to support and address their needs.
This strategy uses a follow-up message asking the client to rate their experience. Based on their answer, Apptoto will respond with an auto-reply. Positive scores can be sent a message asking them to leave a review, while negative scores can be directed to connect with customer support.
To get started:
- Log into Apptoto and navigate to Messaging > Appointment Auto Messages.
- Click “+Add Message” and select text or email based on your preference.*
- Name your Review Request message.
- Select “Followup” as the message Purpose.
- Choose how long after an appointment you want to send the review request.
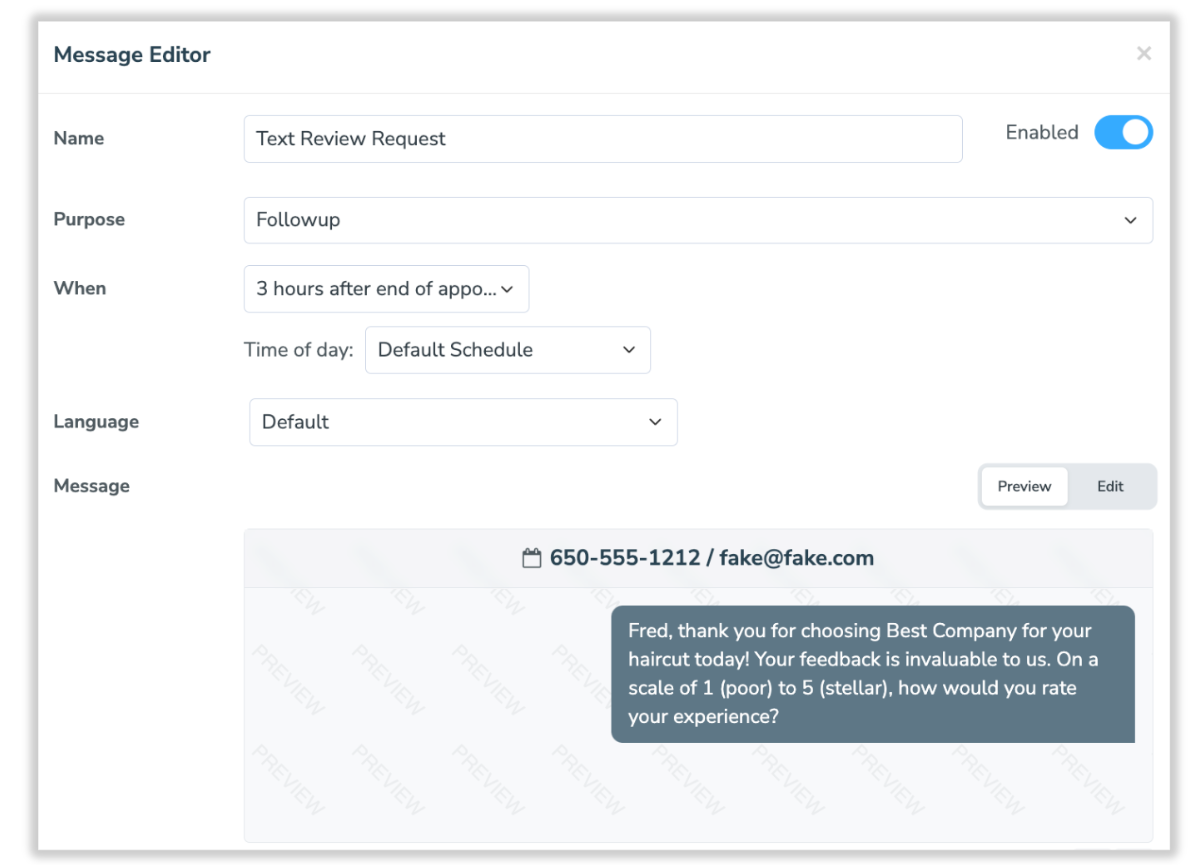
- Click “Edit” to update the message.
- Enter your review request message similar to the “Initial Ask” message in the “Crafting Effective Review Requests Templates” section above.
- Update fields as necessary to ensure message personalization works properly.
- Update fields as necessary to ensure message personalization works properly.
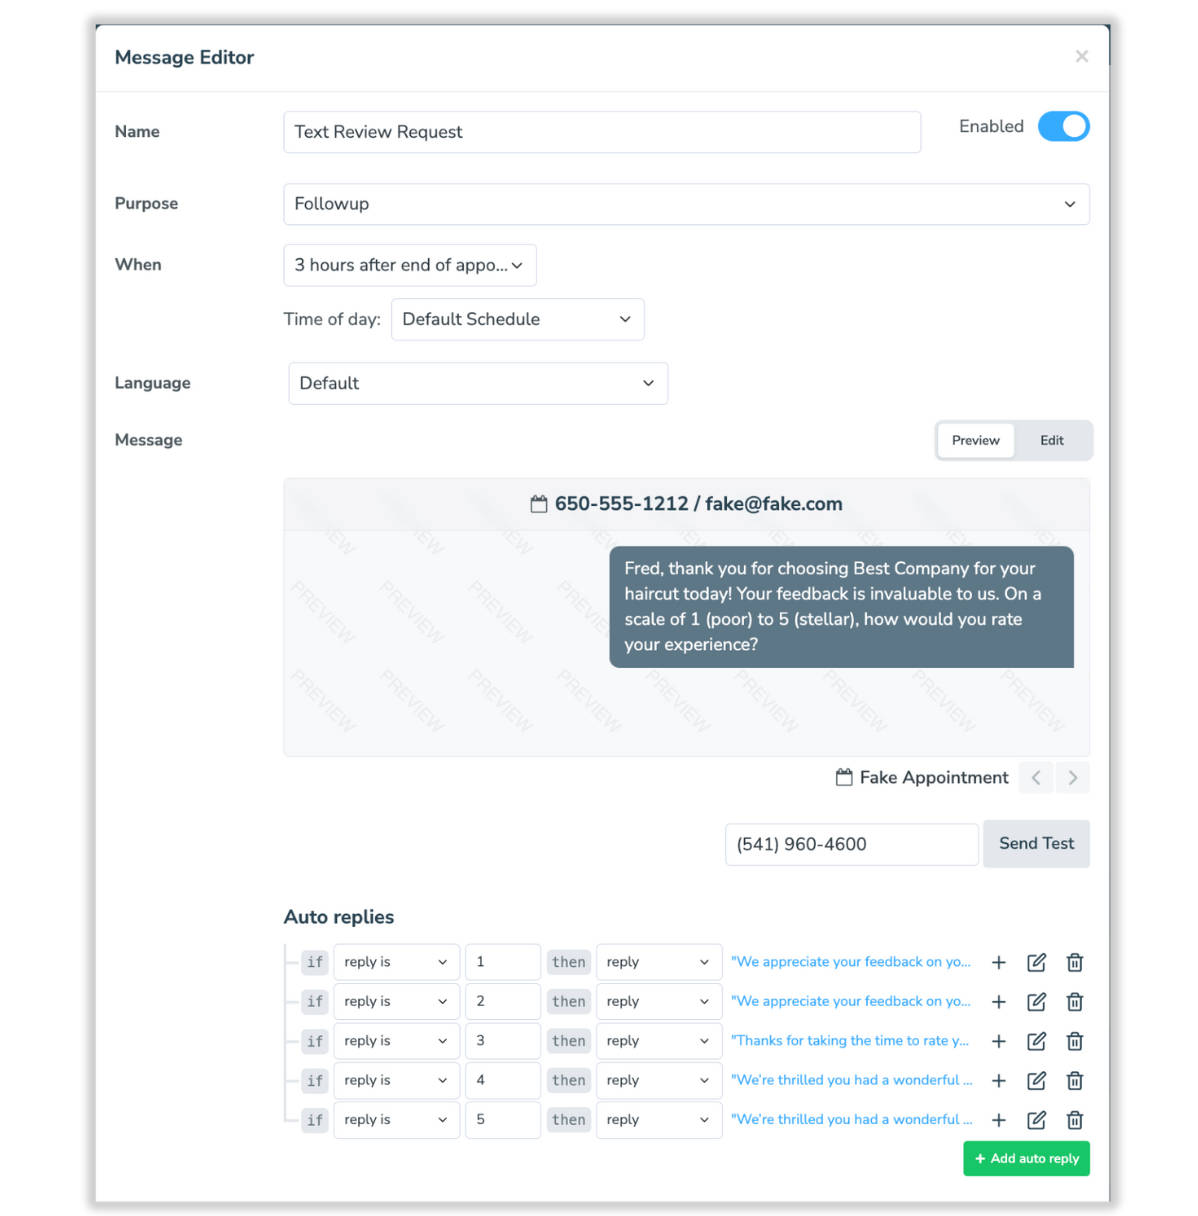
- Under the Auto Replies section, click +Add auto reply.
- Set up rules for your Review Request responses, including what actions you want Apptoto to take based on what responses you receive. There will be a blue “Click_to_Edit” link you’ll need to select to adjust your Auto Reply messages.
- For example, if you’re using a 1-5 ranking system, you might consider setting up 5 auto-response rules as follows:
- If Reply is 1 then Reply > “Poor Rating (1-2) Follow Up” message
- If Reply is 2 then Reply > “Poor Rating (1-2) Follow Up” message
- If Reply is 3 then Reply > “Mediocre Rating (1-2) Follow Up” message
- If Reply is 4 then Reply > “Great Rating Follow-Up (4)” message
- If Reply is 5 then Reply > “Great Rating Follow-Up (4)” message
- For example, if you’re using a 1-5 ranking system, you might consider setting up 5 auto-response rules as follows:
- After you’ve added all the Auto Replies you want, adjust any remaining settings. Click “Done and Save.”
- On the Rules page, click “Save” again near the top right-hand corner.
Differences Between “Manual” Review Requests and Reputation Management
Key Differences
| Feature | Manual (Follow-Ups) | Reputation Management (Automated) |
|---|---|---|
| Setup Effort | Manual steps required | Minimal, rule-based setup |
| Filtering Negative Reviews | Manual auto-reply setup | Automatic, private feedback option |
| Integration with Review Sites | Links must be manually added | Direct integration |
| Analytics & Reporting | No built-in stats | Tracks requests, reviews, and sync status (for Google) |
| Customization | Full control over messaging | Rule-based automation with customization |
The manual method offers slightly more flexibility but requires manual setup and monitoring, whereas Reputation Management provides a streamlined, automated approach with built-in filtering and tracking for efficiency.