To enhance Apptoto’s Salesforce integration, we’ve made it possible to convert Salesforce leads to Salesforce opportunities automatically. Now, after a Salesforce lead books an appointment with you via an Apptoto booking page, you can choose to have them convert to an opportunity instantly.
Converting a Salesforce Lead to an Opportunity after an Appointment Booking
To convert a lead to an opportunity after a person schedules an appointment:
1. If you have not already, be sure to sync your Salesforce Calendars to Apptoto
2. Add your Salesforce Leads Address Book to Apptoto (note: your Salesforce Contact Address Book is added automatically, but your Leads address book is required for this process)
3. Navigate to the Booking Page tab in Apptoto
4. Set your booking page settings (such as appearance, appointment types, form fields, etc.) as needed.
5. Ensure the following settings are set to ensure Salesforce leads convert to opportunities correctly.
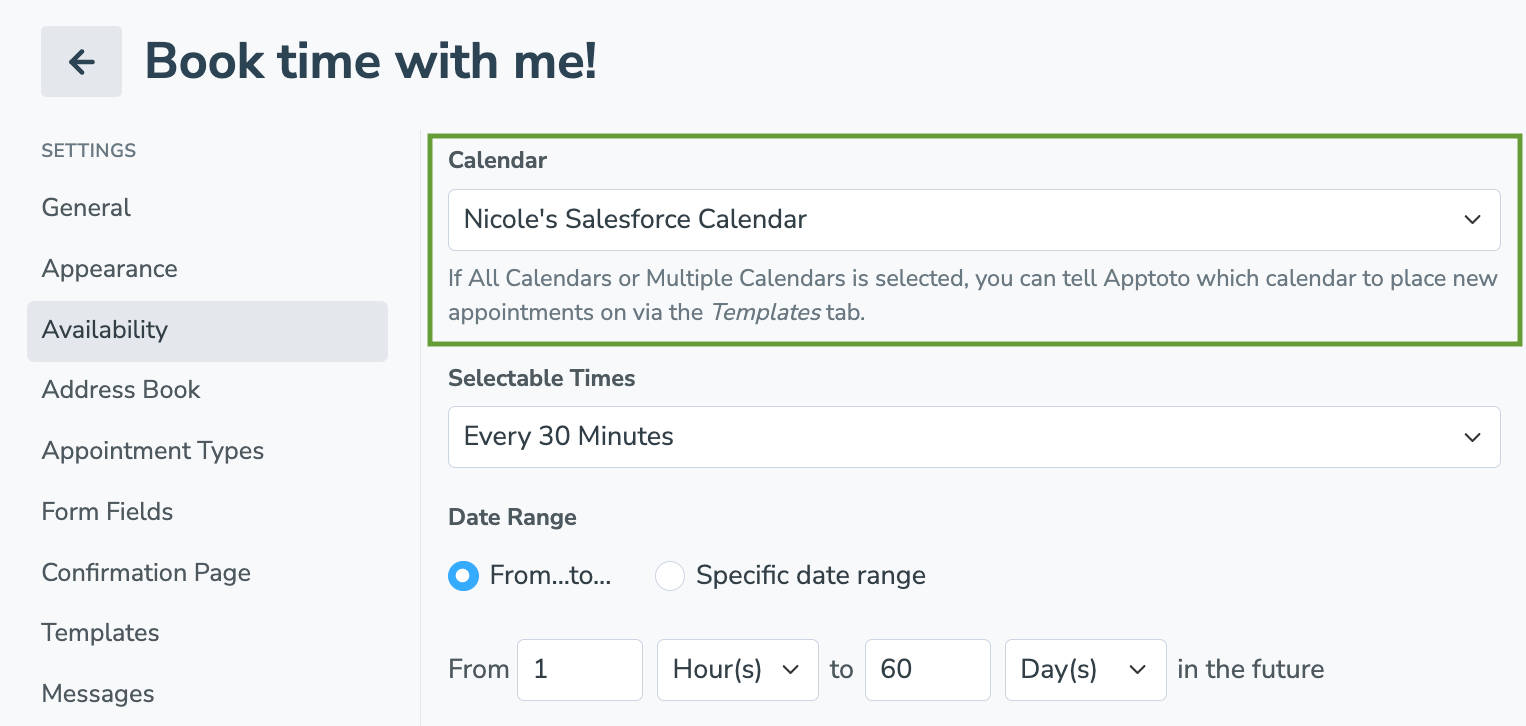
- On the Availability tab, ensure your Calendar is set to sync to a Salesforce Calendar.

- On the Address Book tab, set your Address Book to your Salesforce Leads address book you synced in step 2.

- After you complete the previous step, a checkbox will appear. Click the checkbox to enable “Convert Salesforce Leads to Opportunities upon Booking.”

- A “New Lead Status (After Conversion):” field will appear.
- Enter the name your business uses when a qualified lead is converted to an opportunity in Salesforce.

- Enter the name your business uses when a qualified lead is converted to an opportunity in Salesforce.
6. Click “Create” to launch your new booking page.
Apptoto will default to using the name “Closed – Converted” in the “New Lead Status (After Conversion):” field. You must update this field to the naming convention your company uses in Salesforce for a Converted lead. If you’re unsure of what naming convention your business uses, follow the directions below.
Identifying the Name for a Converted Lead in Salesforce
1. Login to Salesforce
2. Navigate to “Setup” tab then “Object Manager.”
3. Click on the “Lead” object to see more details.
4. Select the “Fields & Relationships” tab and search for the “Lead Status” field. 
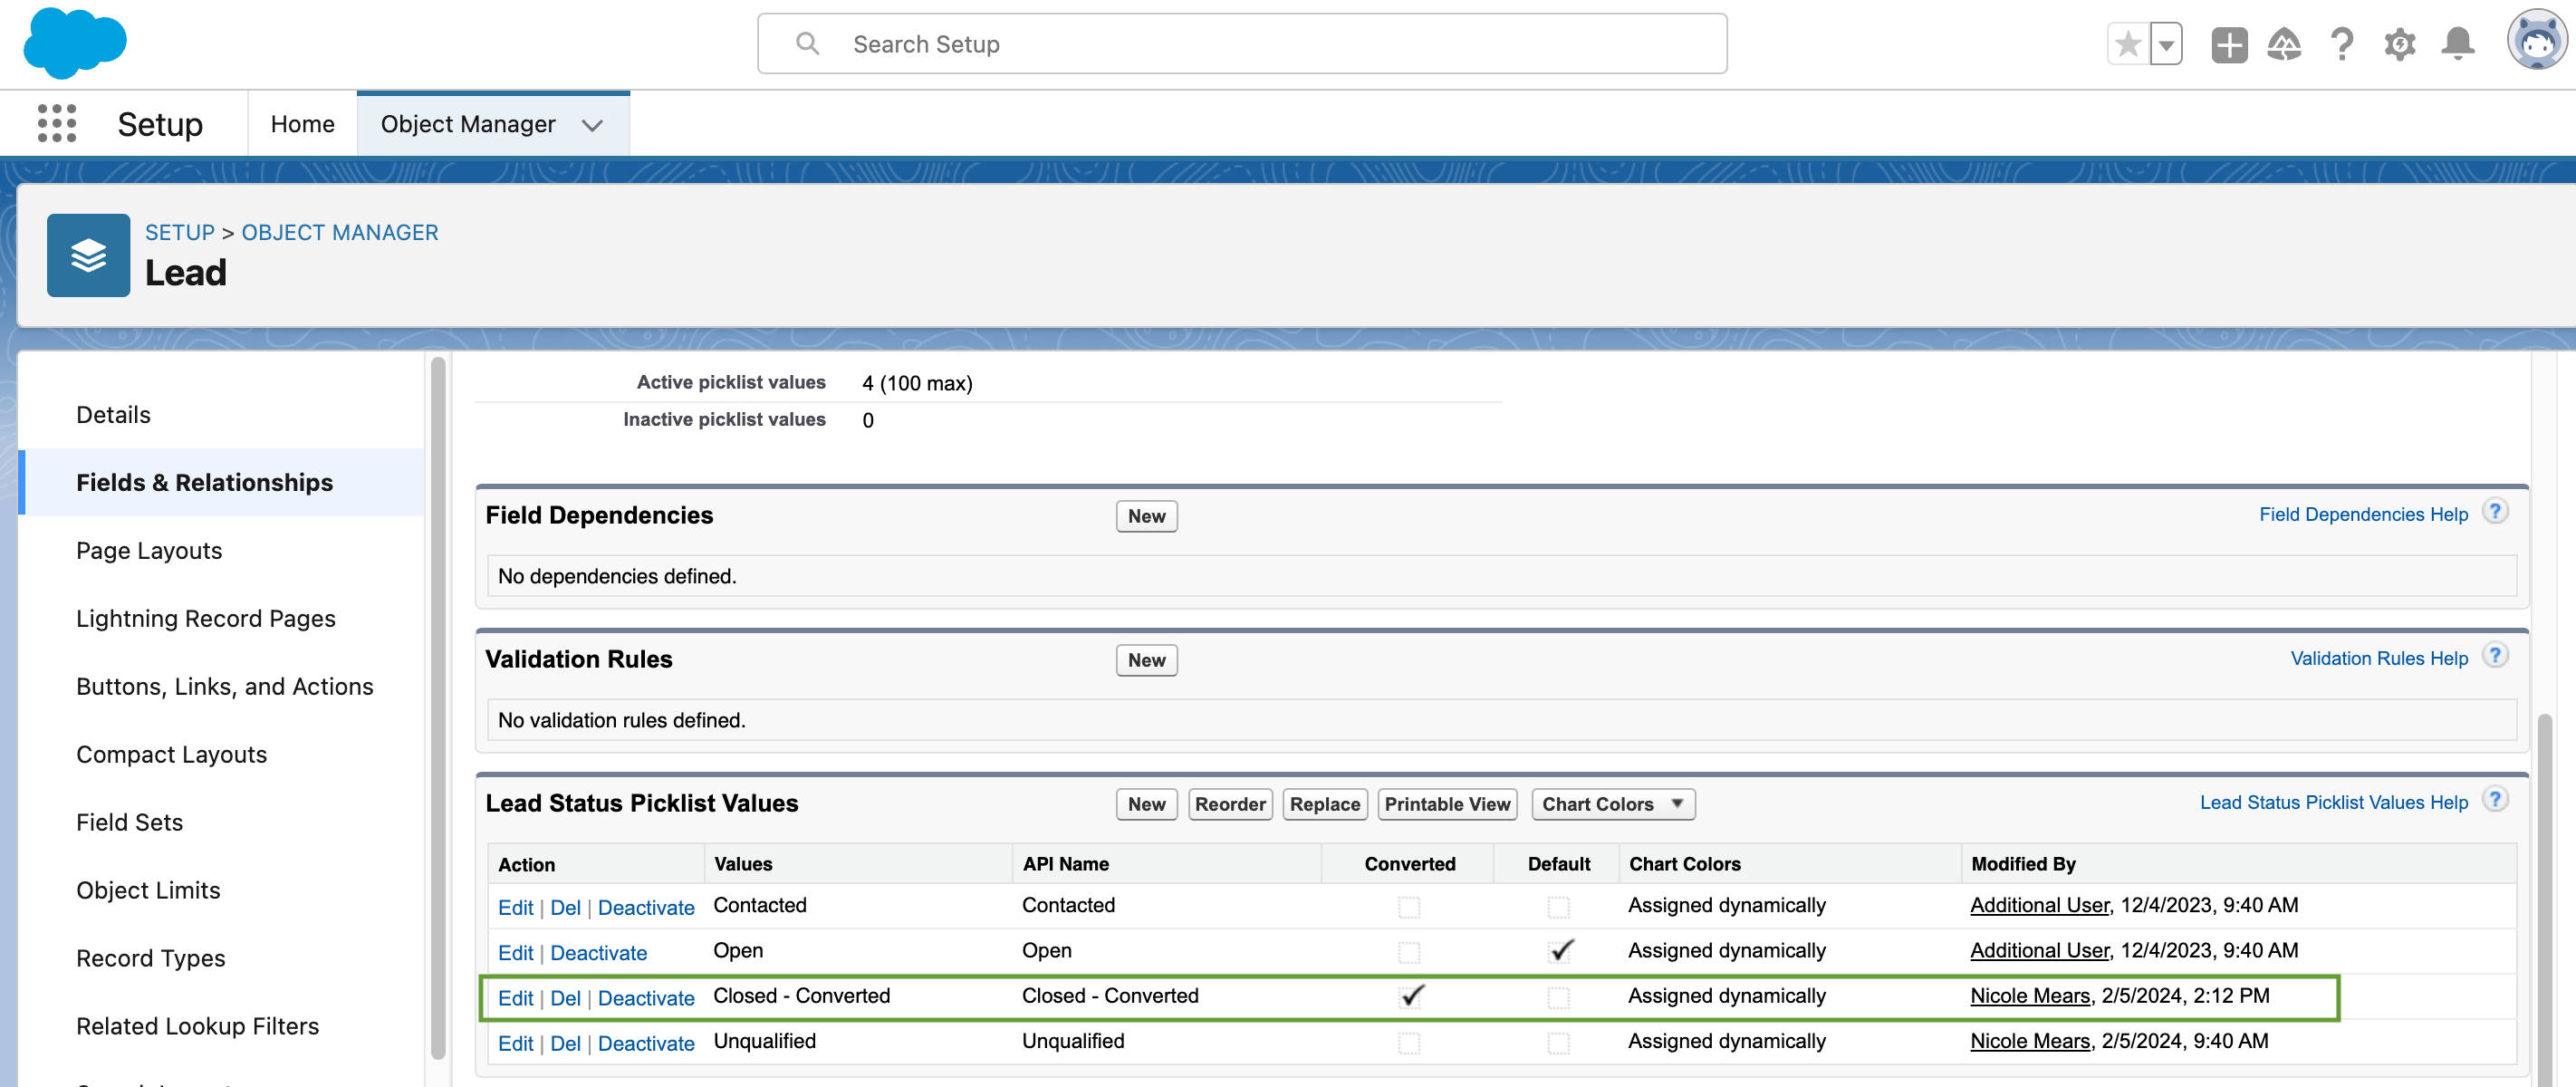
5. Click on the “Lead Status” field and scroll down to the “Lead Status Picklist Values.”
6. In the picklist, one Value/API Name should have a checkmark in the “Converted” column. 
7. Enter the API Name into the “New Lead Status (After Conversion):” in Step 5.4 above.