This setup is designed to work around the issue of having a period of time (upcoming 60 days, for example) where the availability will need to shift. In this example, the user has summer hours (orange) and a default schedule (green) for the rest of the year. In that case, a visual depiction of the weekly availability looks like this:
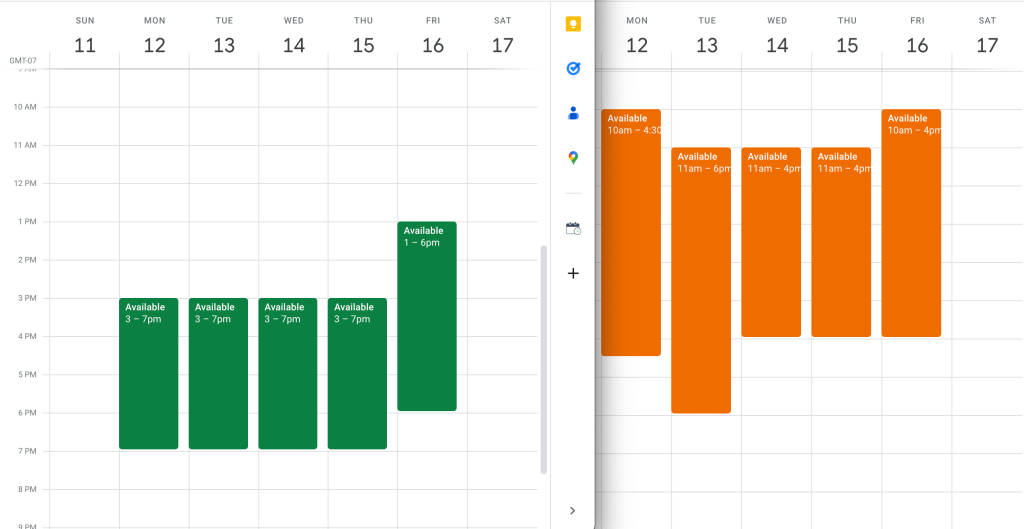
Please note, this is a calendar with “Available” appointments created for display only – you will not need to create these availability blocks unless you want to utilize the following option in your booking pages, in which case you can disregard this “Seasonal Availability” setup:

To help Apptoto know when to adjust for “Seasonal Availability,” we will start with the default availability set in the Booking Page>Availabilty tab in the Availability section as shown here:
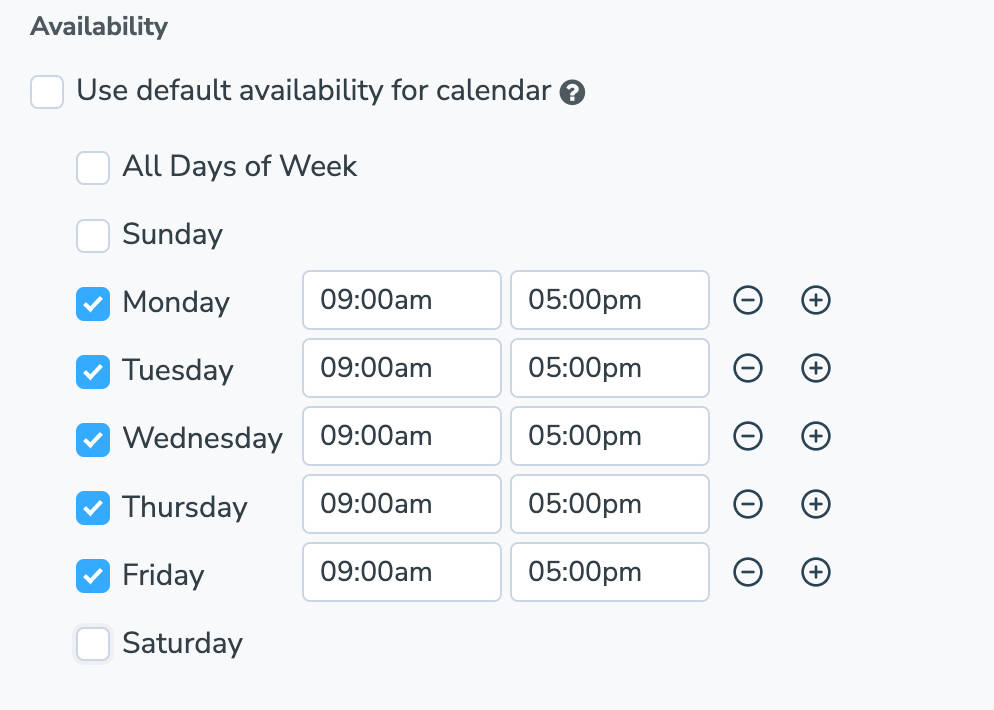
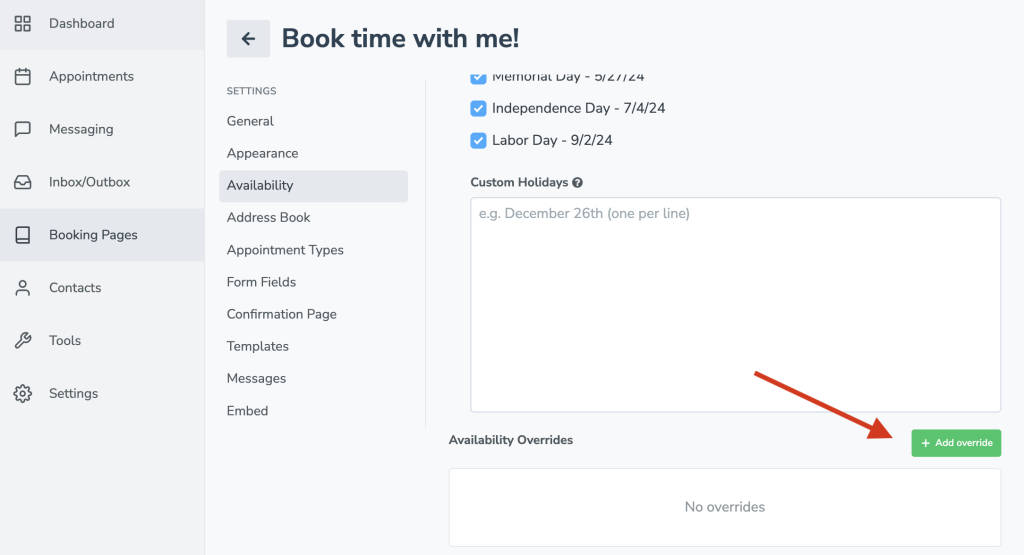
The above availability setup will set the booking page with our default schedule for most of the year. We will use Apptoto’s Availability Override option to set up our summer availability. That button is found beneath the Holidays section:
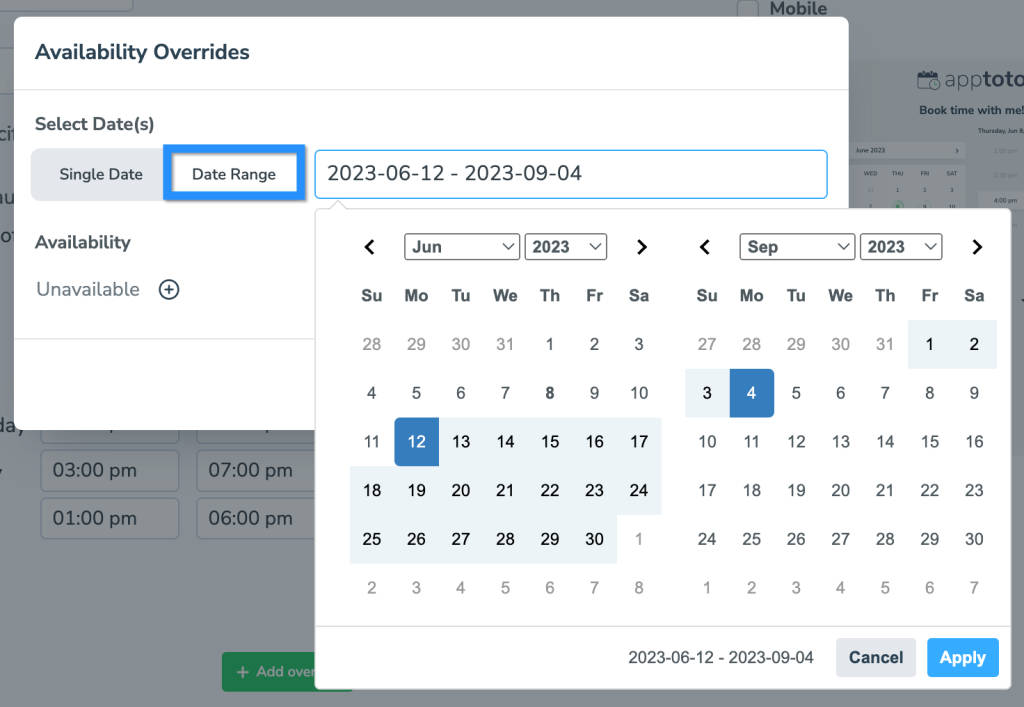
The Availability Override setup wizard will pop up, allowing the user to set the date range of the override they want to set, as shown here:
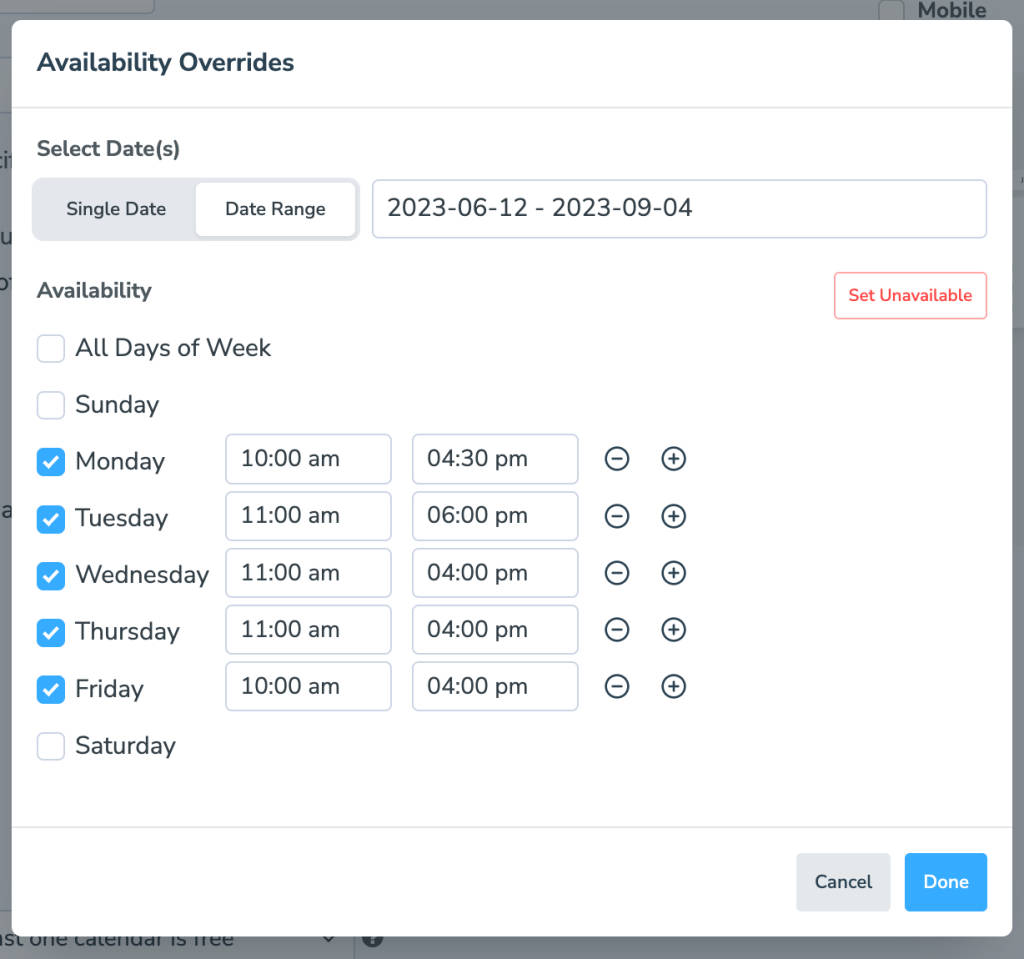
The timing will default to unavailable, but we are setting a separate availability for that period. After selecting the + to the right of Unavailable, it will expand to set availability for all days as a group or individually by day of the week. Our summer availability input would look as follows:
Default availability will not change the display once the override is added, but it will display the override underneath to show impacted dates and settings:

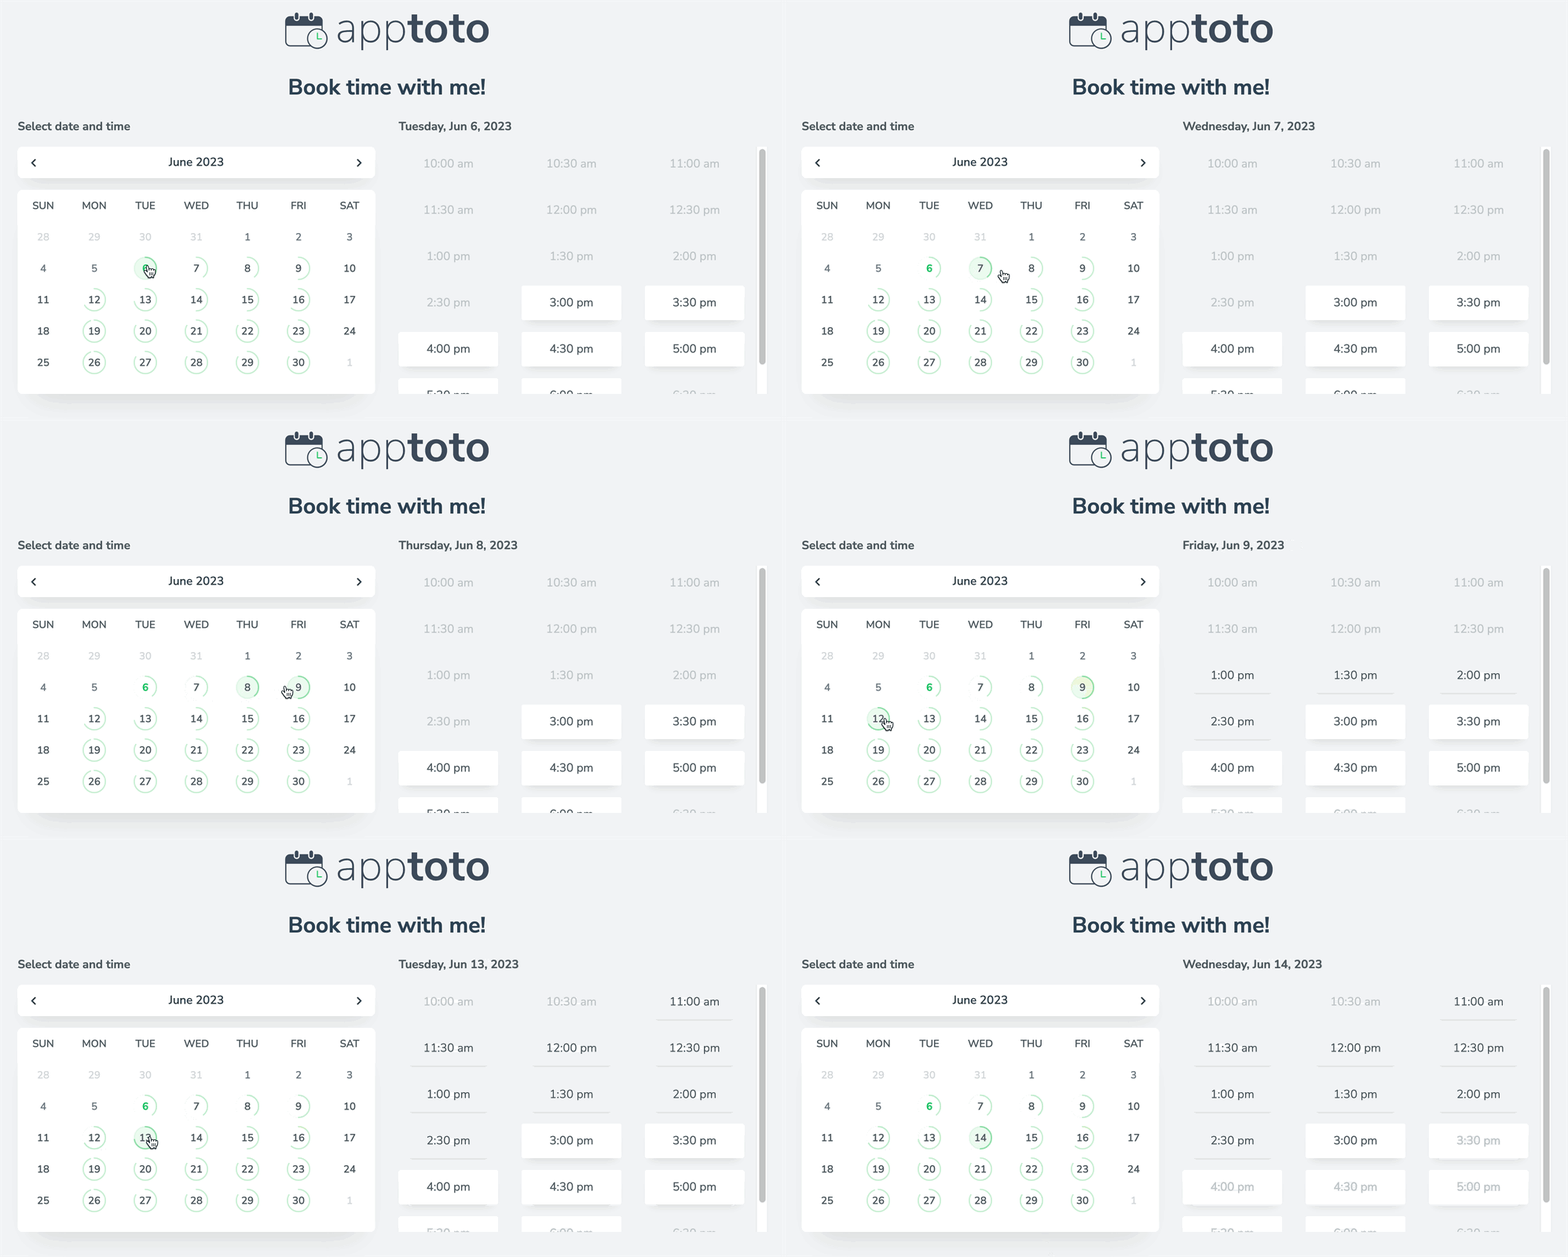
With those settings in place, the availability will adjust and display as intended, with summer availability (set via override) taking over on June 12th:
