Upon completing a booking, by default, Apptoto will present your clients with a confirmation page that includes an “Add to Calendar” button.
This allows them to place this event on their calendar easily. (Note: You can change where clients are directed by using the “After Booking” setting on the “Booking Pages” > “Confirmation Page” tab).
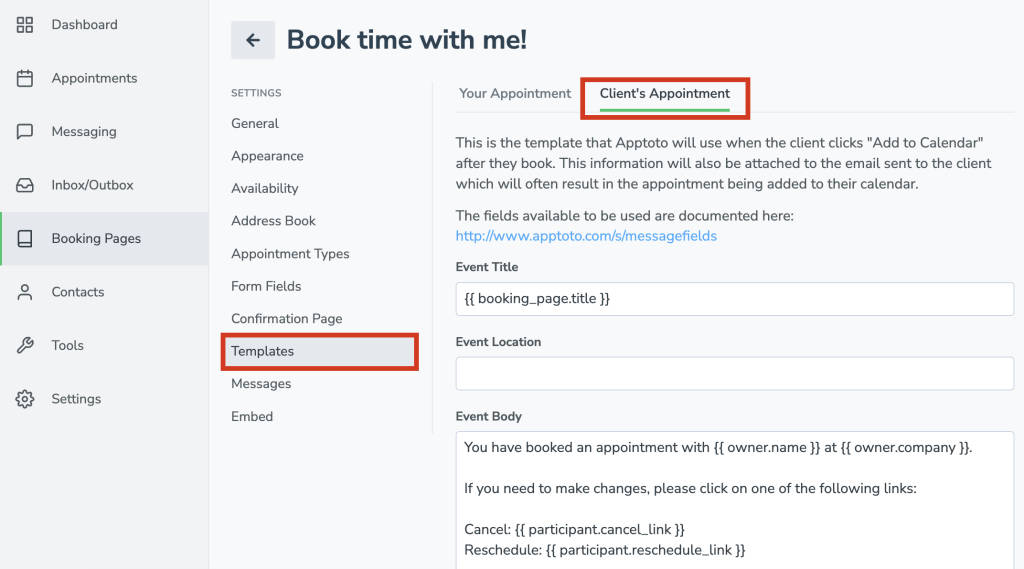
The Add to Calendar settings for your booking page allow you to customize how that event will be formatted when the client adds that appointment to their calendar, including the title, location, and body content. This is found by clicking the “Booking Pages” section > “Templates” tab > “Client’s Appointment” tab.

This page is fully customizable using the same Fields feature as your Auto Messages, allowing you to create a generic template to insert the relevant information for each unique event automatically.