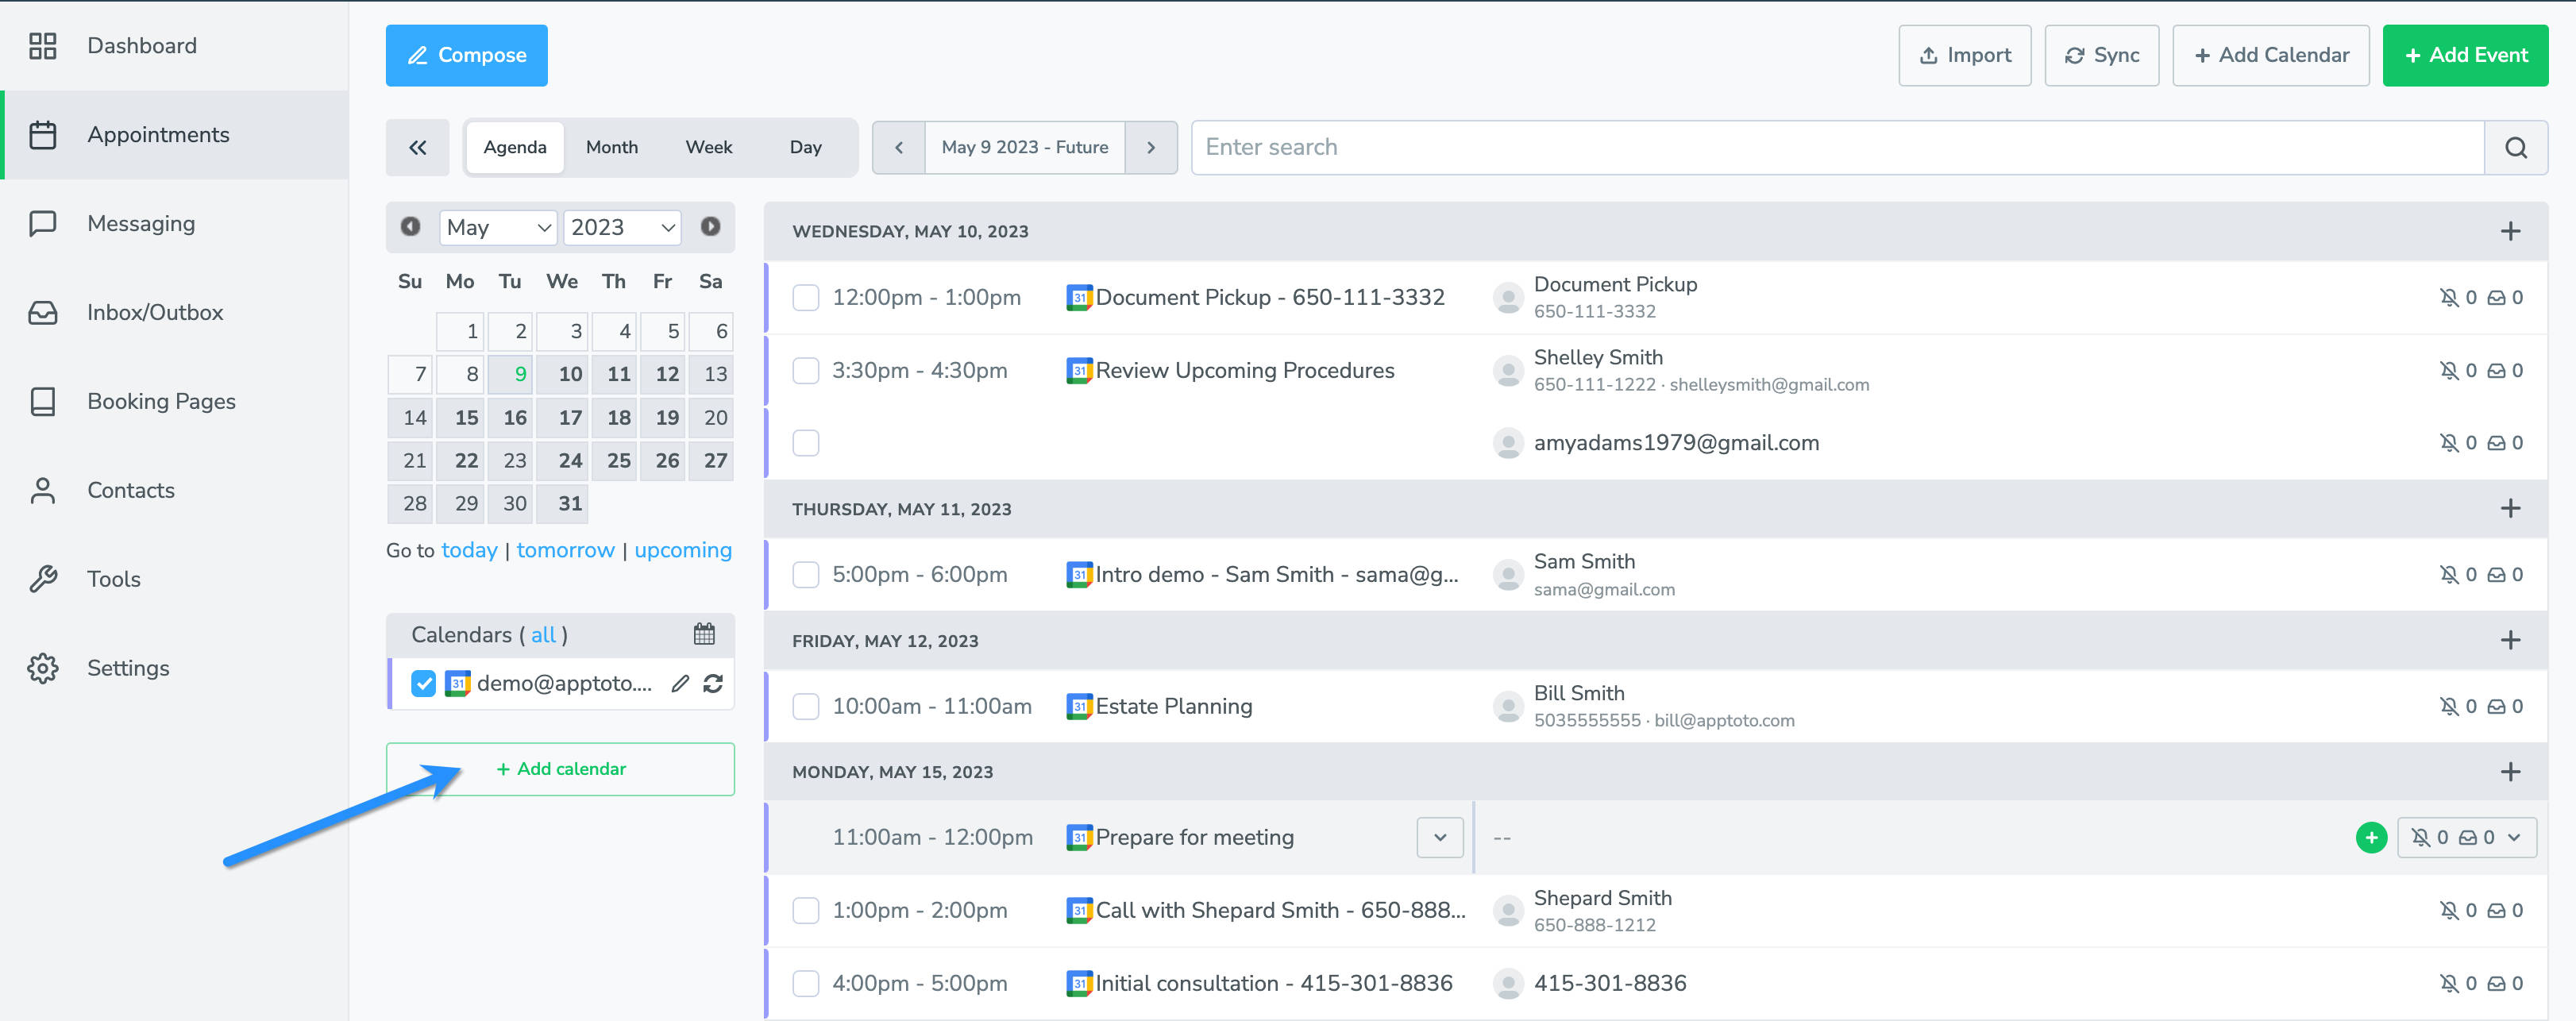
Step 1: Navigate to your “Appointments” tab and click the “+Add Calendar” button

Step 2: Select the ‘iCloud’ option
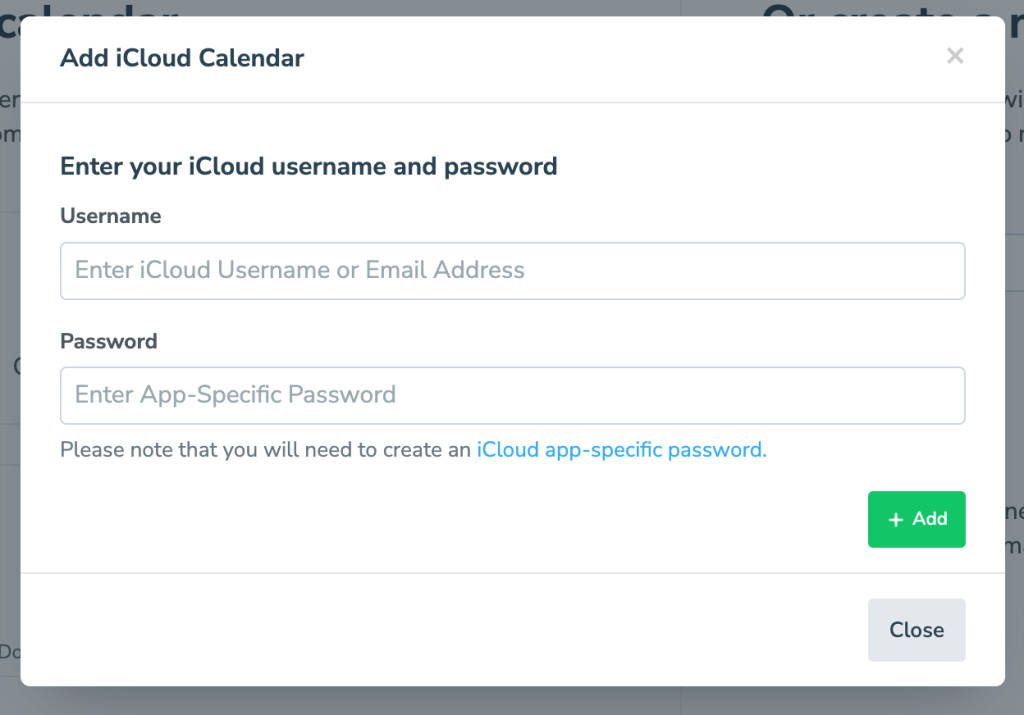
This will direct you to a page where you’ll enter the credentials for the iCloud account you want to connect.
Please note that per Apple settings, you will need to create an iCloud app-specific password.

Step 3: Select calendar
In the drop-down menu, select the calendar that you want to have synced to your Apptoto account, then click the “Add iCloud Calendar” button.
Step 4: Check the “Appointments” tab
Go to Apptoto.com, click “My Account” in the top right, then click on the “Appointments” tab. Confirm that your calendars appear in Apptoto.
Now that your calendars are connected, next steps to setting up your account is to set up your default messages. For a walkthrough of that, see message setup.
Two-Factor Authentication Troubleshooting
PLEASE NOTE: If your iCloud account is configured with two-step or two-factor authentication, you will need to generate an “app-specific password” for Apptoto. Click here for Apple’s instructions on accomplishing this security step.